Learn how to get started with the Integration API.
Activating the Integration API in your workspace
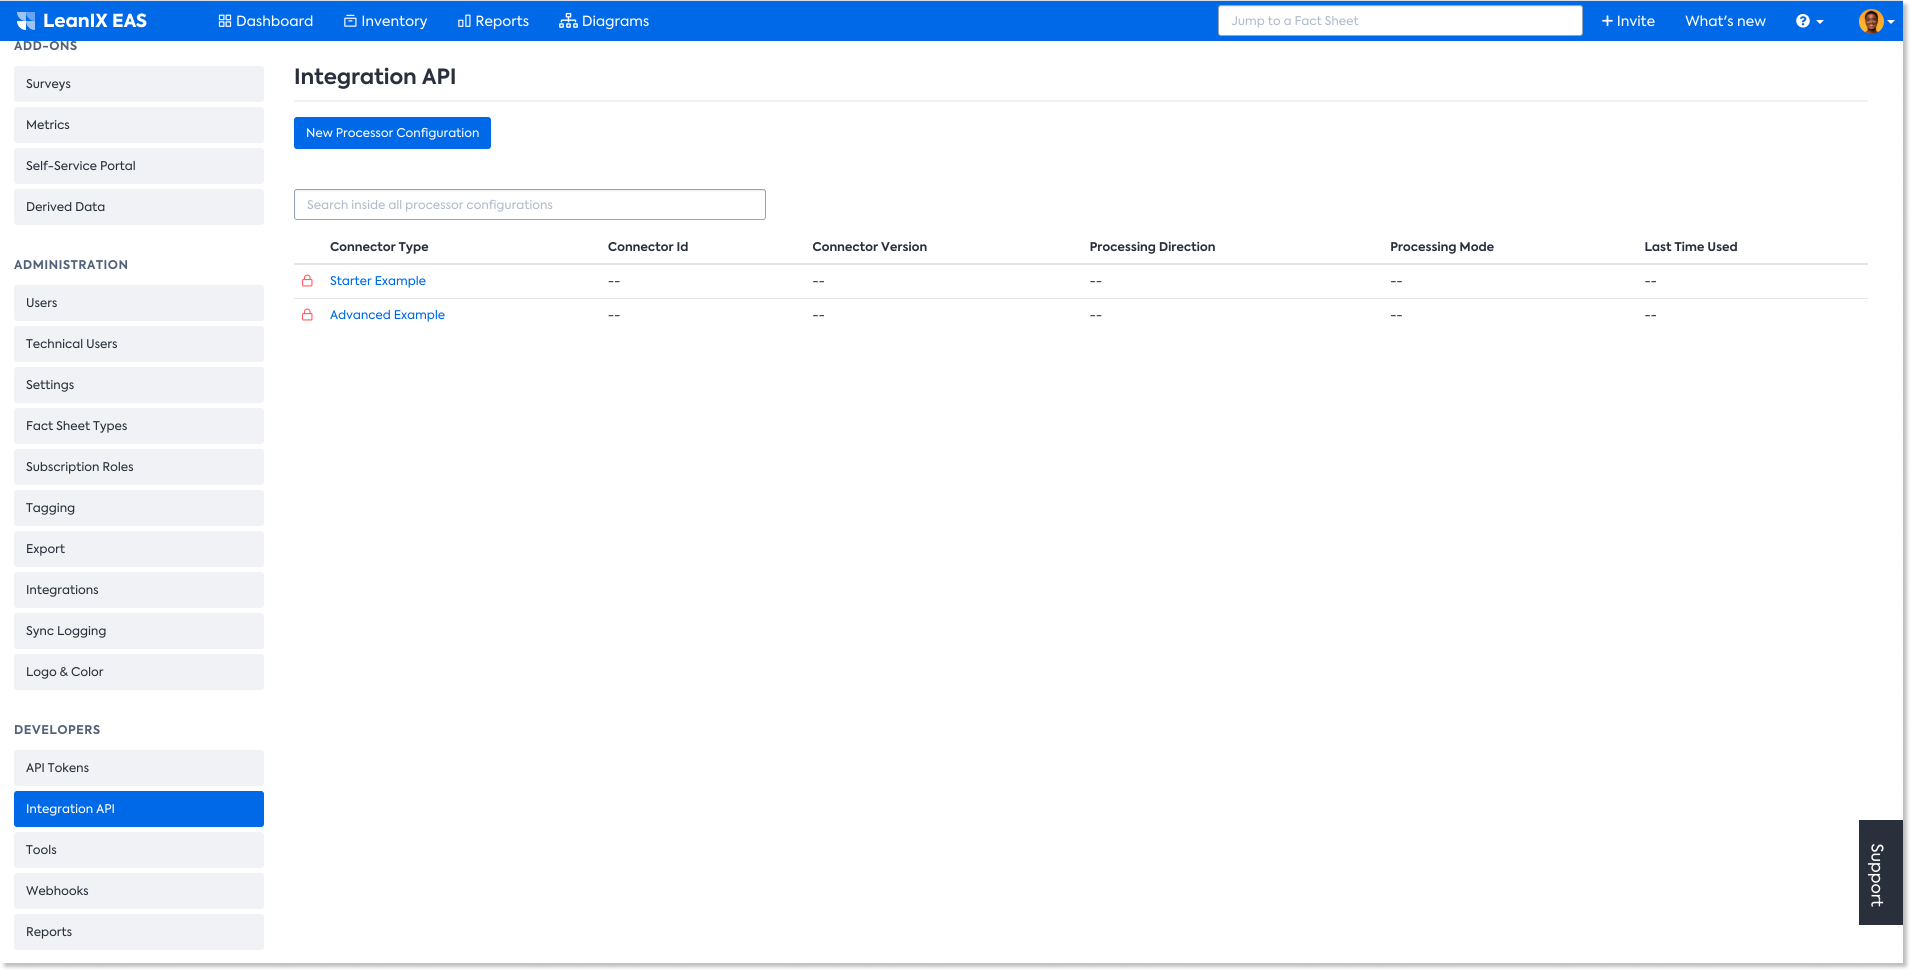
- In the administration area, select Integration API in the sidebar.
- Click New Processor Configuration.

Configuring the Integration API
Setting Up Connectors
Inbound Connector
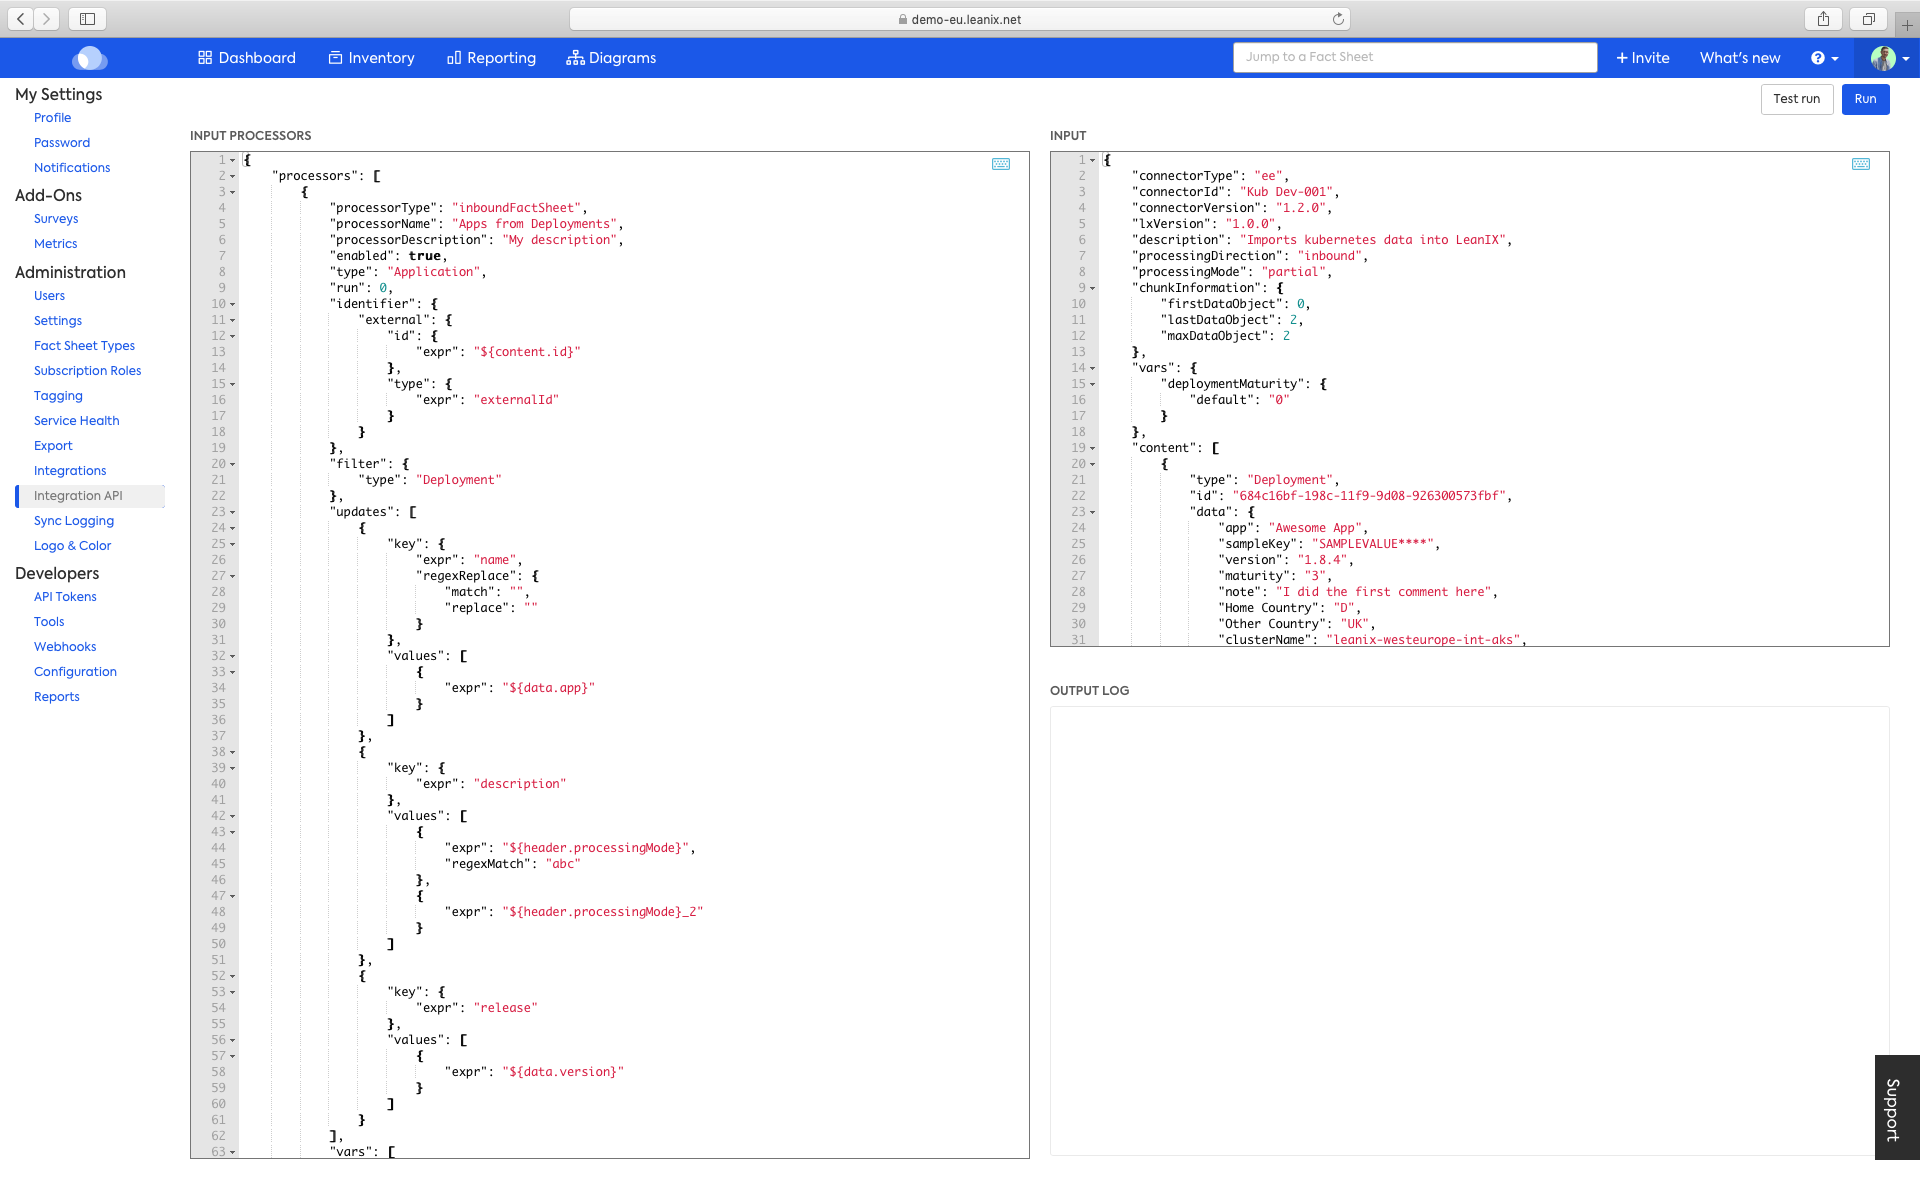
In the screen shot below shows the Data Processors on the left side and the input on the right (LDIF), the processor is free to be manipulated to match the LDIF coming in. The test run button on the top right won't insert any data into LeanIX and it will show the response that comes back in the output log after running the processor against the LDIF. Run will show the response and proceed to insert the data into LeanIX if the processor has been configured correctly.

The Integration API with an LDIF and an input processor
Outbound Connector
The UI is a bit different when setting up the outbound connector. Instead of inputting an LDIF, you can specify the scope of what you would like to retrieve from the workspace. The scope defines the set of fact sheets that will be looked at when iterating over the configured outbound processors and creating content in the resulting LDIF.
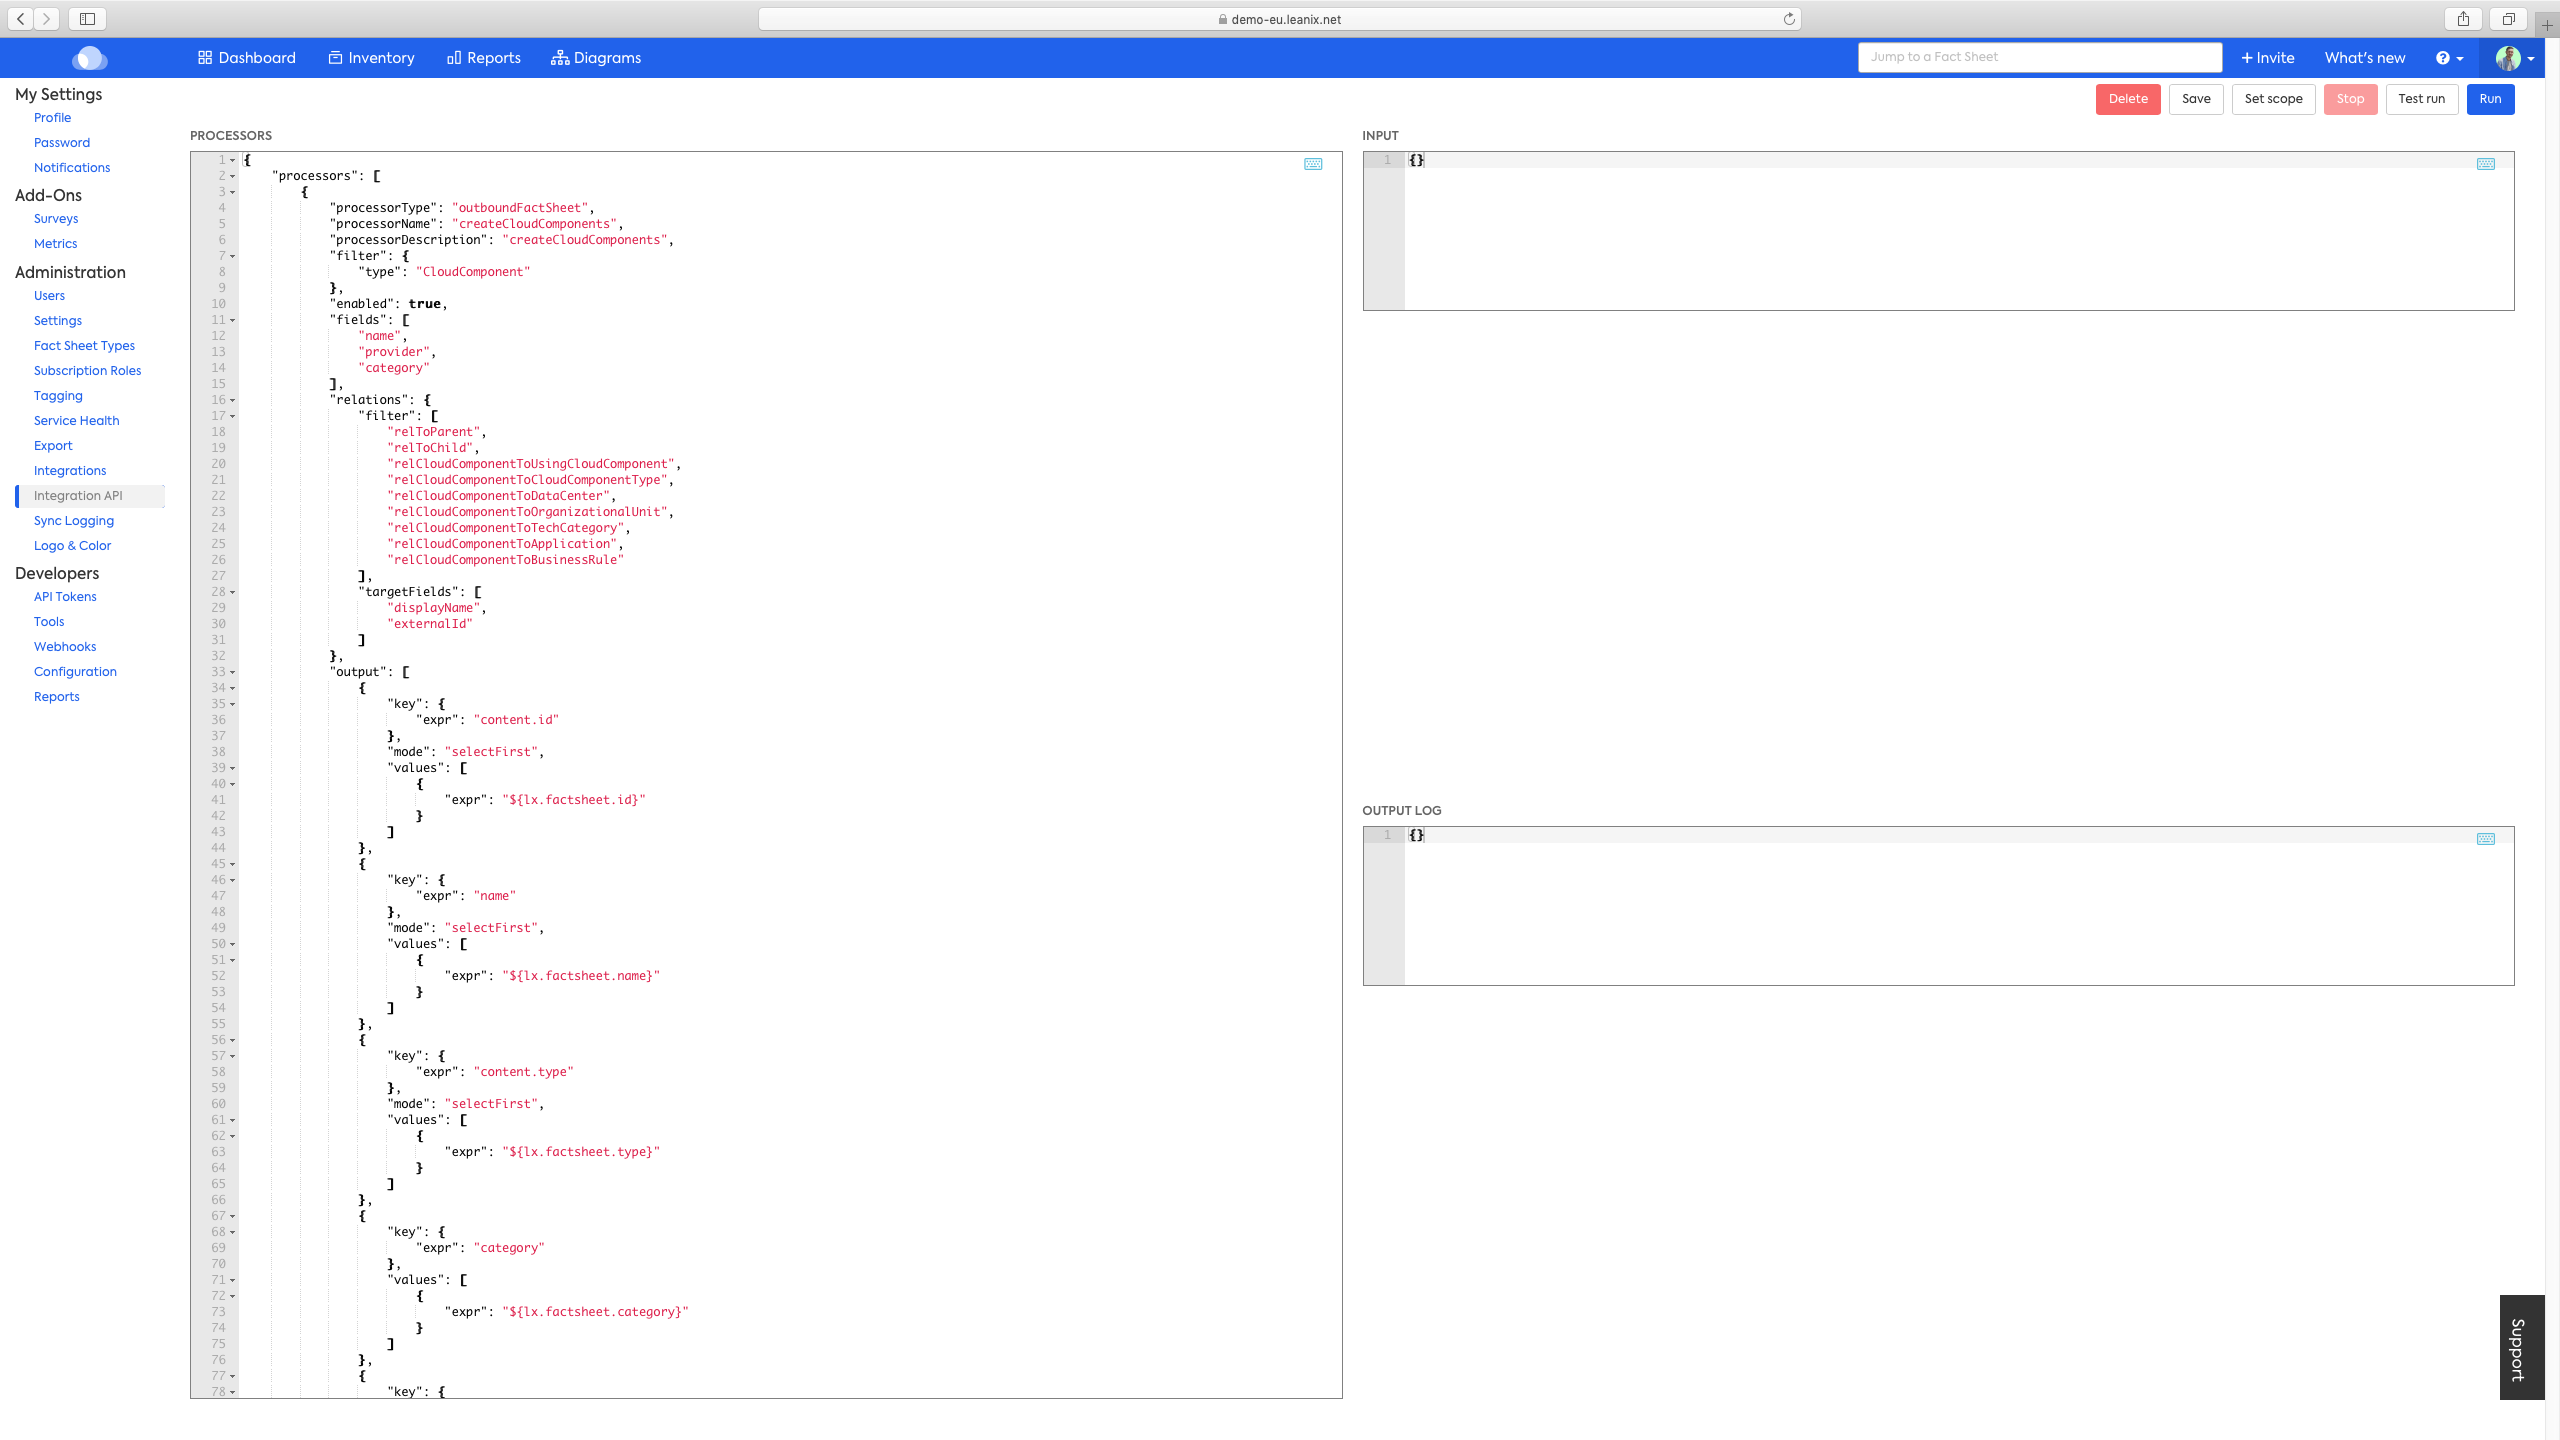
The processor shown below is an example of an outbound processor, which is described in the processors section further down in this document.

An outbound connector with one outbound processor called createCloudComponents
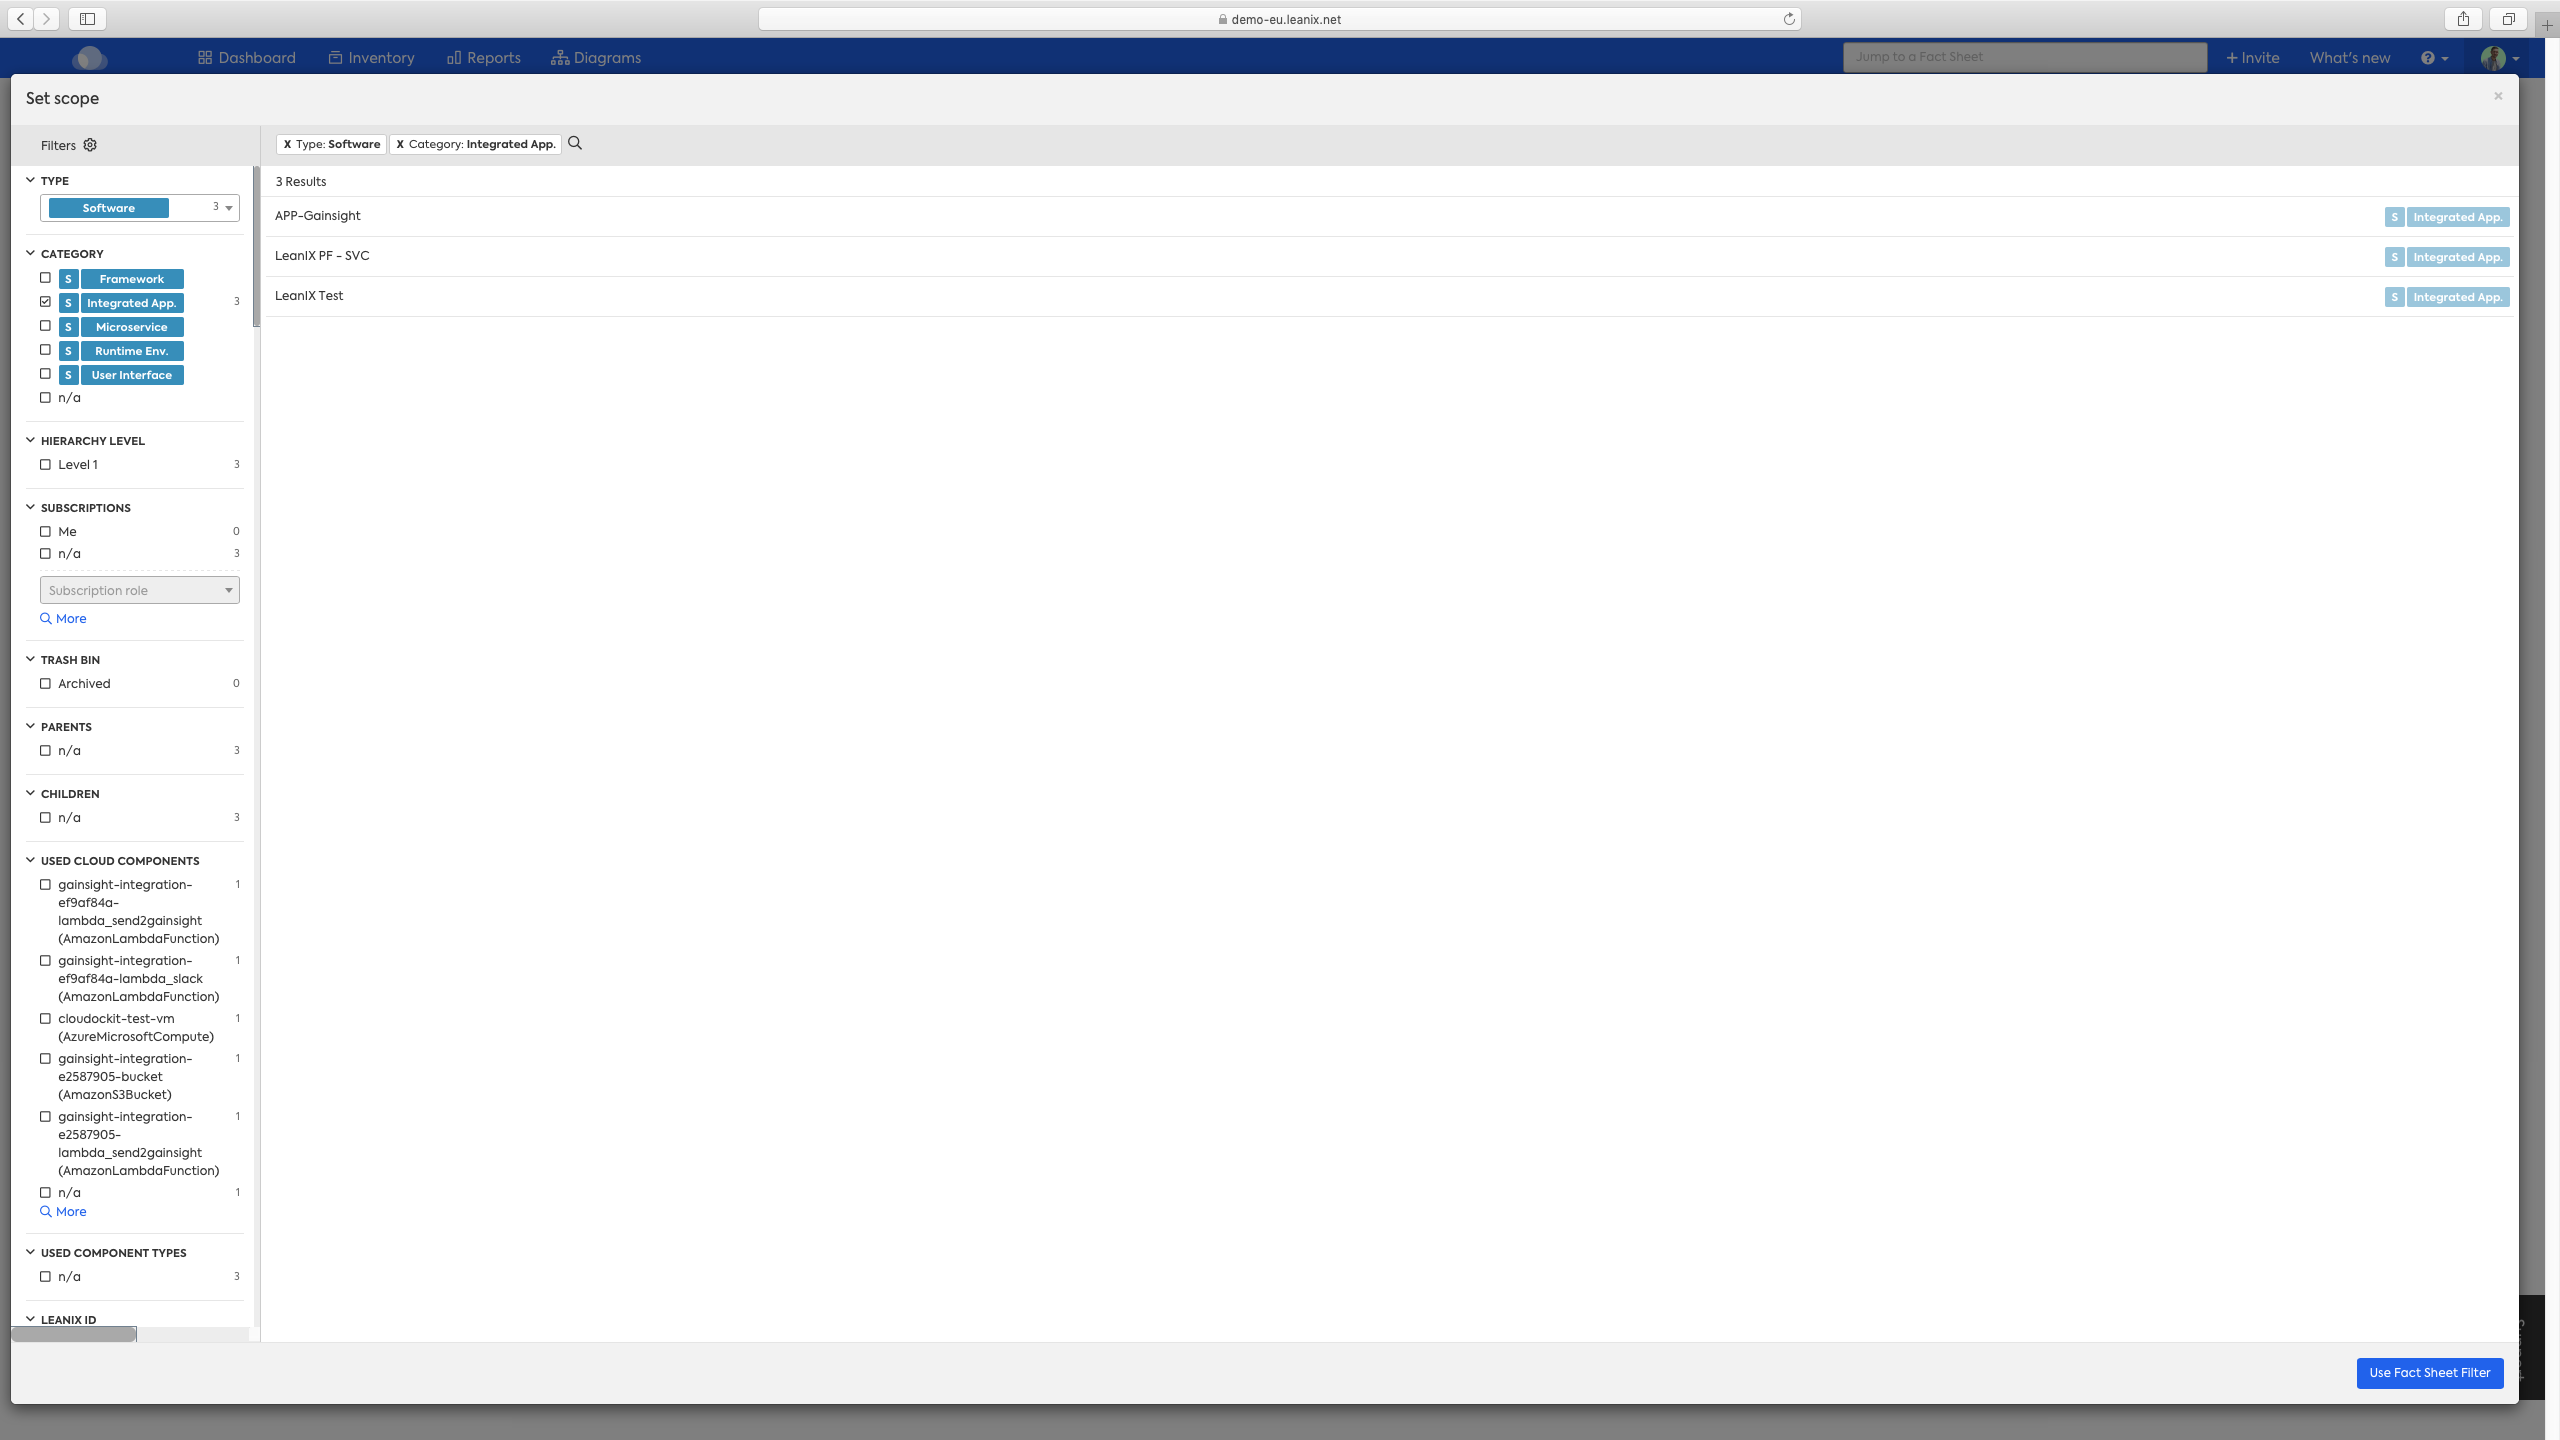
When pressing the Set Scope button you are presented with searching options that comes with filter facets, smart search, similar to the inventory view in a workspace. When you're done, hit the Use Fact Sheet filter button on the bottom right to apply these changes.

Saving your configuration
Configuration and data are strictly separated using the integration API. This is to make synchronization runs reliable, repeatable and audit-able. Whenever you save the configuration of the Data Processors, only the Processors are stored. The system will never store the LDIF data.
Previewing Data
The Preview button allows to quickly open an Inventory view in a sub-tab to then manually filter for the changes that might have been applied. As the Integration API opens as a full-screen modal, there is no navigation bar to switch to the inventory.
The preview helps admins to do a preview of the ongoing work and have a look at already changed data in the Inventory after pressing the "Run" button.
Preview does not mean the changes have not been applied yet. The preview button does not change any data nor executes a run. It only allows opening an Inventory view to look at changes a prior run of the Integration API may have performed. Navigation to the changed Inventory entities by the run needs to be done manually by the admins.
