
Learn how to get started with the Integration API and configure your first processor.
Overview
To get started with the Integration API, use the built-in user interface in the Integration API section of the administration area. Here, you can:
- View, modify, and run preconfigured processors.
- Create and manage processors.
- Complete test runs without the risk of overwriting or deleting workspace data.
- Run processors to import or export data to and from your workspace.
- Get the data model of your workspace in JSON format, which includes the keys of meta model attributes.
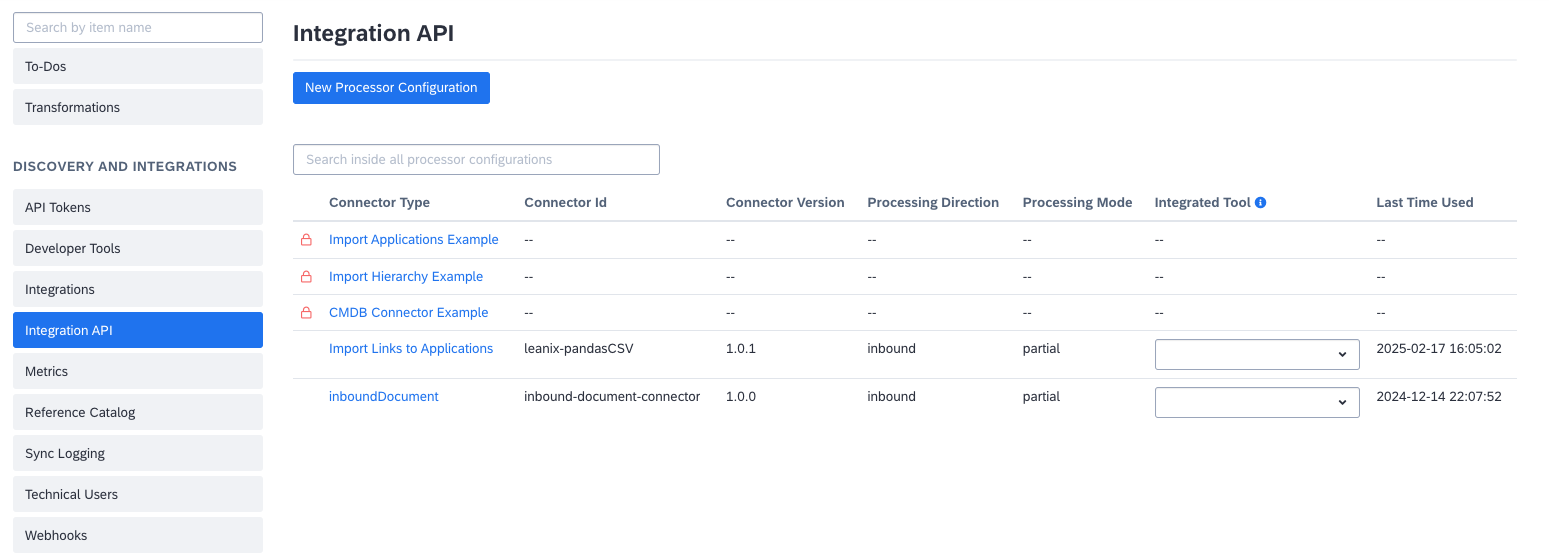
Integration API Page in the Administration Area
Key Concepts
- Processor: A processor defines an action to be executed on each content object of the incoming LDIF.
- Connector: A connector is not an entity within the Integration API but a middleware that creates an LDIF. It defines a set of meta properties the Integration API uses to bind incoming LDIF to a processor configuration. These properties are:
connectorType,connectorId, andconnectorVersion. - Processing direction: The direction of data processing:
- Inbound: Data is imported from an external system to SAP LeanIX in LDIF format. For more information, see Inbound Processors.
- Outbound: Data is exported from SAP LeanIX to an external system in LDIF format. For more information, see Outbound Processors.
- Processing Modes: The mode of data processing:
- Full: The connector expects the complete set of data. You can apply
deletionScope, and any data not sent as part of the run can be archived from the workspace. - Partial: The connector expects a subset of data.
- Full: The connector expects the complete set of data. You can apply
- Integrated Tool: The third-party system from which the data is imported or to which it's exported.
Note
Even though you can use outbound processors, it's recommended to use the writeToLdif inbound processor to export data in LDIF format instead.
Preconfigured Processors
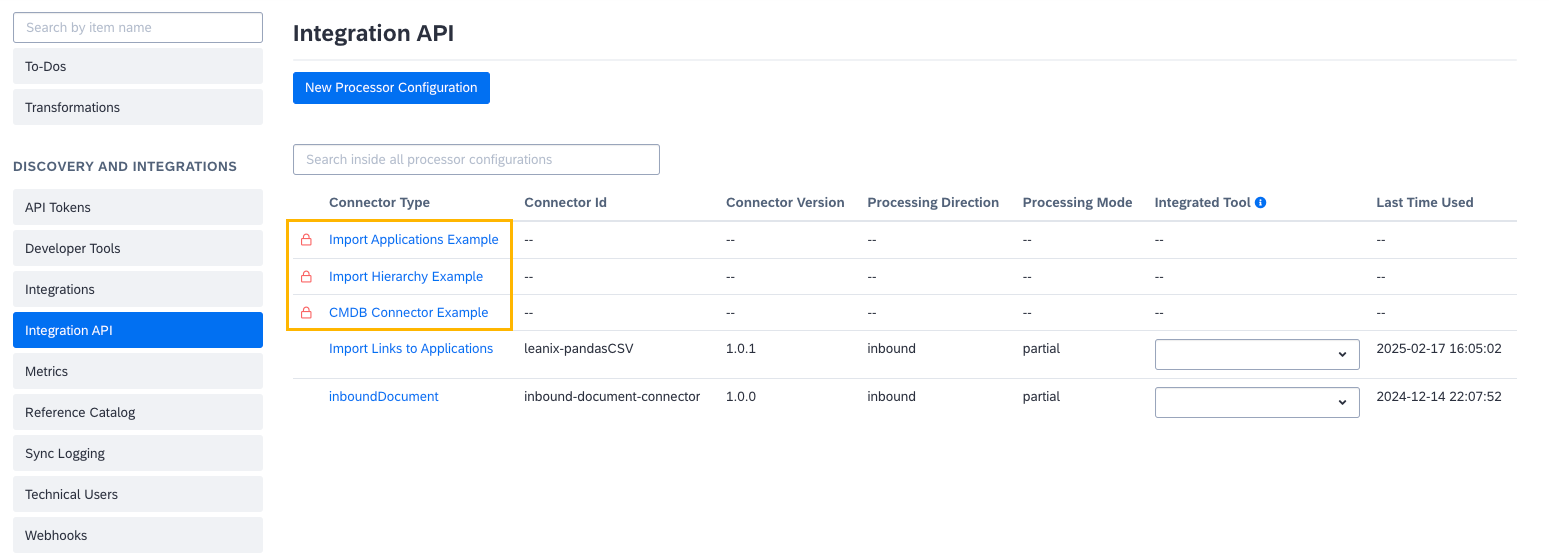
To get started, you can review the configuration of preconfigured processors marked with the lock icon on the Integration API page. These processors cover typical scenarios for importing data into your workspace:
- Import Applications Example: This processor imports application fact sheets with basic attributes, tags, subscriptions, and relations.
- Import Hierarchy Example: This processor imports business capability fact sheets with basic attributes and relation hierarchy, including parent and child fact sheets.
- CMDB Connector Example: This processor imports data from a CMDB to your workspace, including:
- IT component, provider, and application fact sheets
- Relations from IT components to applications and providers
- Links added as resources (documents) on fact sheets
You can perform test runs for these processors and preview the results in the Output Log section. Use these examples as a basis to create your own processors by copying the configuration and adjusting the scope to your needs.
Preconfigured Processors
Configuring a Processor
Follow these steps:
-
In the administration area, go to the Integration API section.
-
Click New Processor Configuration.
-
Specify the processor details, then click Save. Once you save the processor, you can add new versions and update the integrated tool. You can't change any other details.
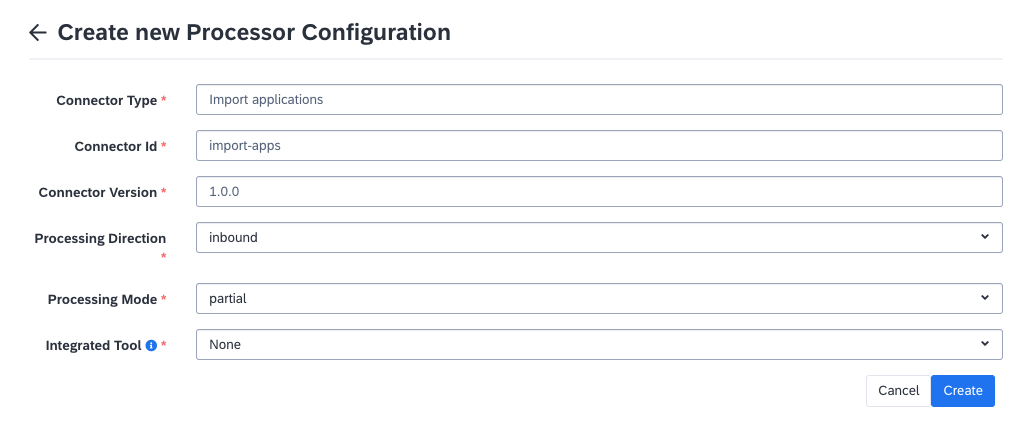
Creating a Processor
-
On the left side of the configuration page, define the processor configuration. You can add multiple processors.
-
In the Input section, enter the following depending on the processor direction:
- Inbound: Enter the data to be imported in LDIF format. For more details, see LeanIX Data Interchange Format (LDIF).
- Outbound: To define the scope of data to export in LDIF format, in the upper-right corner, click the three-dot icon > Define Scope, then select fact sheets using inventory filters. The
scopein the processor configuration on the left side is populated accordingly.
-
Click Save.
After saving a processor, you can test and run it, as described in the following sections.
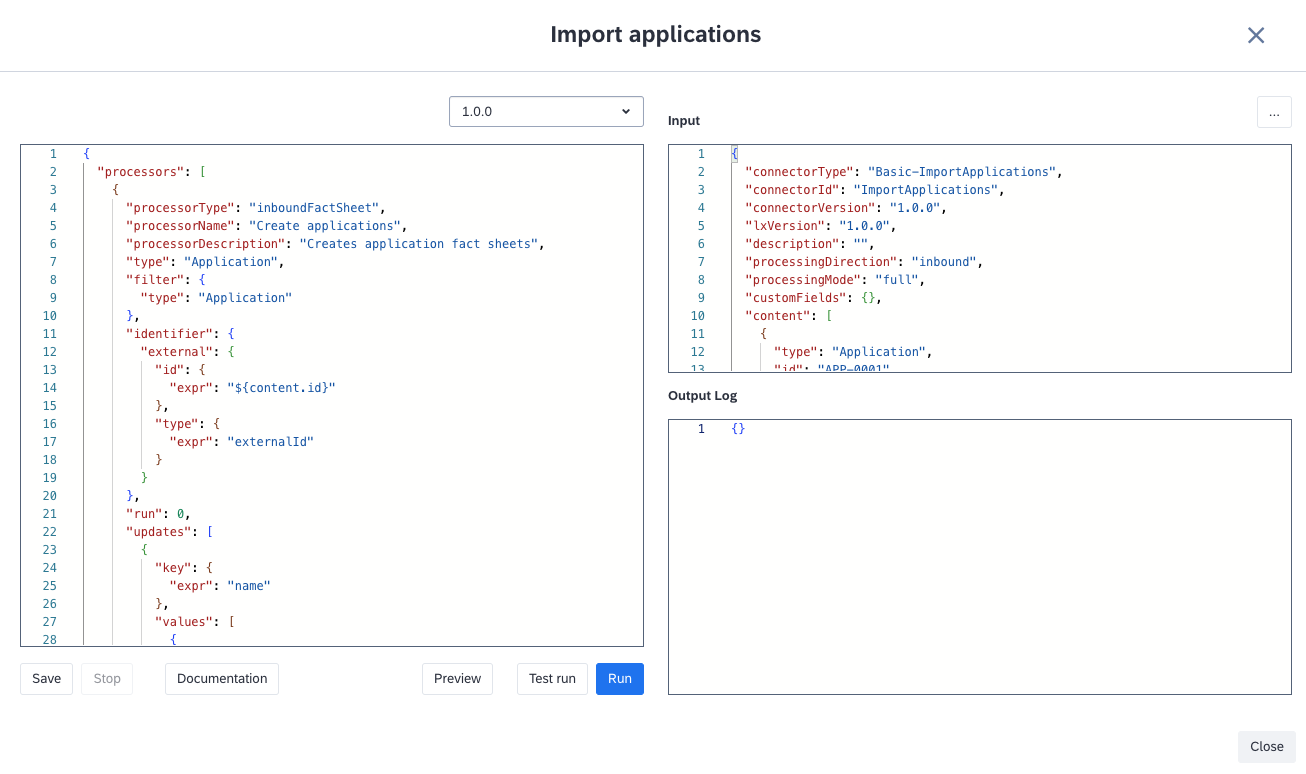
Processor Configuration Page
Note
Processor configuration and data are strictly separated in the Integration API to ensure synchronization runs are reliable, repeatable, and auditable. Whenever you save the configuration of processors, only the processors are stored. The system does not store any LDIF data.
Testing a Processor
To verify the processor configuration, you can complete a test run. This doesn't apply any changes to your workspace.
To complete a test run, click Test Run at the bottom of the processor page. The results of the test run appear in the Output Log section. Review the output for possible errors and update the processor configuration or input as needed.
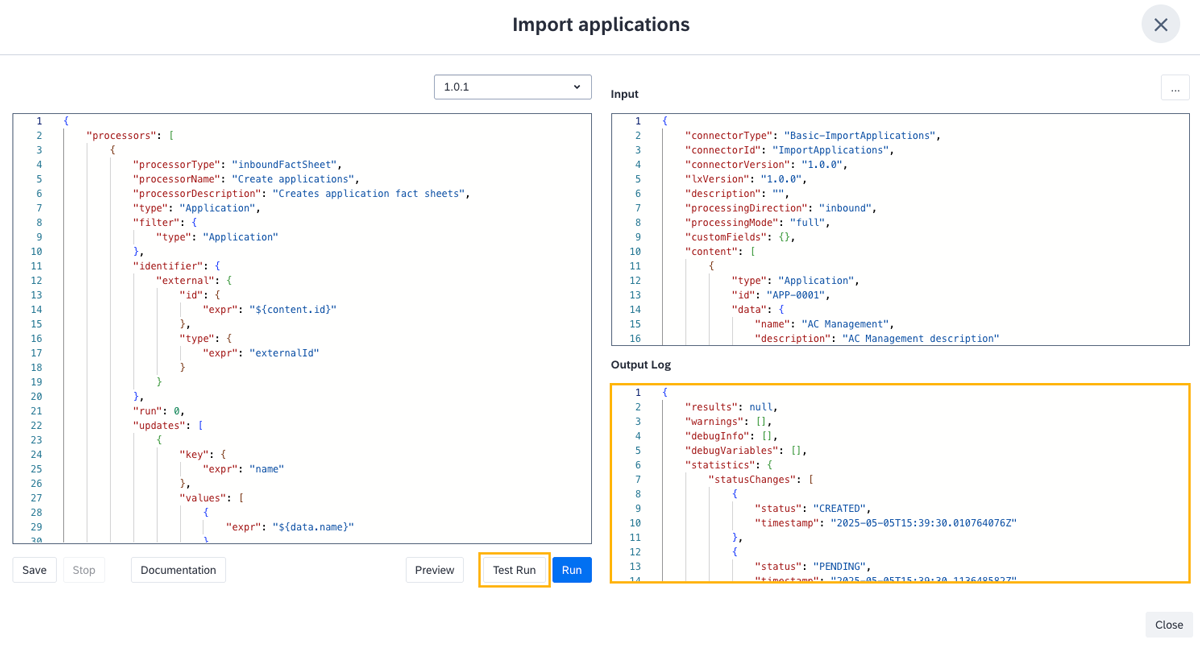
Testing a Processor and Previewing Results in the Output Log
Running a Processor
After successfully testing a processor, you can run it. This applies changes to your workspace, so always ensure to test your processors first.
To run a processor, click Run at the bottom of the processor page. The results appear in the Output Log section.
Saving New Processor Versions
You can update the processor configuration and save it as a new version without deleting the previous version. This allows you to maintain a history of changes.
Always version processors using the number.number.number format, such as 1.0.0. This convention helps maintain the processor's version history and supports versioning during configuration updates.
To save a configuration to a new version, in the upper-right corner of the processor page, click the three-dot icon > Save New Version, then enter the version details and click OK.
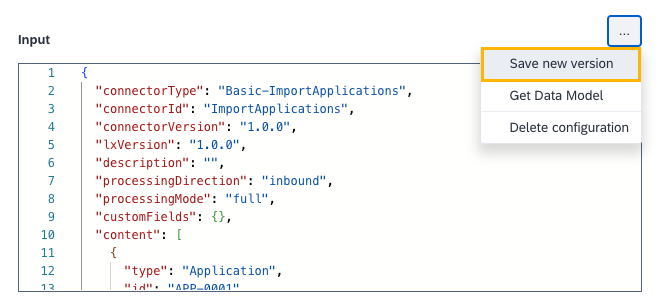
Saving a New Processor Version
You can switch between the processor versions by using the drop-down list at the top of the processor page.
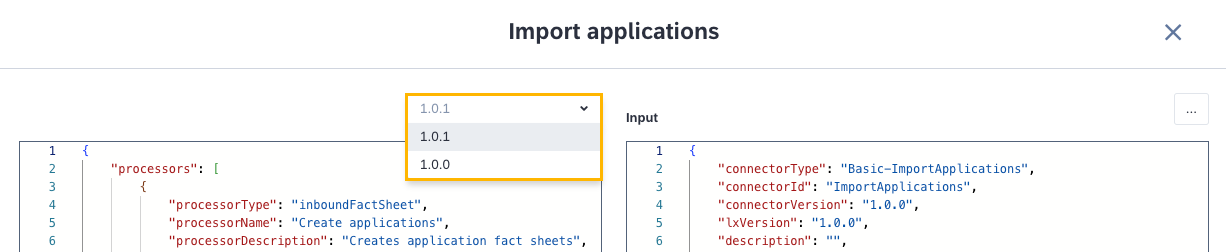
Processor Versions
Getting the Data Model of Your Workspace
The data model of your workspace provides the meta model attributes in JSON format. Each fact sheet attribute is uniquely identified by an attribute key, also known as the technical name. To learn more about attribute keys in the meta model configuration, see Attribute Key.
To get the data model of your workspace, in the upper-right corner of the processor page, click the three-dot icon > Get Data Model.
The data model in JSON format is returned in the Output Log section. You can copy attribute keys from here and use them in your configurations.
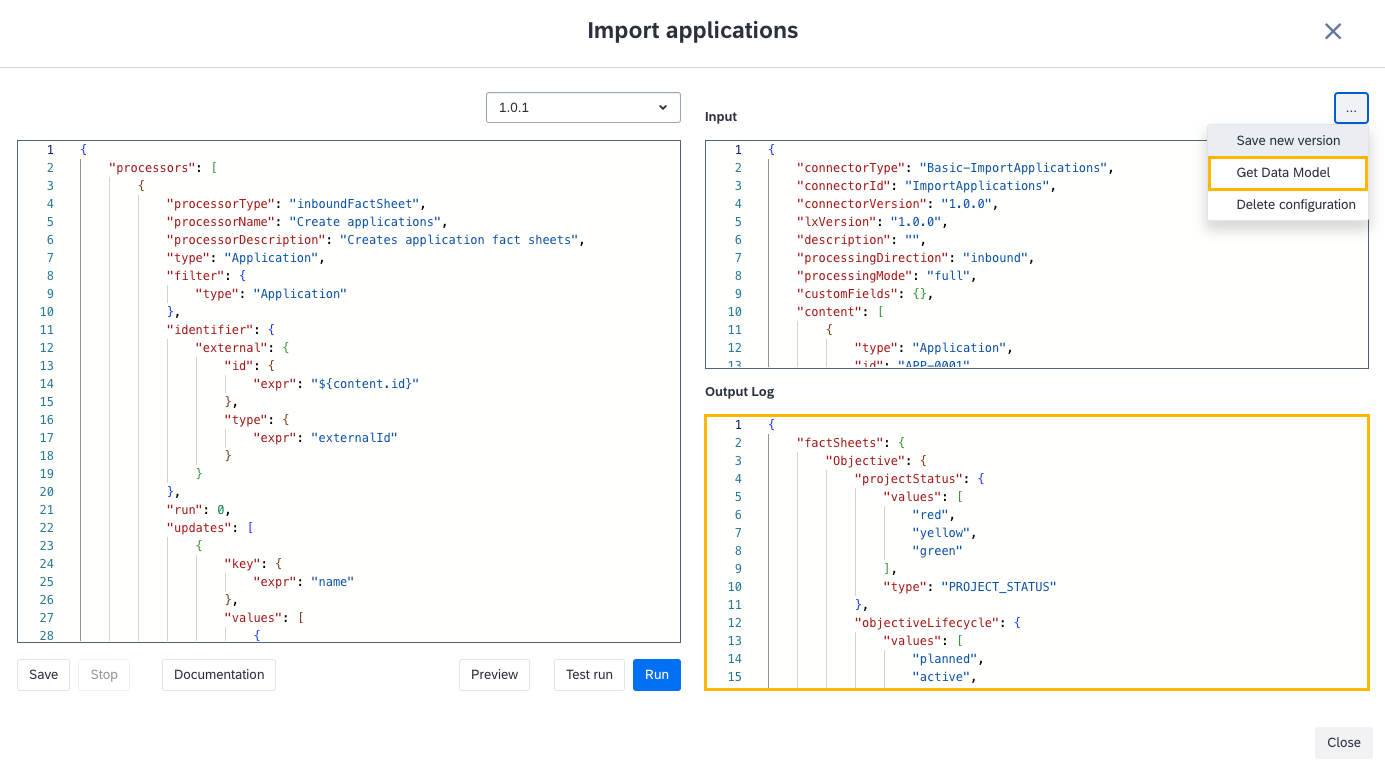
Getting the Data Model of a Workspace
Managing Processors
- Updating the configuration: To update the processor configuration, make the necessary changes and then click Save. Note that the system doesn't save input data.
- Updating the integrated tool: You can update the integrated tool associated with the processor from the Integration API page.
- Deleting a processor: Be cautious with this action, as it cannot be undone. To delete a processor, click the three-dot icon in the upper-right corner of the processor page, then select Delete Configuration.