
Calculations
Calculations let you populate fact sheet fields based on values from other fields. Use calculation templates for common scenarios or configure your own to define custom logic.
Overview
Calculations let you populate fact sheet fields based on values from other fields. You can define the calculation logic using JavaScript code, which runs in a secure environment in SAP LeanIX. When data in any field used for a calculation changes, the calculation triggers automatically, and the result is written to the target field.
With calculations, you don’t need third-party solutions to host code. However, this feature doesn't affect any custom code-based calculations that you host on external platforms.
As an admin user, you can manage calculations in the Calculations section of the admin area. Here, you can activate calculation templates based on common best practices and configure your own calculations to define custom logic.
Benefits
- Automated data population: Fact sheet fields automatically populate with calculated values based on other fields.
- Customizable logic: You can use templates or create your own calculations from scratch to define custom logic.
- Secure execution: Calculations run securely within SAP LeanIX, without involving third-party solutions.
Scope
You can configure calculations for fields on the selected target fact sheet type. This affects all fact sheets of that type.
Limitations
You can have only one active calculation for a specific target field.
Technical Details
Note
In calculations, ECMAScript 2024 (ES15) is supported. The import of libraries is not supported.
- Syntax: Start the code with
export function main() {and end it with the closing bracket}. Write the logic for your calculation between the brackets using JavaScript. - Field keys: Use the technical keys of fact sheet fields in code. You can find them in the meta model configuration. For more information, see Attribute Key.
- Referencing fields: To reference fact sheet fields, use the notation
data.fieldName. Do not use notations likedata['field'+'Name']orconst key = ‘fieldName’; data[key]or others. Incorrect notations can lead to calculation triggers not being identified properly. As a result, the calculations might not execute correctly. - Referencing relations: To reference relations, use the notation
data.relationName. This returns an array of relations on the fact sheet of the specified relation type. You can perform further operations, such as accessing the number of related fact sheets withdata.relationName.length. You can also loop through the relations to access fields usingfor (const relation of data.relationName) { ... relation.fieldOnRelation ... }. - Referencing fields on related fact sheets: To reference fields on related fact sheets, use the notation
data.relationName.factsheet. For example, in a calculation for business capability fact sheets, you can access thefunctionalSuitabilityfield on related applications withdata.relBusinessCapabilityToApplication[0].factsheet.functionalSuitability. - Checking for empty states in fields: Empty fields may have the value
nullorundefinedif they were never set. To check for empty fields, we recommend using non-strict operators==or!=. You can use strict operators!==or===as well, but you'll need to handle both cases ofnullandundefinedseparately. - Output: The function's returned value is written to the specified target fact sheet field. If the code doesn't return an output, the calculation doesn’t run. To reset a field to an empty value, configure the code to return
null. - Preventing loops: If activating a calculation creates a potential loop due to cyclic dependencies with other calculations, the system blocks the activation. You can then only save the calculation.
Supported Attributes
- Fact sheet fields of the following types:
- Double
- Integer
- Multiple Select
- Single Select
- String
- External Id
- Base Field, except for the field Level. Base fields can only be used as input and not as target fields.
- Relations
- Fields on relations
- Fields on related fact sheets
To learn more about field types, see Field Types.
Note
For source fields referenced in calculations, you can populate data using any method: manual input or automated population through integrations. Calculations trigger regardless of the method you use.
Tip
To prevent users from manually updating target fact sheet fields that automatically populate from calculations, set these fields as read-only in the meta model configuration. This approach ensures users don’t mistakenly overwrite target fields. For instructions, see Setting Fields as Read-Only.
Unsupported Attributes
- Special fields such as Lifecycle, Location, and Project Status
- Tags
Calculation Templates
We provide predefined calculation templates based on common best practices. Activate them in your workspace to automate data population on fact sheets. You can also create your own calculations by customizing templates.
Note
We currently offer a calculation template for the Gartner® TIME assessment. We're working on adding more templates for common use cases.
Activating a Calculation Template
Follow these steps:
-
In the administration area, go to the Calculations section.
-
Click New Calculation.
-
In the Templates section, find the template you need and click Use Template.
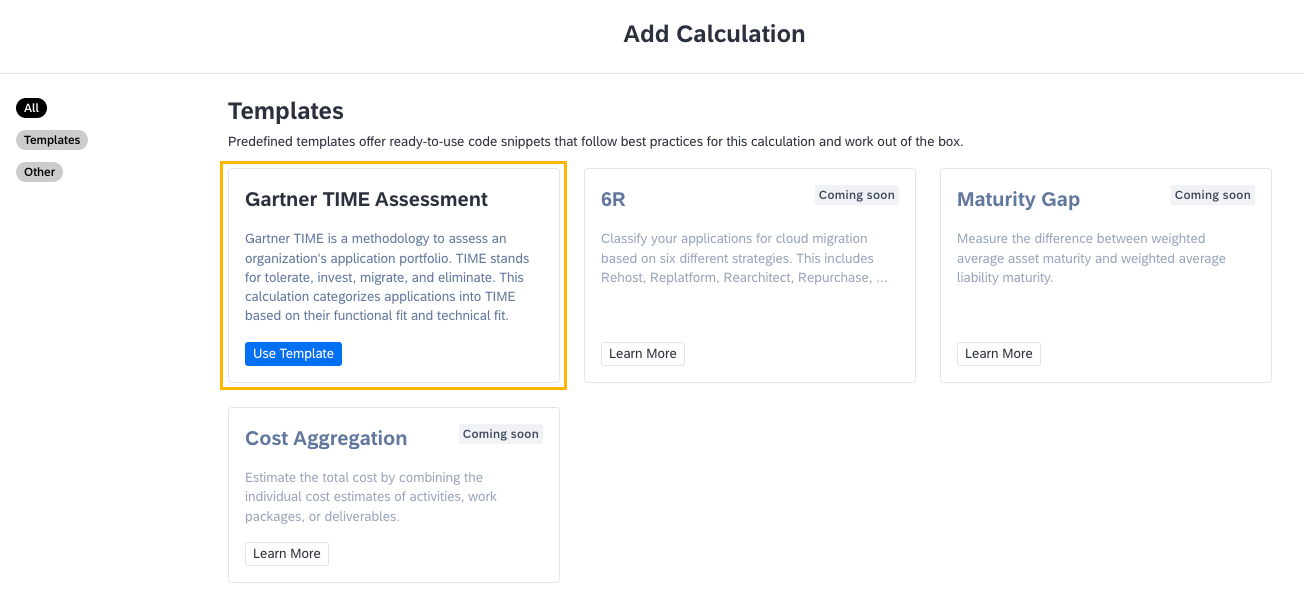
Selecting a Calculation Template
-
On the calculation page, adjust the configuration as needed, then click Save and Activate.
Gartner® TIME Assessment
The Gartner® TIME framework is a methodology used to strategically manage and optimize an organization's application portfolio. The acronym TIME stands for Tolerate, Invest, Migrate, and Eliminate. The purpose of the framework is to guide decisions on which applications to maintain, invest in, migrate to new technologies, or phase out altogether. By categorizing applications into these four groups, organizations can ensure that their portfolio aligns with business objectives and technological advancements, while making efficient use of resources. For more information, see Gartner® TIME Framework.
The Gartner® TIME assessment calculation is configured for application fact sheets. Once the Functional Fit and Technical Fit values are updated on a fact sheet, the TIME Classification field is populated automatically. The following table shows the logic of the Gartner® TIME assessment calculation.
| Functional Fit | Technical Fit | TIME Classification |
|---|---|---|
| Unreasonable or Insufficient | Fully Appropriate or Adequate | Tolerate |
| Appropriate or Perfect | Fully Appropriate or Adequate | Invest |
| Appropriate or Perfect | Unreasonable or Inappropriate | Migrate |
| Unreasonable or Insufficient | Unreasonable or Inappropriate | Eliminate |
Custom Calculations
You can configure your own calculations to define custom logic tailored to your needs. You can use calculation templates or start from scratch. To view code samples for typical use cases, see Calculation Examples.
Configuring a Custom Calculation
Follow these steps:
-
In the administration area, go to the Calculations section.
-
Click New Calculation.
-
In the Other section, on the Create from Scratch tile, click Create. Alternatively, you can create a calculation from a template.
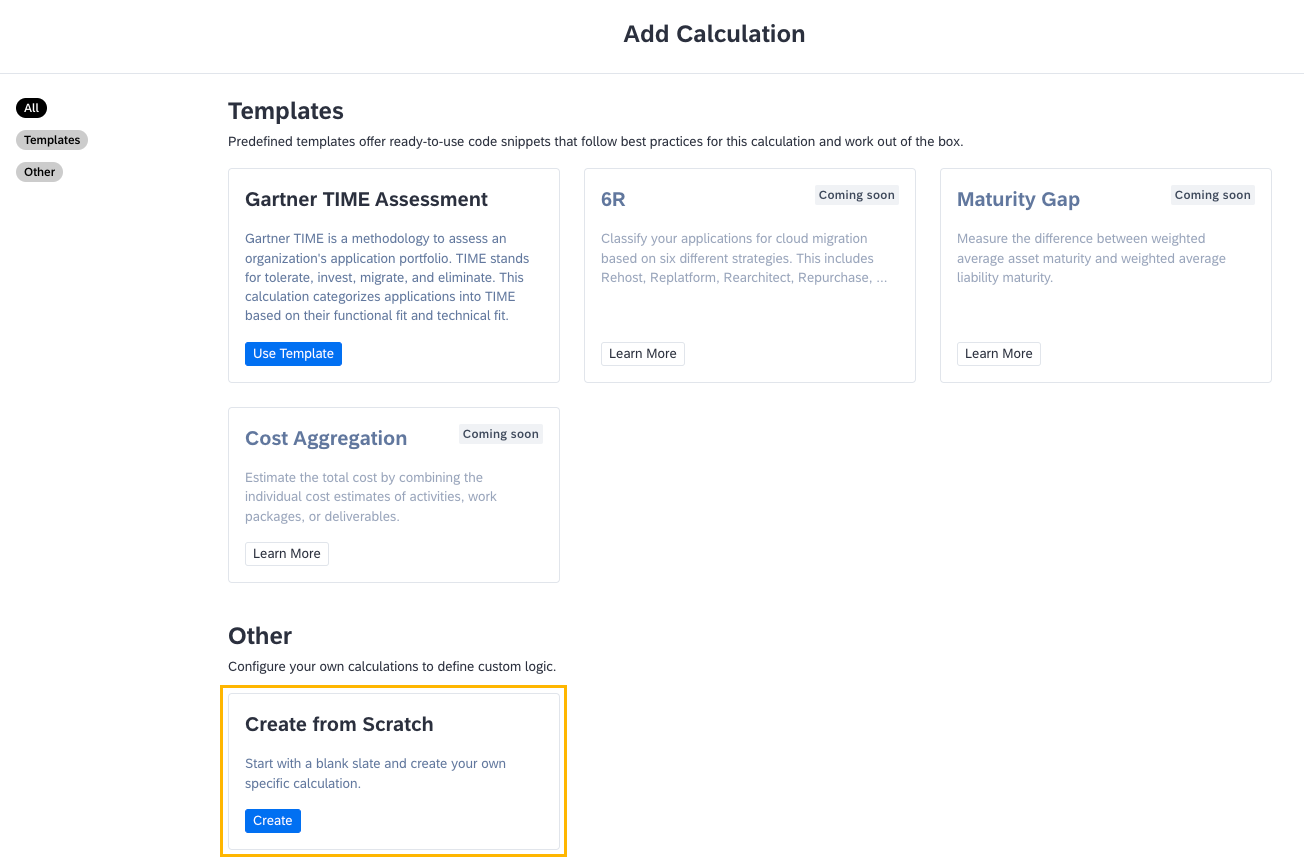
Creating a Custom Calculation from Scratch
-
Configure the calculation:
- Enter a name and, optionally, a description for the calculation.
- Select a target fact sheet type and field.
- Enter JavaScript code to define the calculation logic. For more information, see Technical Details.
-
Test the calculation to ensure it works as expected. For details, see Testing a Calculation.
-
Save the calculation as a draft or activate it immediately after saving.
Testing a Calculation
To test a calculation on specific fact sheets without updating the actual data, follow these steps:
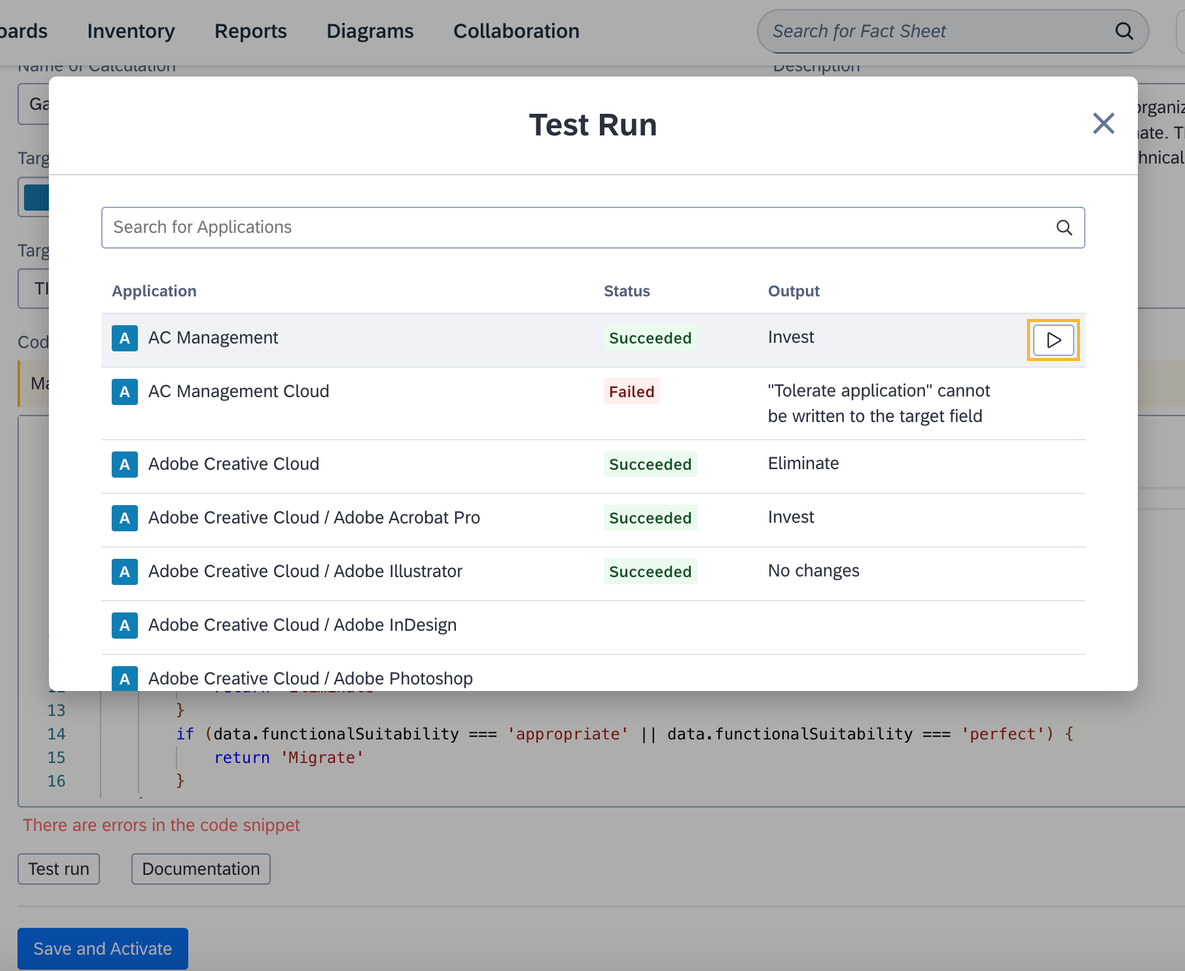
- On the calculation page, click Test Run.
- In the modal that appears, find the fact sheet you want to test, then click Request Run (arrow icon) on the right.
The status and output update based on the test run. You can perform test runs on multiple fact sheets. If test runs are successful, you can activate and run the calculation. If a calculation fails on some fact sheets, check the output and adjust the code accordingly.
Testing a Calculation
Managing Calculations
You can manage calculations in the Calculations section of the administration area. Here, you can:
- Activate calculations: To activate a calculation saved as a draft earlier, on the calculation page, click Save and Activate.
- Deactivate calculations: To deactivate an active calculation, in the upper-right corner of the calculation page, click the three-dot icon > Disable.
- Delete calculations: Proceed with caution as this action cannot be undone. You may want to deactivate calculations instead. To delete a calculation, in the upper-right corner of the calculation page, click the three-dot icon > Delete.
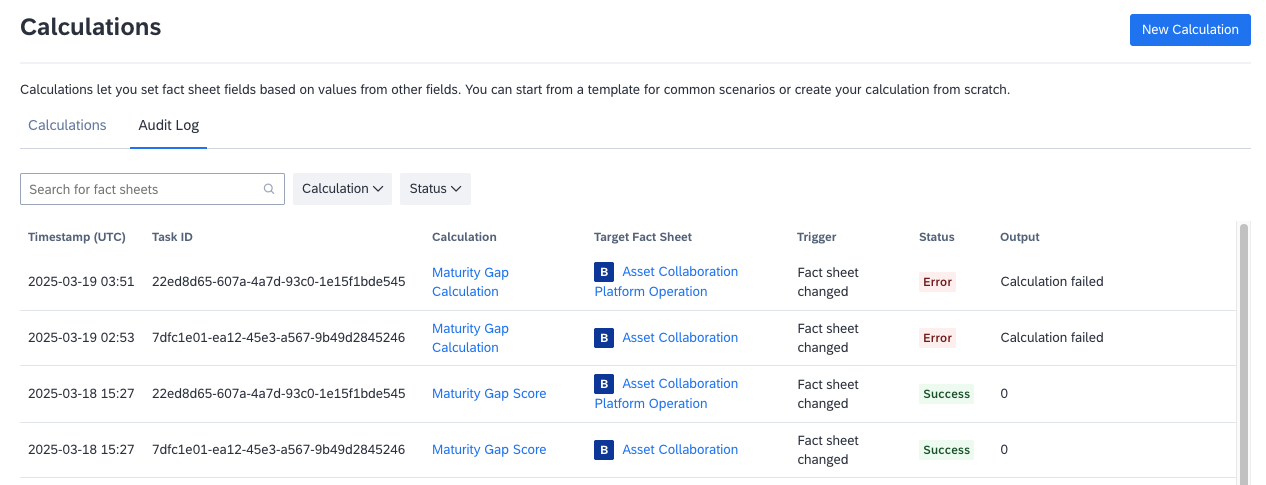
Audit Log
On the Audit Log tab of the Calculations page, you can view the history and details of executed calculations. Audit logs are retained for the past 30 days and include both successful and failed calculations. You can use the search field and apply filters to find the records you need.
List of Executed Calculations in the Audit Log
Examples
To explore JavaScript code samples for common use cases, see Calculation Examples.
Updated 6 days ago