
Configuring SSO with Microsoft Entra ID
Instructions for configuring single sign-on (SSO) with Microsoft Entra ID as an identity provider.
Prerequisites
Before you start, do the following:
- Submit a ticket to SAP LeanIX Support to request setting up SSO for your organization. If you're an SAP customer, submit a request from the SAP for Me portal.
- Learn about the SSO configuration process in SSO Configuration Process.
For additional information, refer to the Microsoft Entra ID documentation.
Note
The single sign-out protocol is not supported for Microsoft Entra ID.
Configuring SSO
Step 1: Create an SSO Application and Configure SAML Settings
Follow these steps:
- In Microsoft Entra ID, create a non-gallery application for SSO. For instructions, please refer to the Microsoft Entra ID documentation.
- On the SSO application page, navigate to the Single sign-on section and select SAML as the single sign-on method.
- Under Basic SAML Configuration, enter the following details:
- Identifier (Entity ID):
https://{SUBDOMAIN}.leanix.net/Shibboleth.sso - Reply URL (Assertion Consumer Service URL):
https://{SUBDOMAIN}.leanix.net/Shibboleth.sso/SAML2/POST
- Identifier (Entity ID):
Note
Replace
{SUBDOMAIN}in the URLs with your custom subdomain that you specified in the SSO request form (for example,https://your-company.leanix.net).
Step 2: Configure SAML Token Attributes
Configure SAML 2.0 attribute mapping in Microsoft Entra ID. For more information, see Attribute Mapping. Mapping attributes are defined as SAML Token Attributes in the Relying Party Trust.
Follow these steps:
-
Under Attributes & Claims, configure additional claims using the following values:
Claim Name Type Value firstnameSAML user.givennamelastnameSAML user.surnamemailSAML user.mailroleSAML user.assignedrolesuidSAML user.userprincipalnameThe following image shows the target values that you should configure. When you open the configuration page, it may show different values. For example, the first claim in the Additional claims table is initially set to
givenname, but you should change it tofirstname.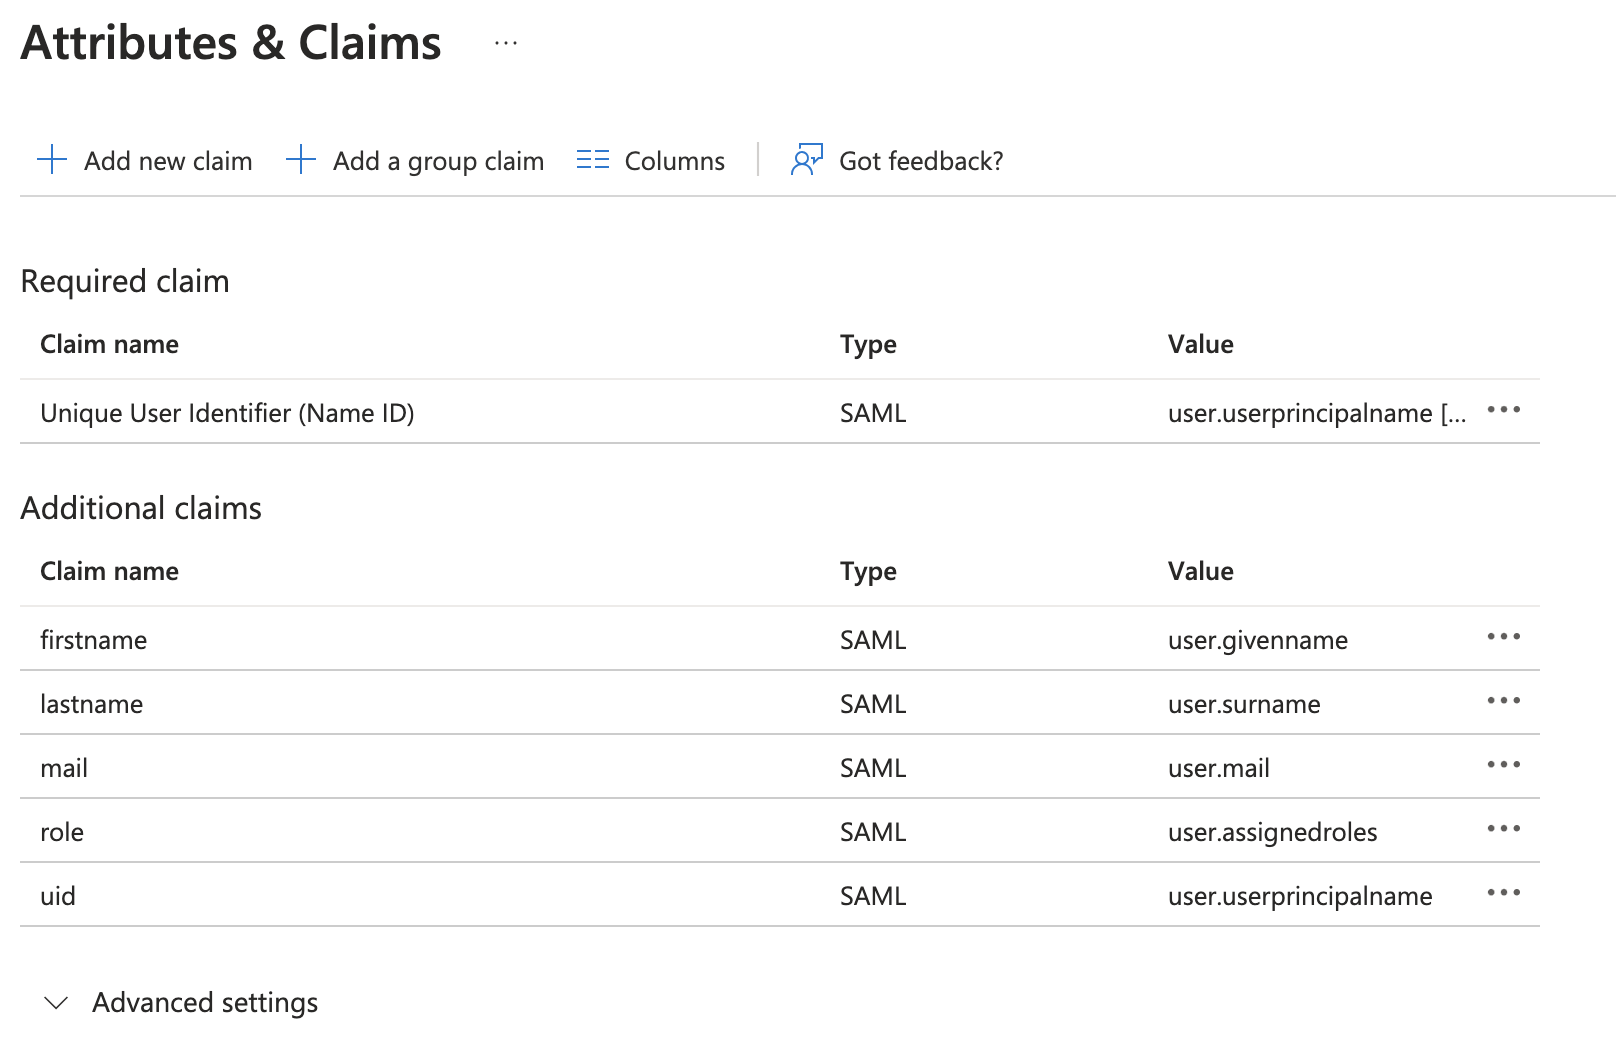
Configuring Attributes and Claims in Microsoft Entra ID
-
For each claim, delete the Namespace value in the configuration.
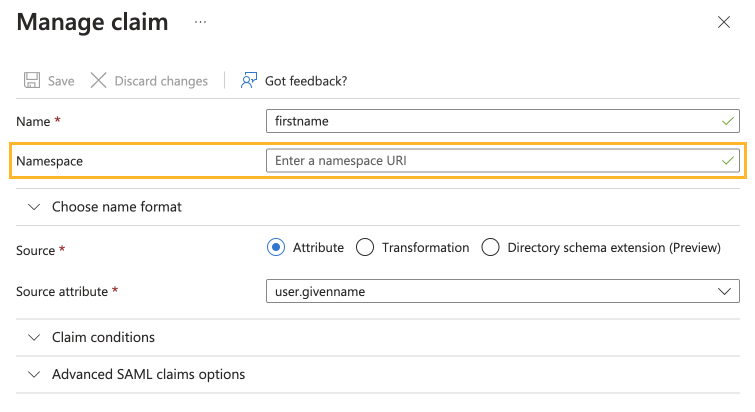
Leaving the "Namespace" Value Blank in the Claim Configuration
Basic SSO configuration is set up.
Configuring Role Attributes
If you want to manage user roles within Microsoft Entra ID and not within SAP LeanIX, create the corresponding roles in Entra ID. To learn more about managing roles, see Managing User Roles with SSO.
To configure role attributes, follow these steps:
-
In Microsoft Entra ID, navigate to your enterprise application, then go to the Single sign-on section. Under Attributes and Claims, add attributes listed in the following table.
Name Required Source Attribute roleRequired user.assignedrolescustomerRolesOptional
Use this attribute if you want to create custom roles. For more information, see Custom User Roles.user.assignedrolesentryACIOptional
Use this attribute if you want to configure virtual workspaces. For more information, see SSO Configuration.user.assignedroles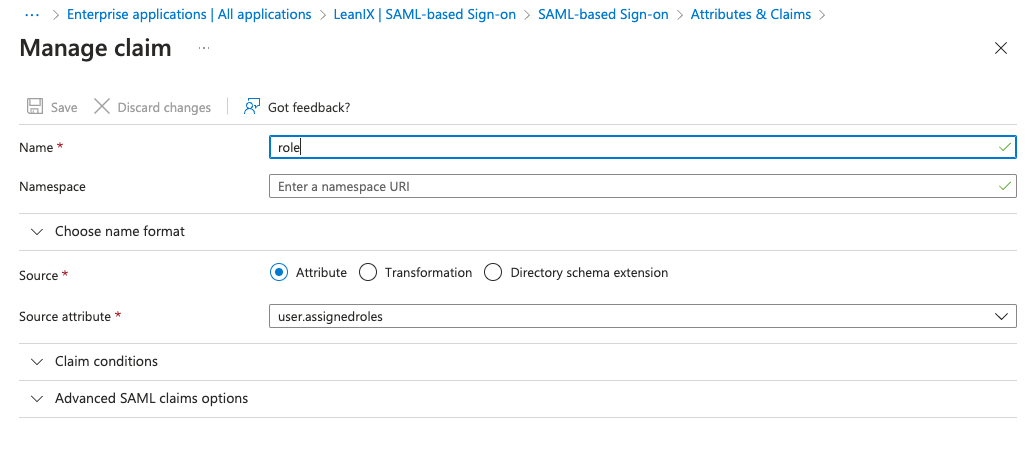
Adding Claims
-
Create app roles for your enterprise application. Navigate to App registrations, go to App roles, then create standard roles by clicking Create app role:
VIEWER,MEMBER, andADMIN. If you're also using custom roles, create them using uppercase letters and underscores.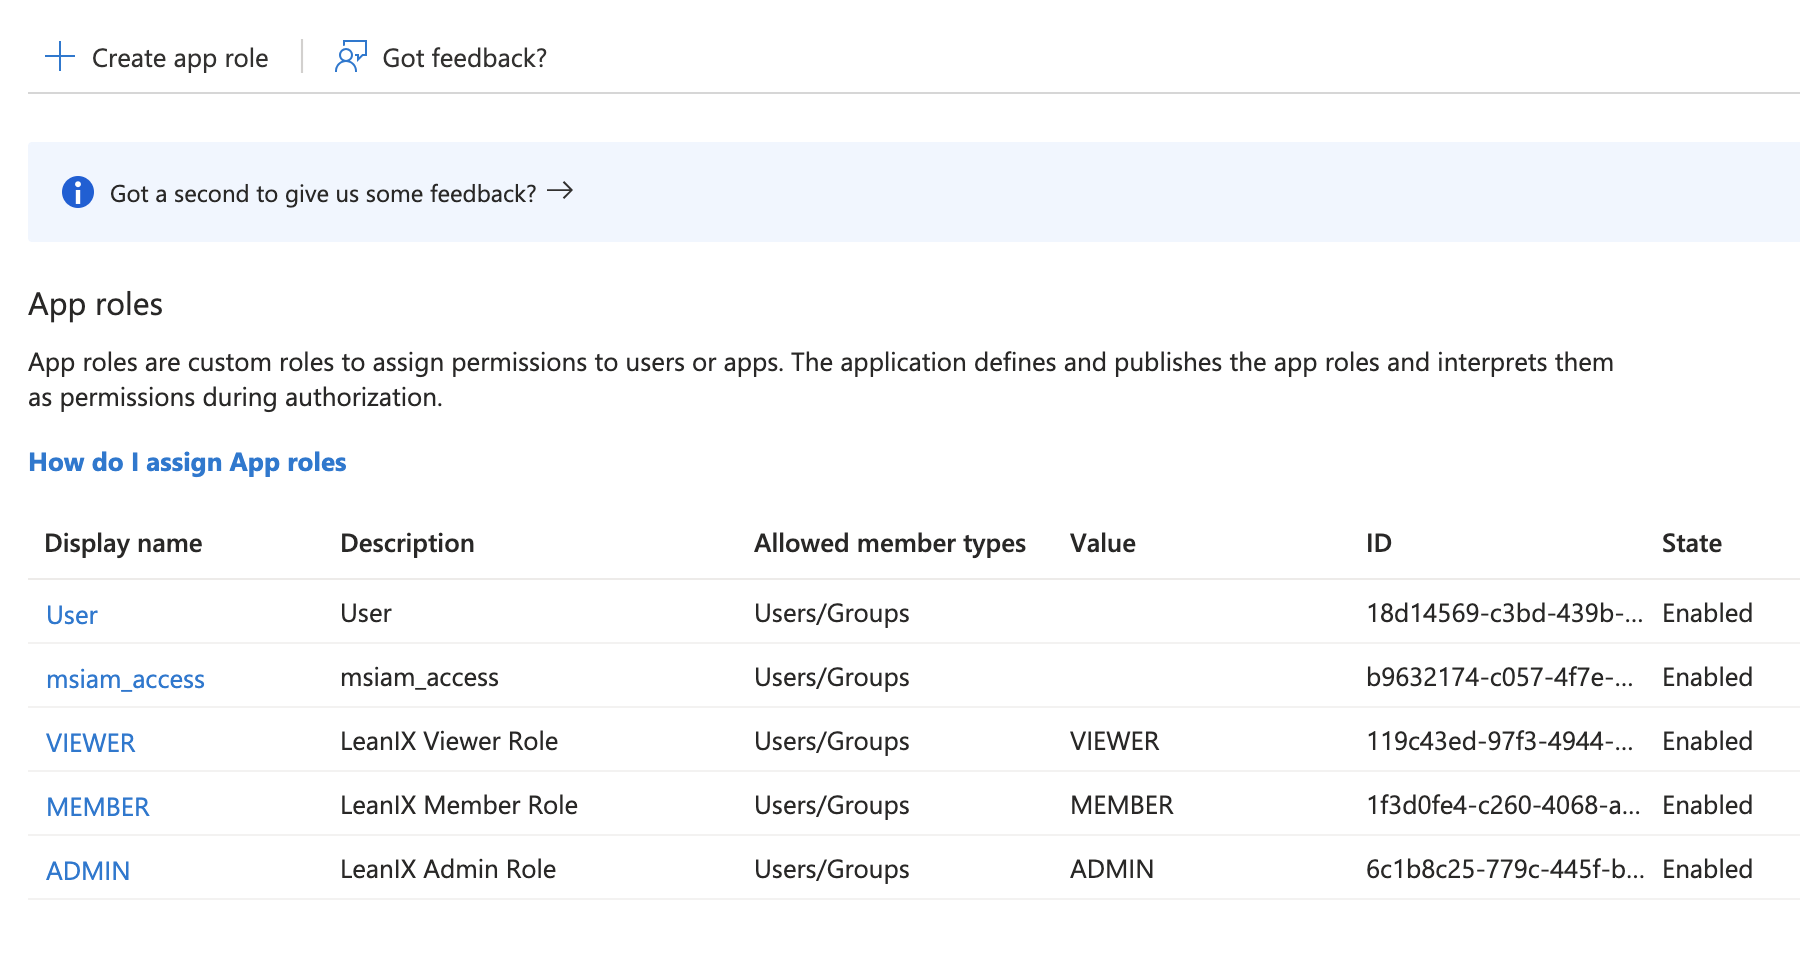
Creating Application Roles
-
In the configuration of the enterprise application, assign app roles to users or groups.
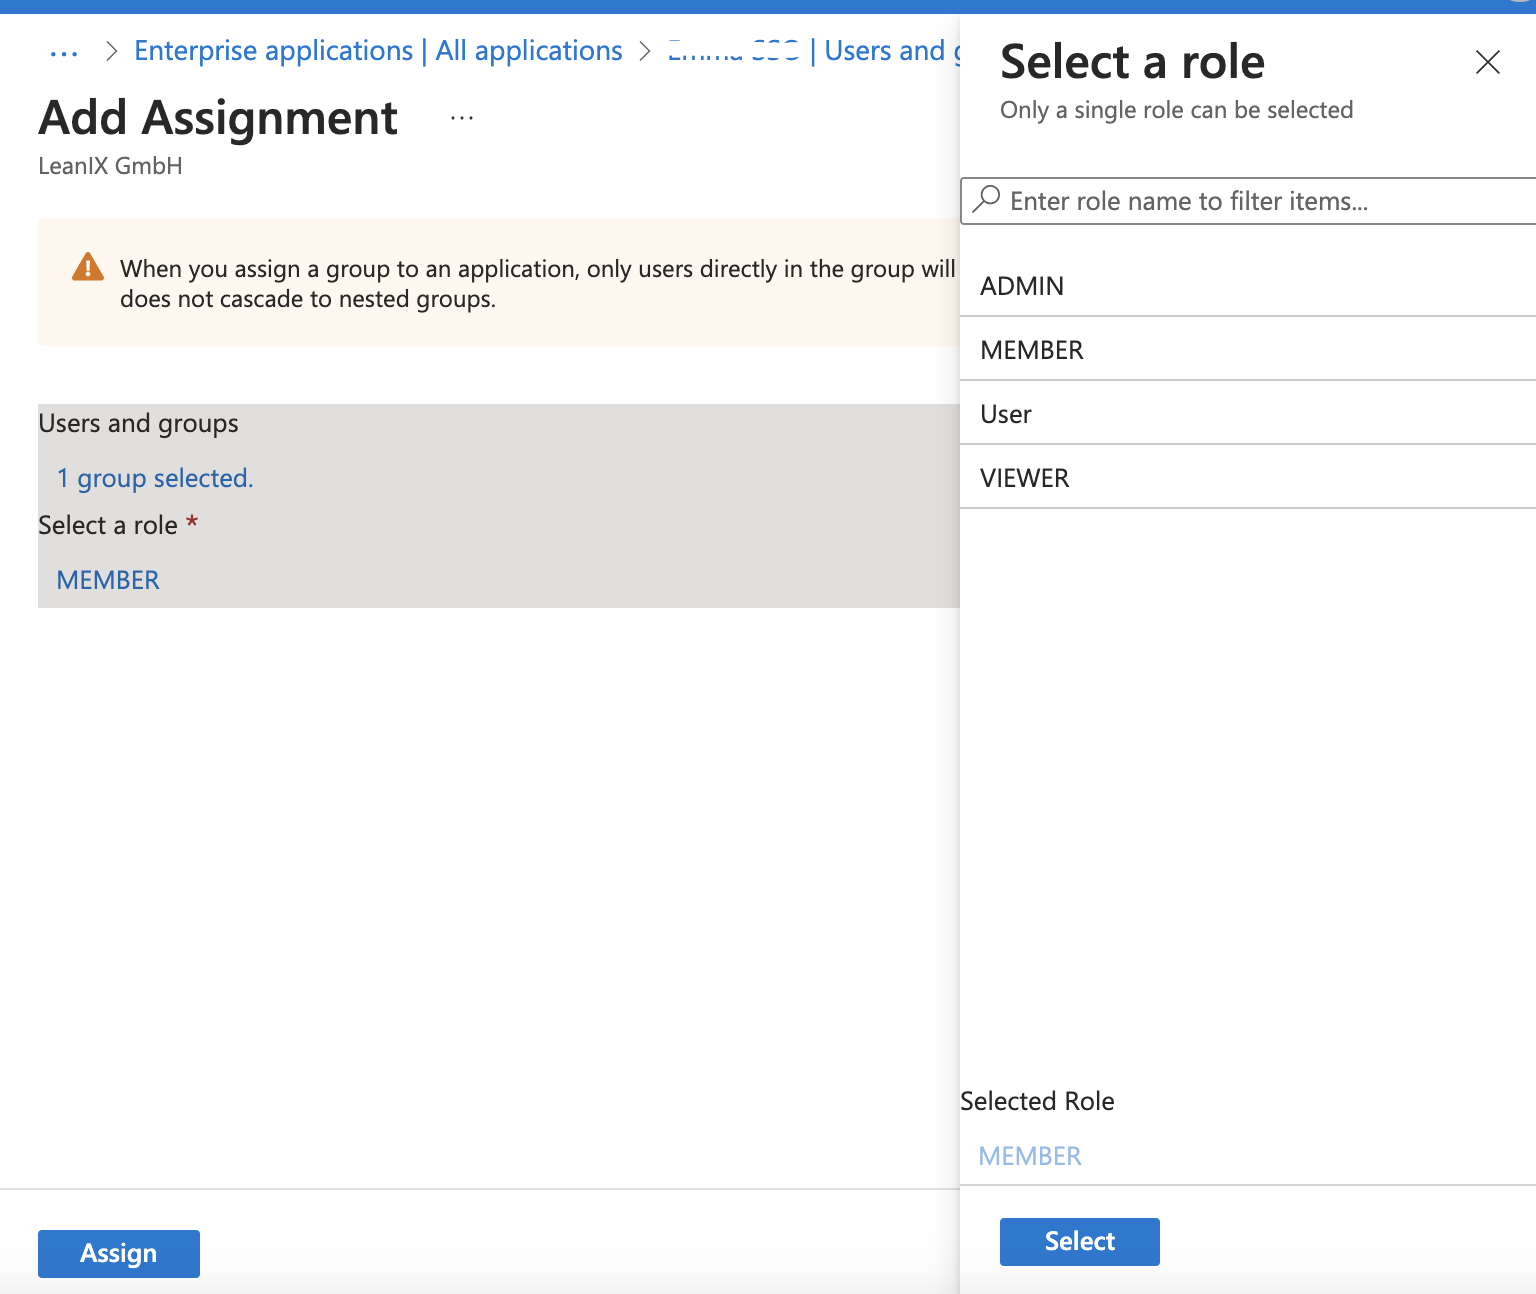
Assigning User Roles
-
Optional: If needed, configure claim conditions. Claim conditions is an option for assigning roles to Active Directory groups. Conditions will be processed in order of appearance.
An example of configured claim conditions is shown in the following image. If a user belongs to the scoped groups
VIEWERandMEMBER, they will be assigned theMEMBERpermission according to the specified order because the latest matching condition is always applied.To learn how to configure the
user.assignedrolesvalues, please refer to the Microsoft Entra ID documentation.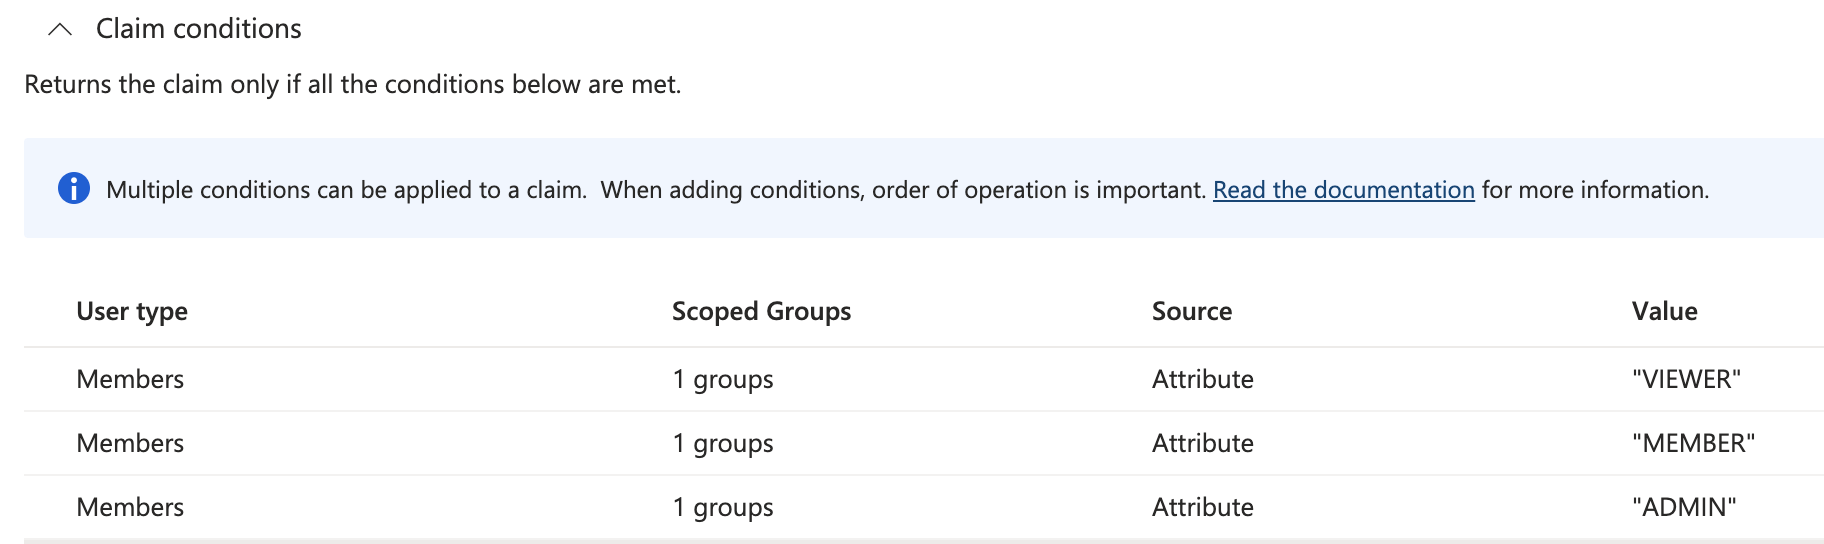
Configuring Claim Conditions
Updated about 1 month ago