
Configuring SSO with PingOne
Instructions for configuring single sign-on (SSO) with PingOne as an identity provider.
Prerequisites
Before you start, do the following:
- Submit a ticket to SAP LeanIX Support to request setting up SSO for your organization. If you're an SAP customer, submit a request from the SAP for Me portal.
- Learn about the SSO configuration process in SSO Configuration Process.
For more information about configuring SSO with PingOne, refer to the PingOne documentation.
Step 1: Create a SAML Application
Follow these steps:
-
In the PingOne admin dashboard, in the Applications section, click Add Application.
-
Enter a name for your application.
-
Select SAML Application as the application type, then click Configure.

Creating a SAML Application in the PingOne Admin Dashboard
Step 2: Configure SAML Settings
Follow these steps:
-
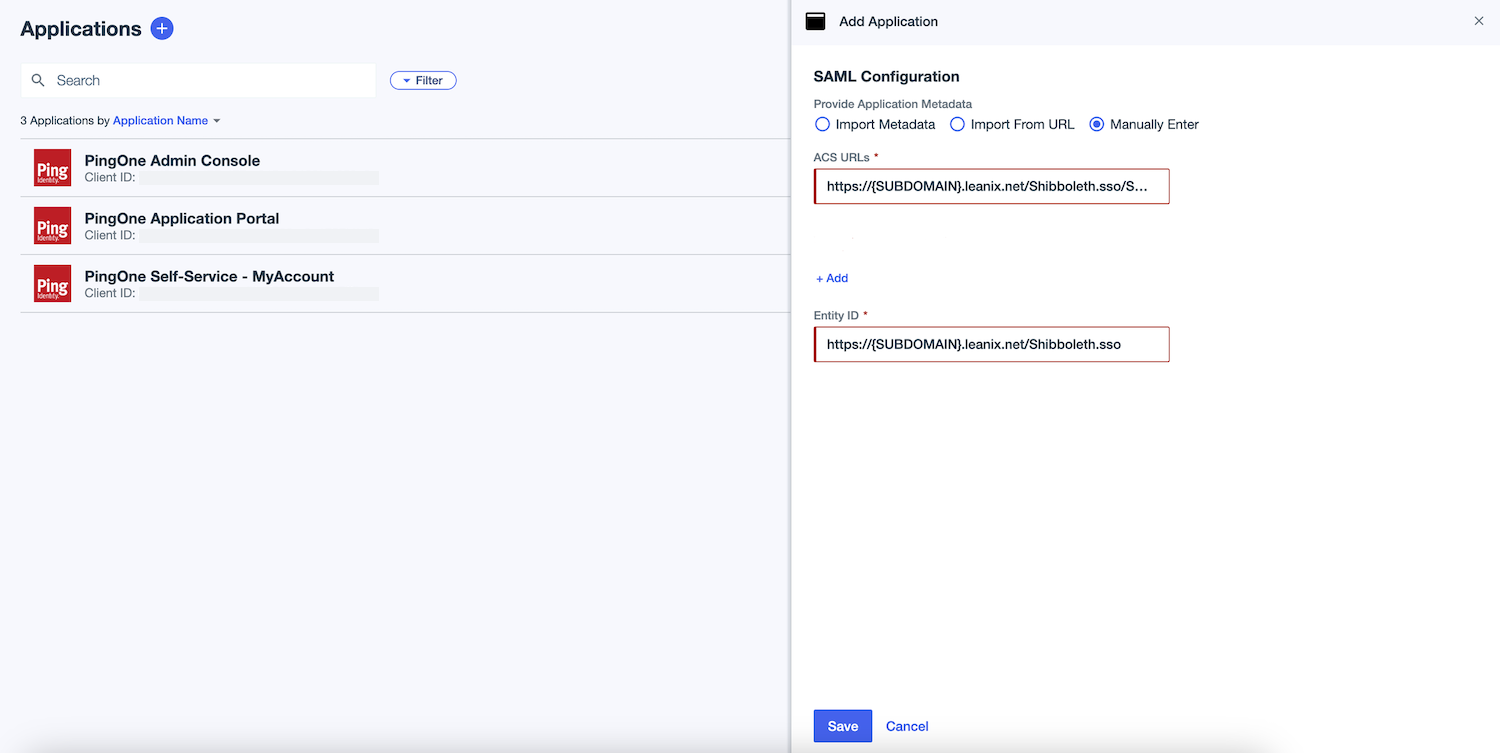
In the SAML Configuration section, under Provide Application Metadata, select Import Metadata and upload the metadata file. Alternatively, select Manually Enter and specify the following:
-
ACS URLs:
https://{SUBDOMAIN}.leanix.net/Shibboleth.sso/SAML2/POST -
Entity ID:
https://{SUBDOMAIN}.leanix.net/Shibboleth.ssoNote
Replace
{SUBDOMAIN}in the URLs with your custom subdomain that you specified in the SSO request form (for example,https://your-company.leanix.net).
-
-
Save the changes.
Configuring General SAML Settings for a SAML Application
Step 3: Configure Attribute Mapping
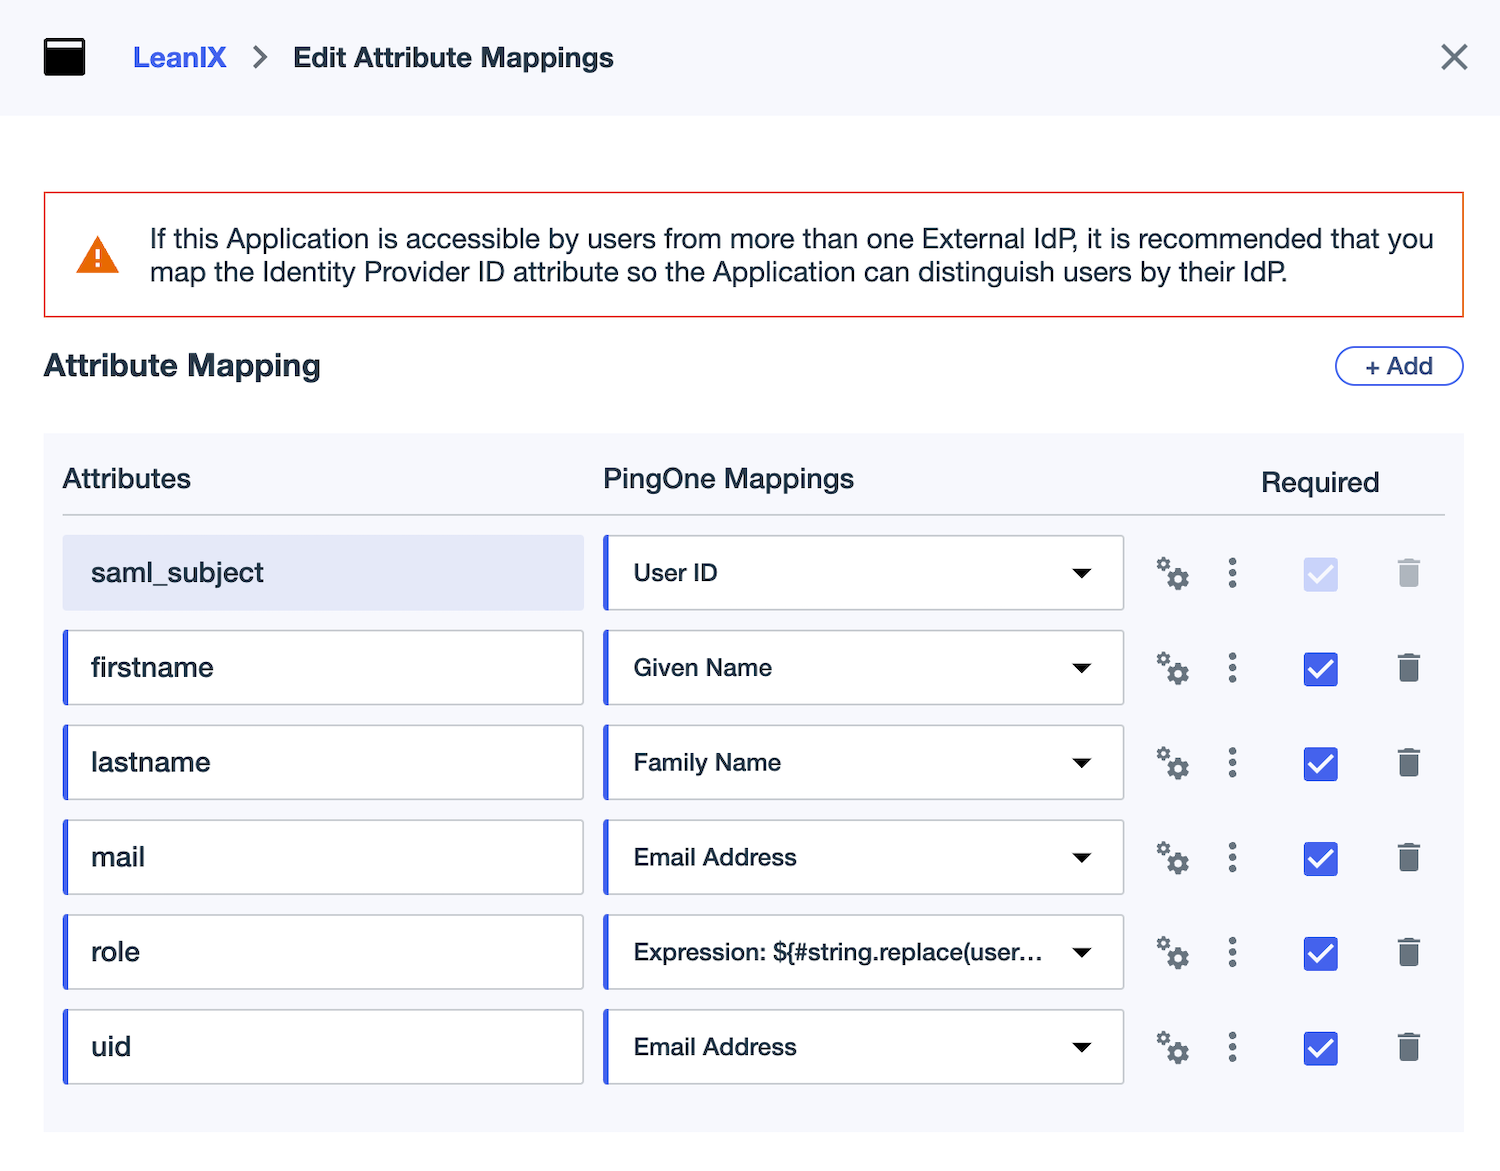
In the Attribute Statements section, specify attributes to be added to the SAML assertion as shown in the following tables. Set all attributes as required. All fields are case-sensitive.
For the following required attributes, the corresponding values already exist in PingOne Mapping.
| Attribute | Required | PingOne Mapping |
|---|---|---|
firstname | Required | Given Name |
lastname | Required | Family Name |
mail | Required | Email Address |
uid | Required | The unique ID of the user in the email format. |
If you want to manage user roles within PingOne and not within SAP LeanIX, configure optional attributes specified in the following table using expressions. To learn more about managing user roles, see Managing User Roles with SSO.
For effective implementation of the expressions, it's crucial to use accurate group naming. The mapping of group membership to a role or custom role is created by extracting a segment from the group name. For example, for the group name LEANIX MEMBER, MEMBER is sent to SAP LeanIX as the user role. User roles in the group names must exactly match the roles listed in the User Roles and Permissions section of your workspace's admin area in SAP LeanIX. For more information, see Custom User Roles.
While it's less common, another method is to map specific user attributes instead of group membership, which can be an option in some use cases such as when using virtual workspaces.
| Attribute | Required | PingOne Mapping |
|---|---|---|
role | Required only if you want to manage user roles within PingOne | Example expression: #string.replace(user.memberOfGroupNames.?[#string.startsWith(#this, 'LEANIX ')], "LEANIX ", "", -1) |
customerRoles | Required only if you want to manage user roles within PingOne | Example expression: #string.replace(user.memberOfGroupNames.?[#string.startsWith(#this, 'LEANIX ')], "LEANIX ", "", -1) |
entryACI | Required only if you want to manage user roles within PingOne and want to use virtual workspaces | Example expression: #string.replace(user.memberOfGroupNames.?[#string.startsWith(#this, 'LEANIX ')], "LEANIX ", "", -1) |
Configuring Attribute Mapping for a SAML Application
Step 4: Assign Users to the SAML Application
Follow these steps:
-
In the PingOne admin dashboard, navigate to Directory > Groups. Review your user groups and verify that they're already populated with users. In the following screenshot, the example user groups are
LEANIX MEMBER,LEANIX VIEWER, andLEANIX ADMIN.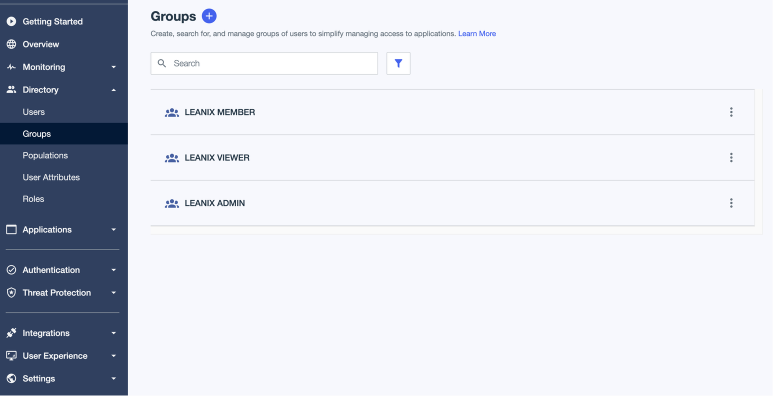
Creating User Groups in PingOne
-
Navigate to the SAML application page. On the Access tab, grant access to the application to the user groups. If you don’t need to manage authorization, assigning fewer groups will suffice.
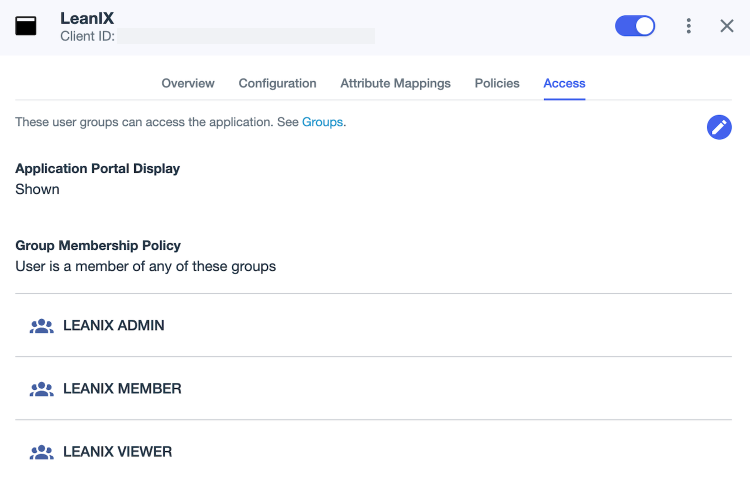
Assigning User Groups to a SAML Application
To verify your SSO configuration, first, access your workspace at https://{SUBDOMAIN}.leanix.net, then navigate to the SAML session page at https://{SUBDOMAIN}.leanix.net/Shibboleth.sso/Session.
The following screenshot shows a SAML session page with a list of required user attributes that appear under Attributes. The role attribute is optional and may not apply to your setup.
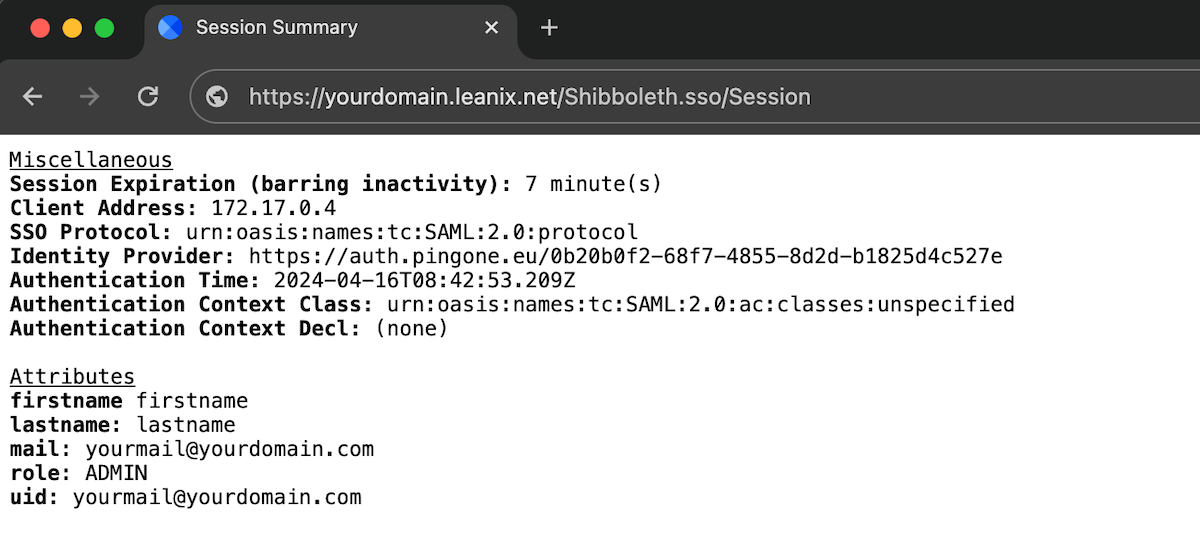
SAML Session Page
Updated about 1 month ago