To-Dos (Administration)
As an admin, learn how to create approval to-dos and manage all the to-do items in the administration area.
Note
This guide is for admin users and contains information on functions only they can perform. For general information about the to-do feature and how to use it, please refer To-Dos.
Introduction
To-dos provide an effective way of delegating tasks and responsibilities. As admins, you can use to-dos to assign tasks and ensure the overall integrity and quality of data in the workspace. In the administration area, you can access all to-dos of a workspace in one place to monitor their completion and effectively manage them.
To-dos play an important role in enforcing and tracking governance processes. Action item to-dos and approval to-dos provide an effective means to complete manual tasks within automated workflows. While action item to-dos can be created by any user, the approval to-dos can only be created by admins through the automation feature.
Creating Approval To-Dos
An approval to-do allows users to review and respond to tasks with approval or rejection. You can preset the approval or rejection decisions to automatically complete certain actions in the fact sheets. It streamlines decision-making and enables you to enforce and track governance workflows.
Approval to-dos are created through the automation feature in the administration area. When the automation is triggered, defined approval to-dos are automatically created and assigned to relevant users.
Summarily it involves defining the trigger event for the automation, setting the condition if necessary, and creating approval to-do as an action of the automation.
To create an approval to-do, follow these steps:
-
In the workspace Administration area, select the Automations section under Advanced Settings.
-
Click New Automation.
-
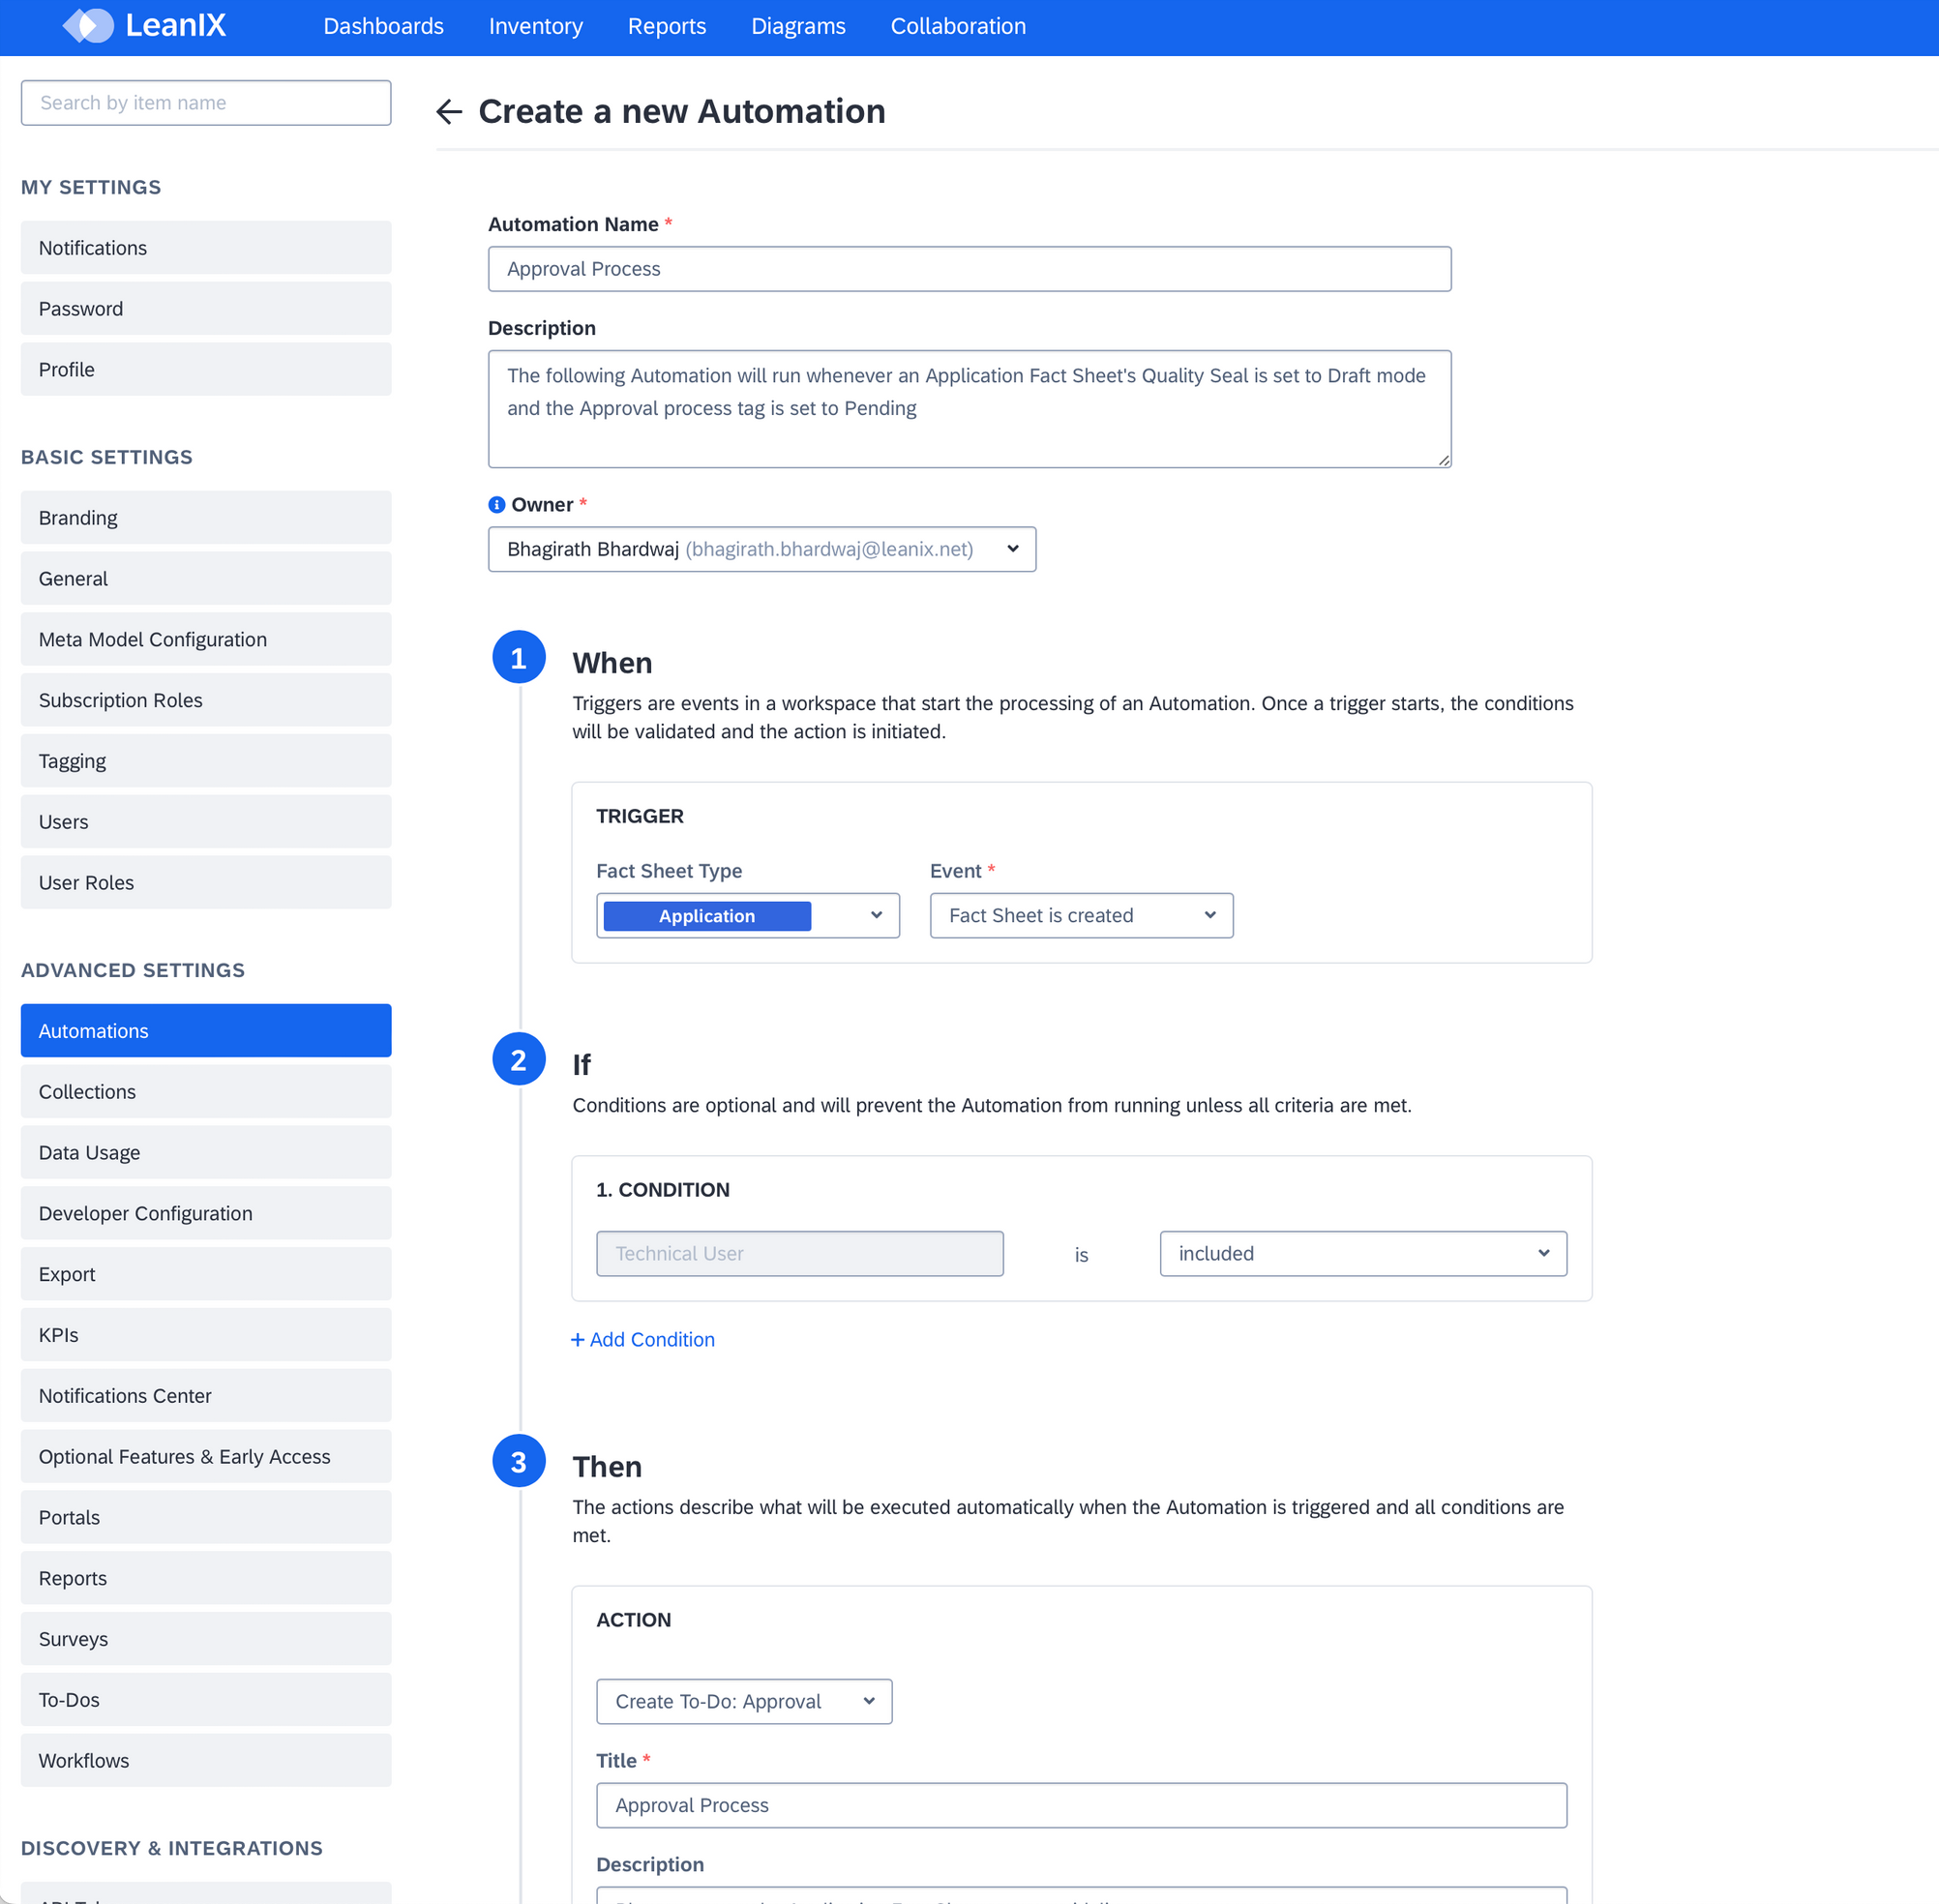
Configure the trigger and, if needed, conditions for the automation.

Example: Automation Creating an Approval To-Do Based on the Creation of an Application Fact Sheet
-
To define the actions of the automation:
-
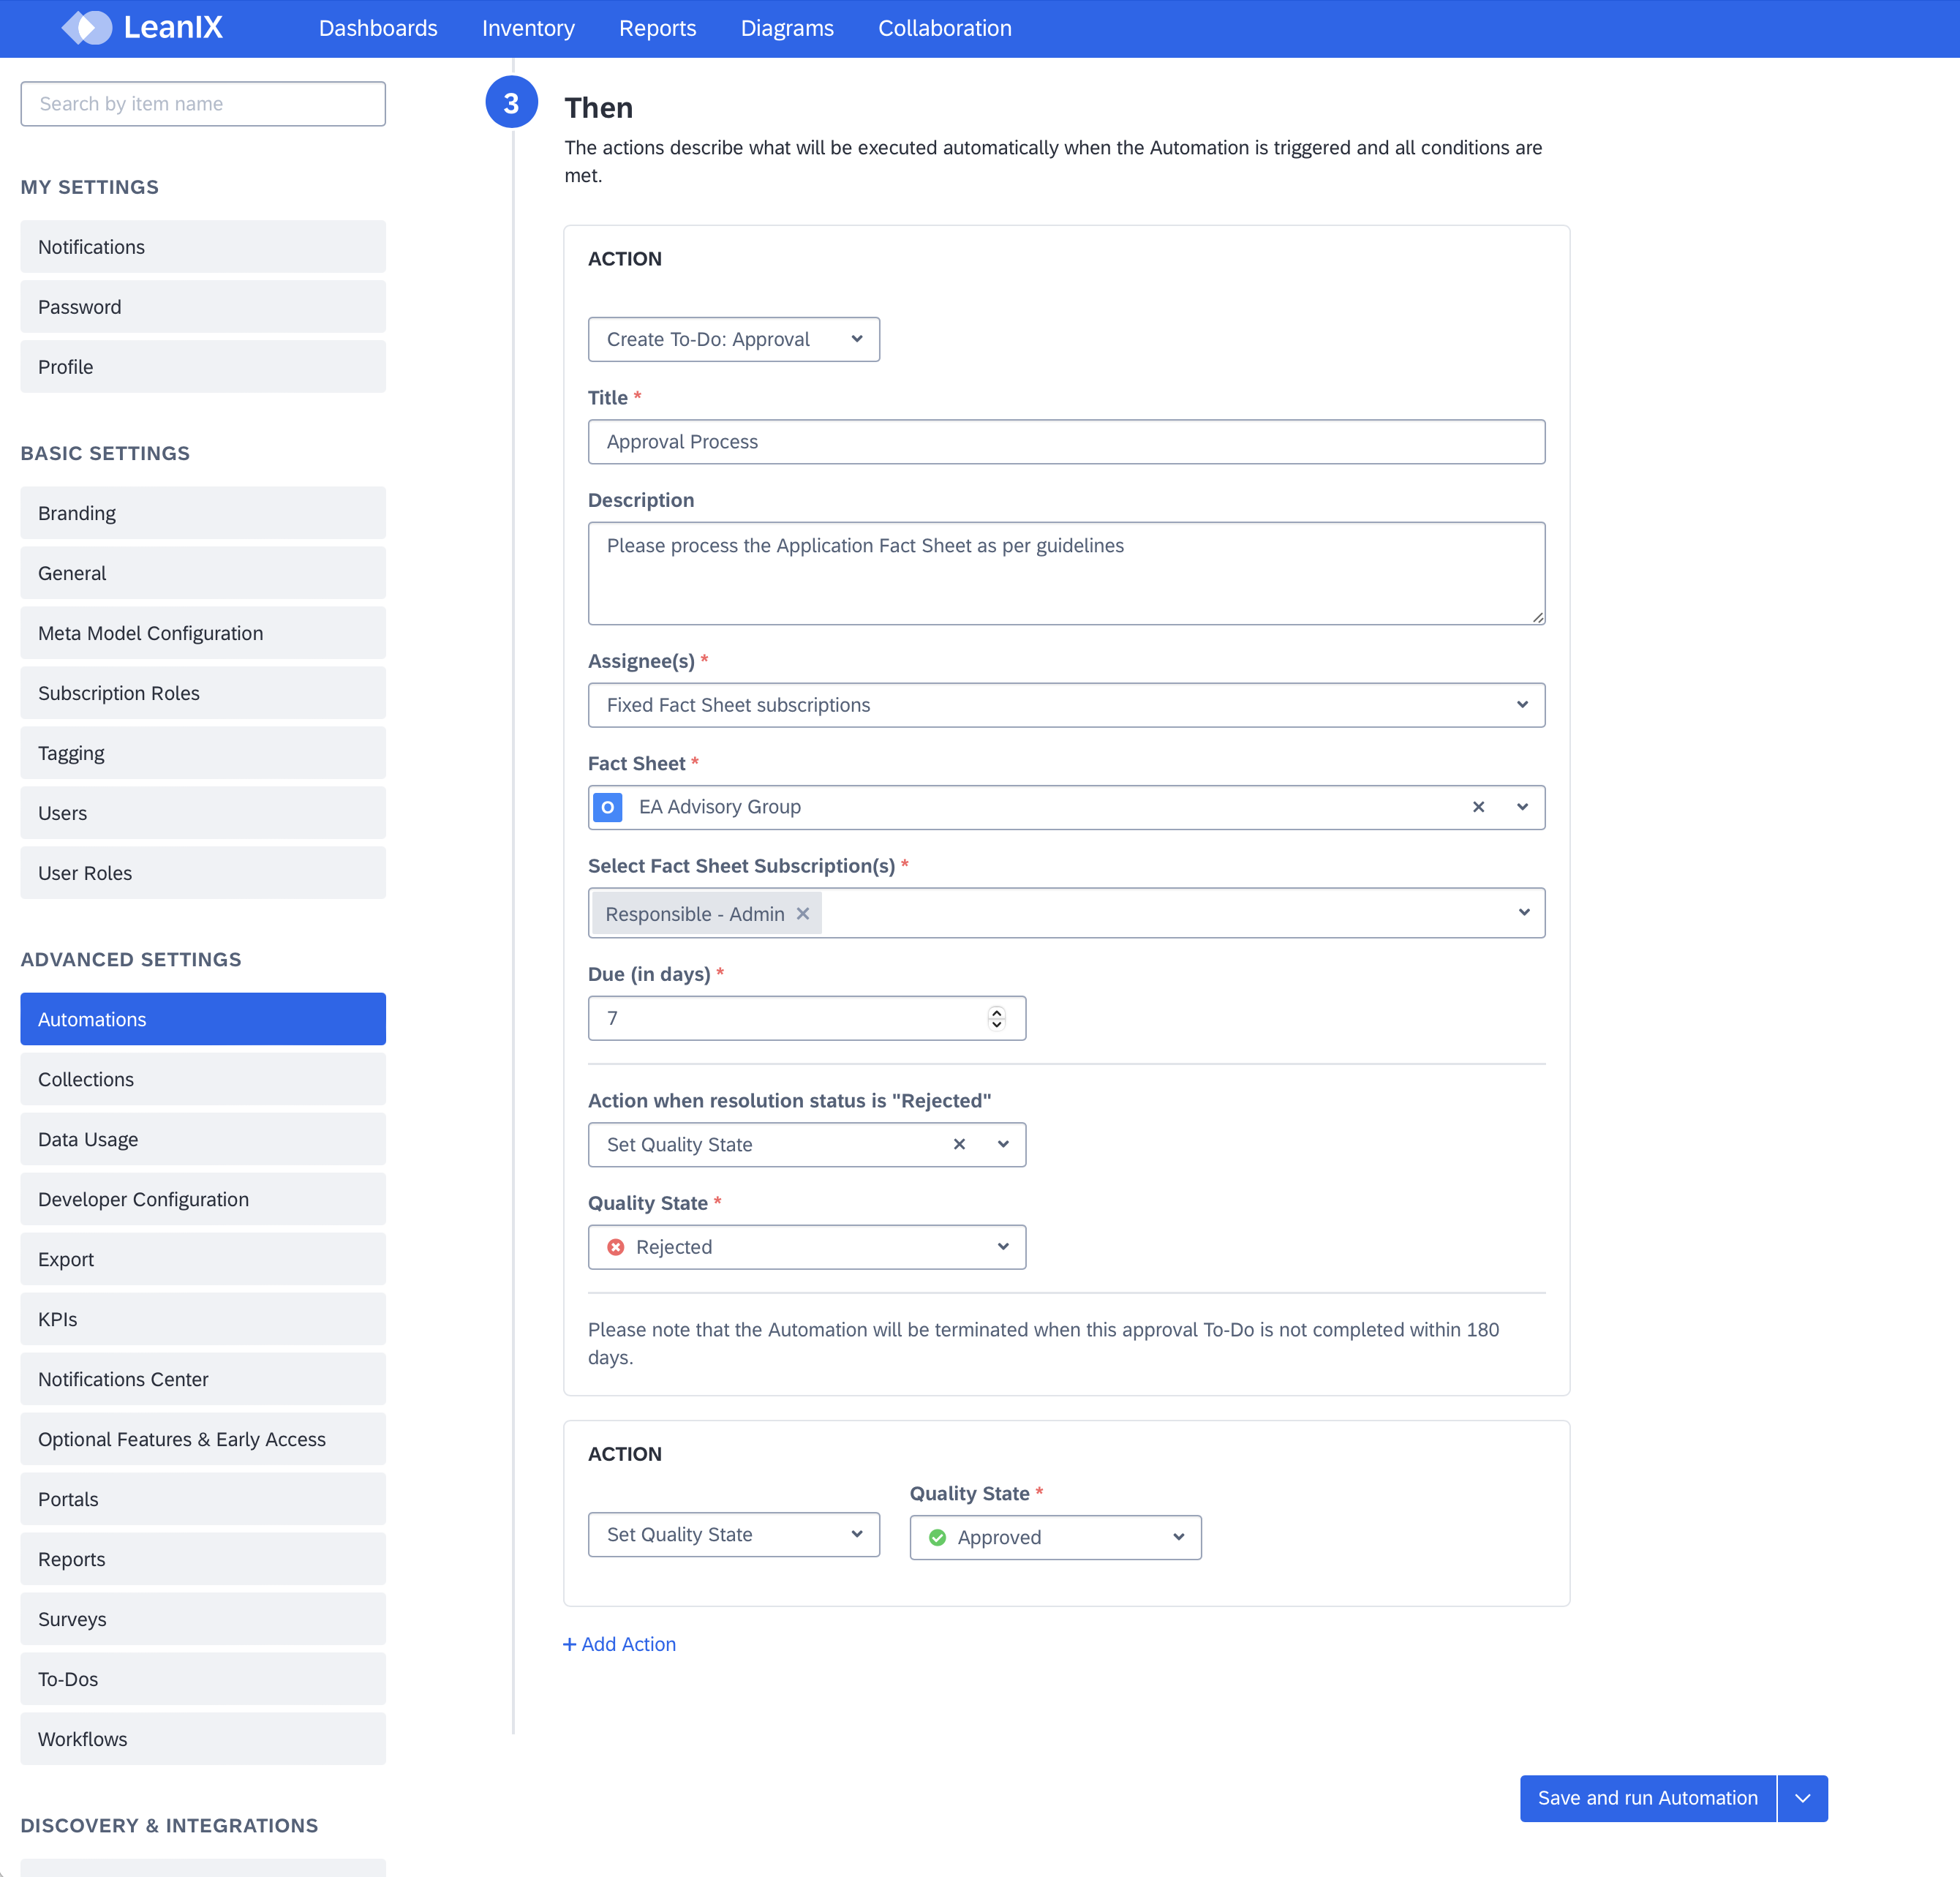
Click +Add Action and select Create To-Do: Approval from the drop-down menu.
-
Fill in the necessary information regarding the assignee, fact sheet, and fact sheet subscription.
-
Define action to be taken if the approval to-do is rejected and action to be taken if the approval to-do is approved. To define an action for approval, you need to add one more action item by clicking on the +Add Action button.

Example: Defining the Actions of Automation for a Rejection or Approval of To-Do
-
-
Select Save and run Automation.
Based on the trigger and conditions of the automation, an approval to-do will be created on a fact sheet with the relevant assignees.

Approval To-Do in Fact Sheet
Managing To-Dos
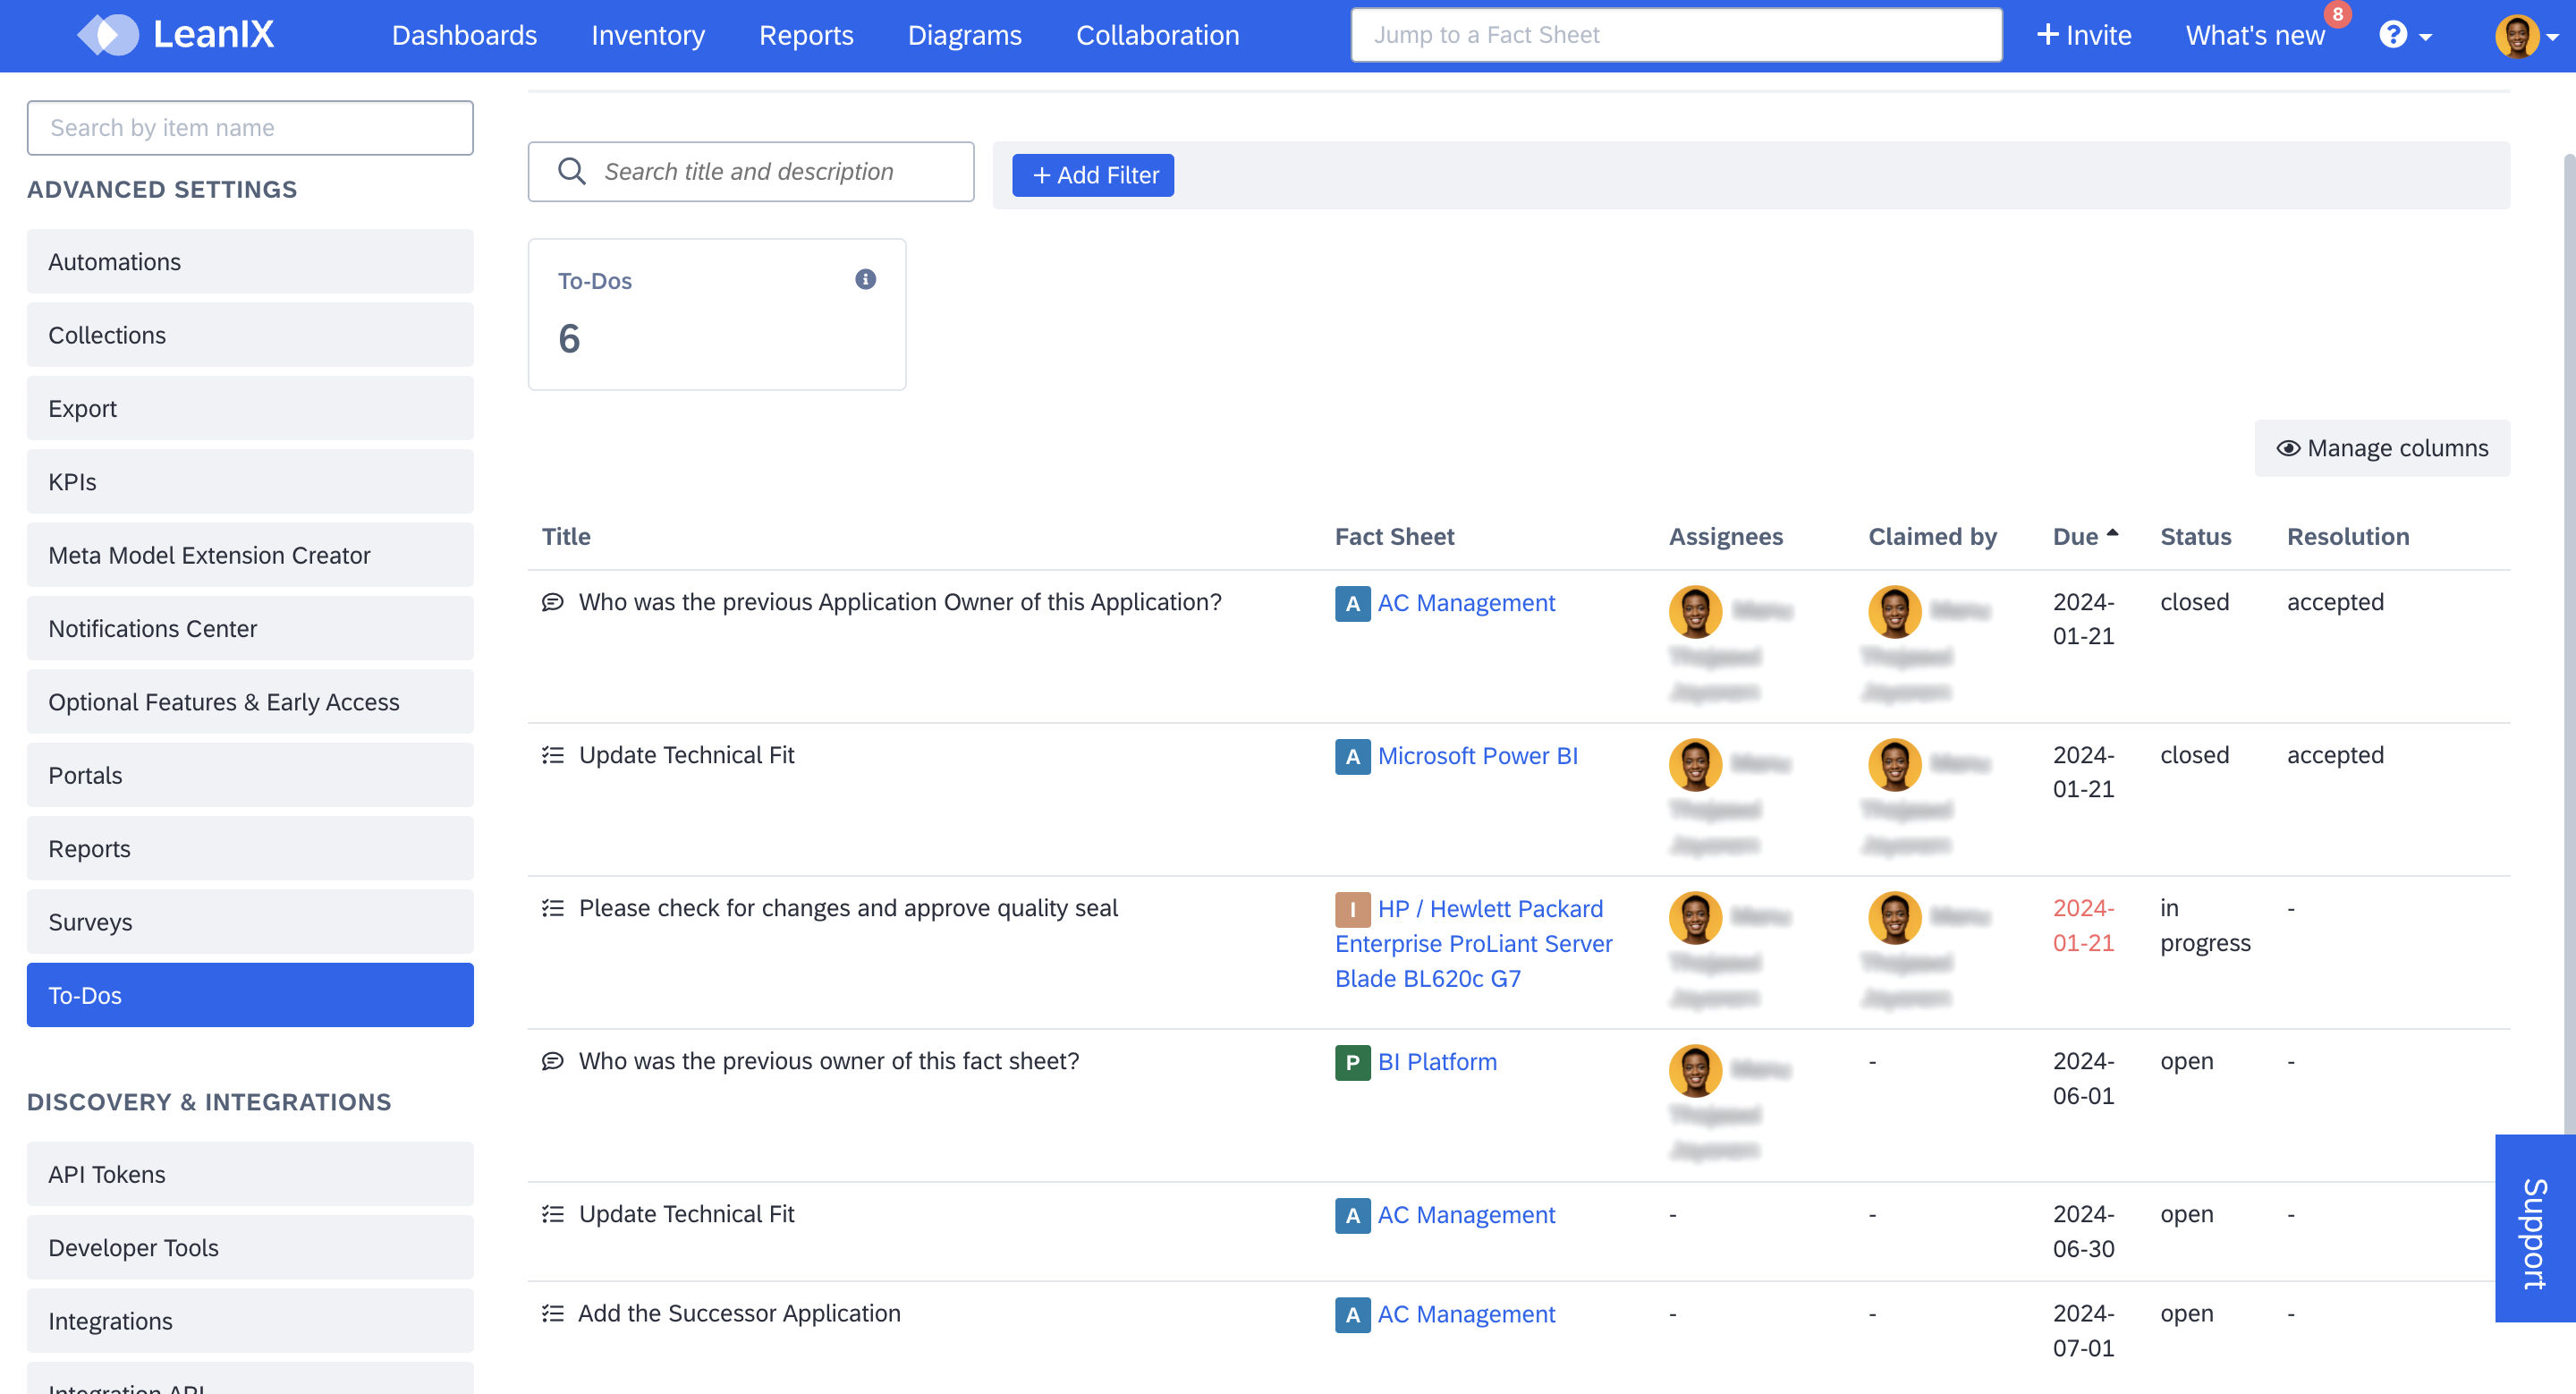
Admins can conveniently monitor and manage all to-dos of a workspace in one place in the administration area for effective oversight and management. You can search, sort, and filter the items and modify any of the to-do items.
To access the list of to-do items, select To-Dos in the Administration area.

To-Dos in the Administration Area
Click +Add Filter and select the filter criteria to filter the to-do items. You can filter by:
- To-Do type
- Status
- Claimed by/Owner
- Assignees
- Creators
- Fact Sheets
- Due date
- Creation date
- Resolutions
- Fact Sheet Types
You can sort the list by clicking on the column titles. Additionally, you can choose which columns to display through Manage columns.
Modifying To-Do Items
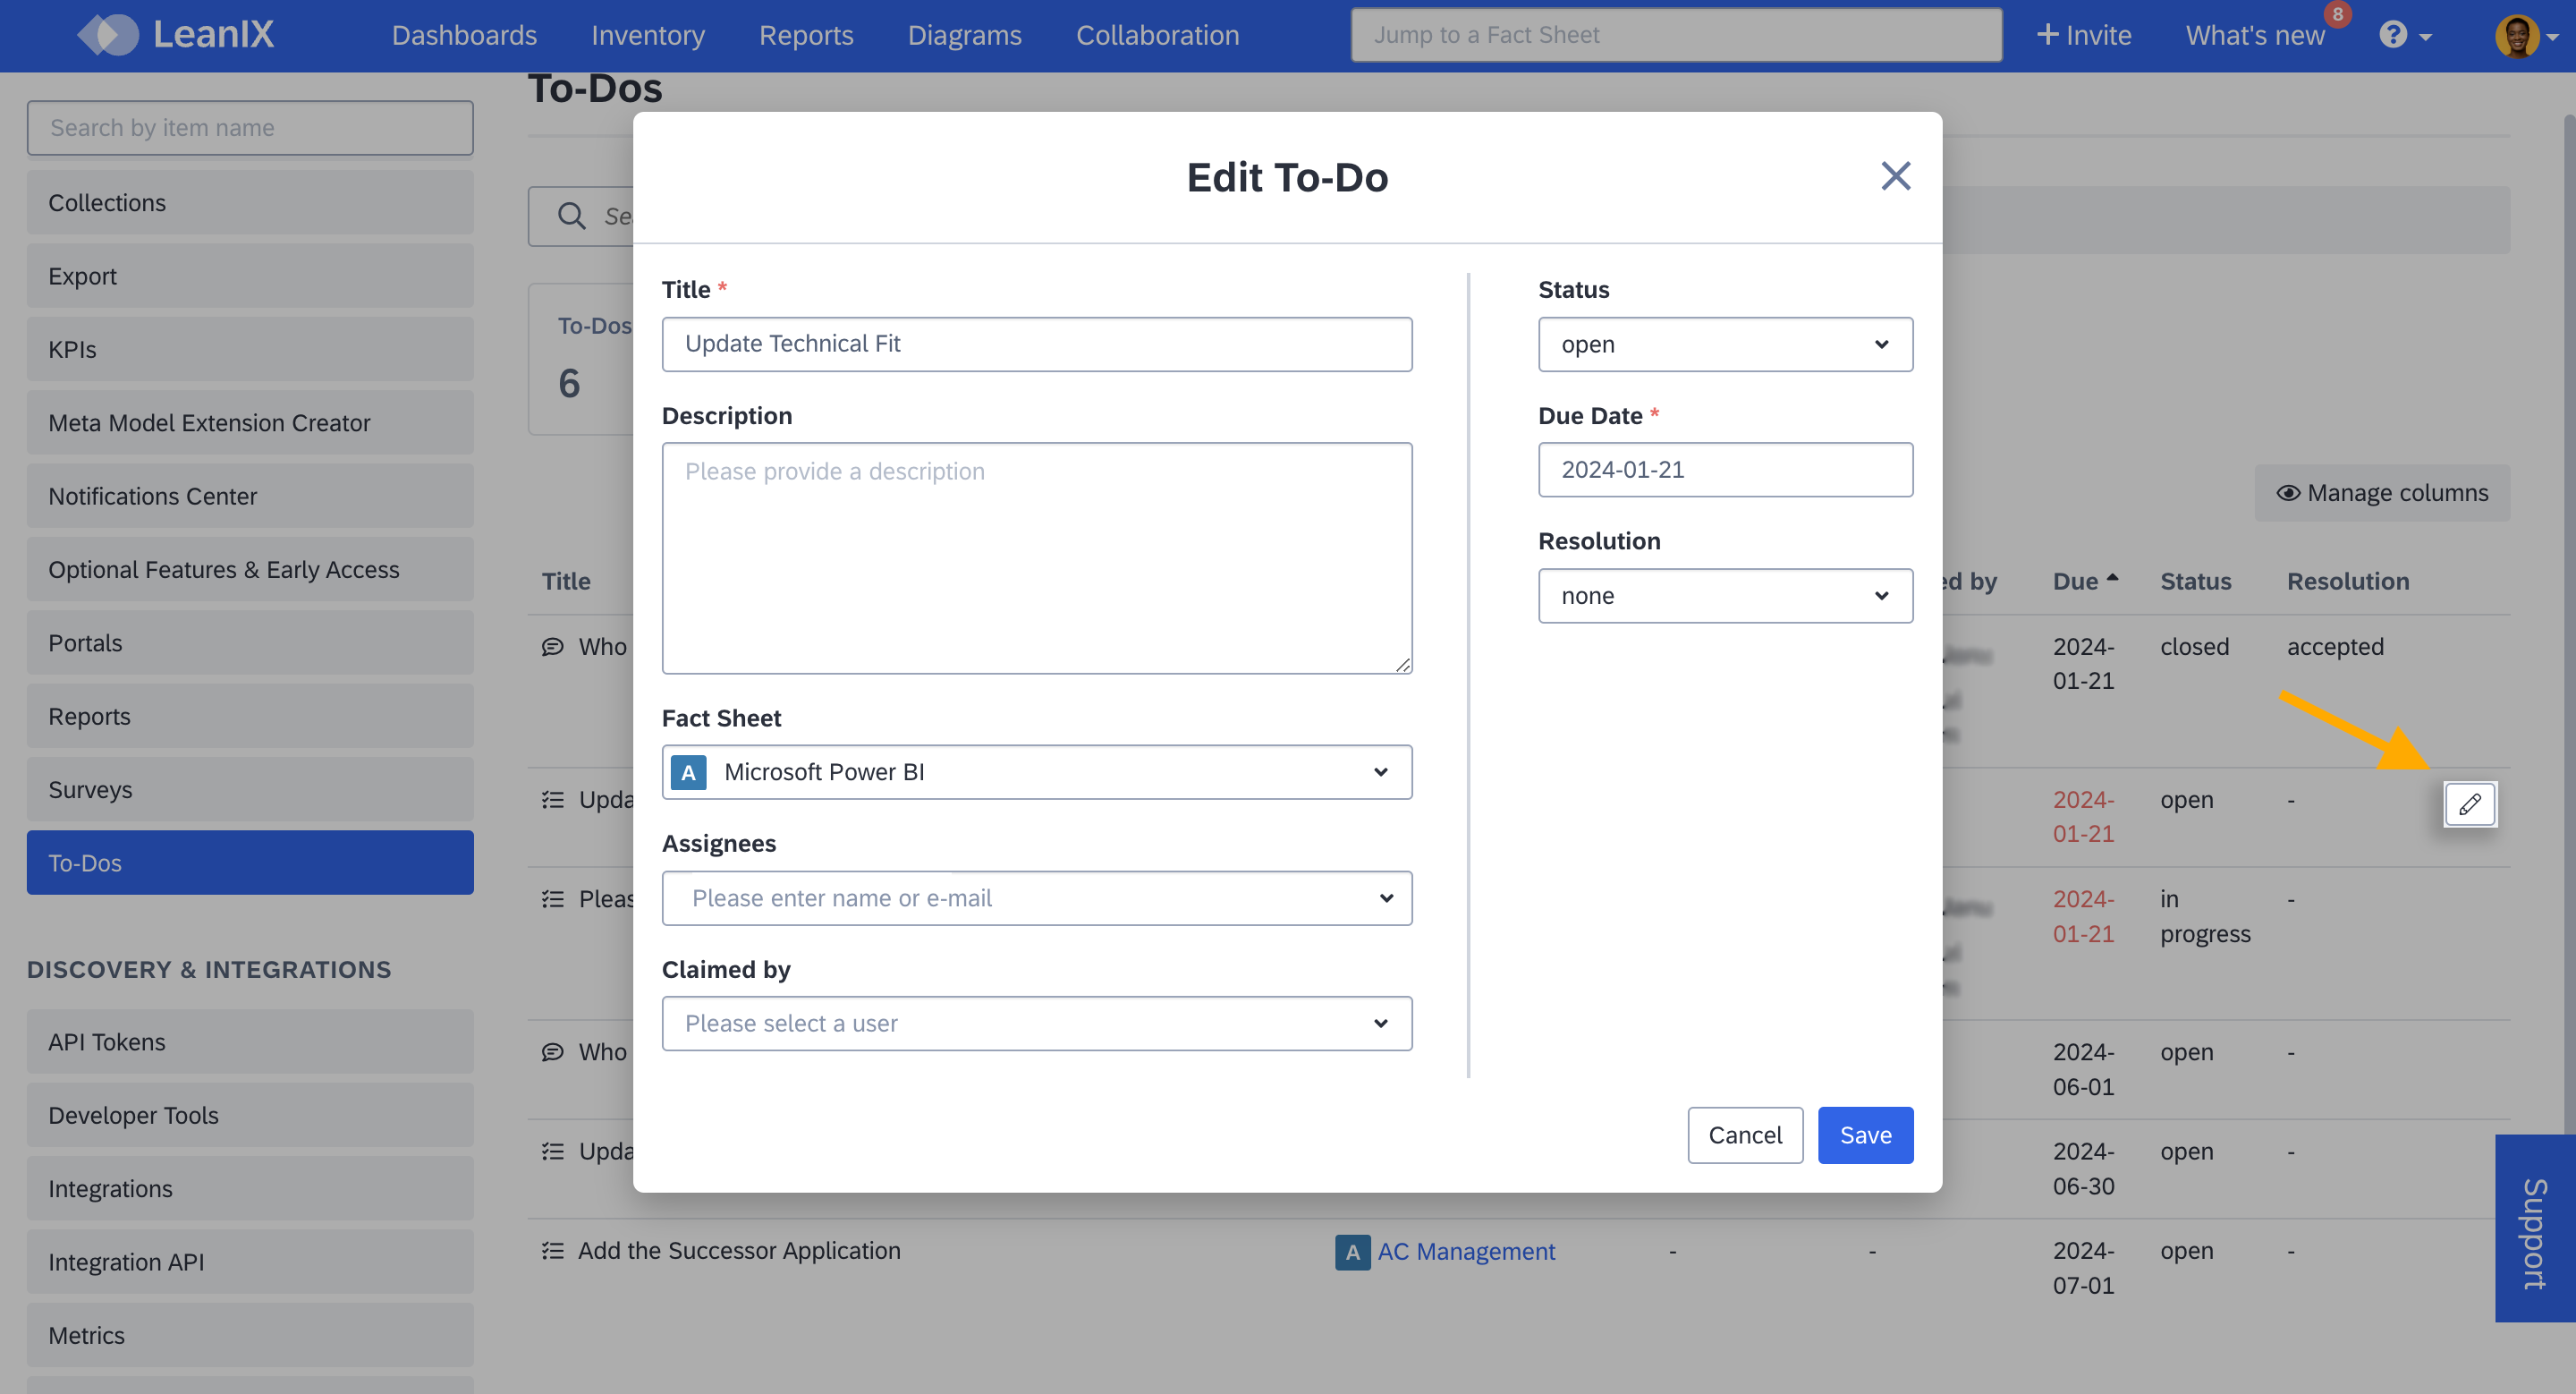
To edit a to-do item, hover over the to-do item you need to modify and click on the edit icon represented by a pen. This action opens an overlay where you can make your edits.

Modifying a To-Do Item
After making the needed changes, click Save.
Note
In the collaboration tab of the workspace, non-admin users can also modify to-do items. However, they can only edit the ones that were created by them. For more, see Modifying To-Do Items.
Information
- Bulk operations are not supported in the user interface, but they can be done using the API endpoint or the iAPI. To learn more, see To-Do API.
- Archiving or deleting a to-do item is not possible through the user interface, but it is aligned with the fact sheet archiving or retention period.
- Unfinished to-dos can be deleted using endpoints.
Updated 10 months ago
