
General Settings
General Settings encompass fundamental configurations that align workspace functionality, user preferences, and security with organizational requirements.
General settings cover essential configurations for the workspace, such as tagging mode, language, fiscal year start, subscription management, and more. These settings ensure workspace functionality, user preferences, and security align with organizational needs.
Tagging Mode
By choosing the Tagging Mode, you can control how users can add new Tags to Fact Sheets. There are three tagging modes:
- On-the-fly tagging: All Workspace Members and Admins can create new tags directly in the Fact Sheet
- Pre-defined tag groups OR On-the-fly tagging: For fact sheet types where tag groups are pre-defined by an Admin, on-the-fly tagging is disabled; otherwise, Members and Admins can create their tags on-the-fly
- Pre-defined only: Only Admins can create tags
The drop-down menu provides options to choose the mode that suits your needs.

Tagging Modes
For additional information, see Tags.
Best Practice
On-the-fly tagging may result in the widespread use of unstructured tags, particularly during initial data loading or in distributed organizations. Therefore, we suggest defining Tag Groups that align with your objectives and setting the standard to "Pre-defined only."
Quick Search Mode

Quick Search Mode
The Quick Search Mode setting determines the default view for quick search results in your workspace. You can choose to see the results in a single list or view them grouped by Fact Sheet type. While you can easily switch modes in the search tab, the default mode is based on what you have chosen in the Quick Search Mode setting.
Switching Quick Search Mode in the Search Bar
Choosing Currency
You can select the currency to be displayed in reports and Fact Sheets.
Note that changing the currency does not alter the values themselves.

Choosing Currency for the Workspace
Custom Fiscal Year
You can set any month as the start of the fiscal year for your organization, depending on your accounting practice or regulatory requirements. This will be used to show roadmap reports in alignment with your fiscal year.
Idle Timeout Duration
After a period of inactivity, SAP LeanIX automatically disconnects users for security. The duration can be adjusted using the Idle Timeout Duration setting. Upon disconnection, users are redirected to a login screen where they have the option to log in again.

Setting Idle Timeout Duration
Setting the duration to 0 Hours and 0 Minutes disables this feature.
Subscription Mode
You can make the selection of a Subscription Role mandatory by choosing Required. Opting for Optional allows users to decide whether to select a Subscription Role or not. For more on Subscription Role, see Subscription Role.

Choosing Subscription Mode
Note
if you set the subscription mode to required, ensure you have defined subscription roles for Fact Sheets. Otherwise, users won't be able to choose a role and they may subscribe to Fact Sheets without a subscription role.
Subscription Types
While defining a Subscription Role, the Subscription Type ‘Accountable’ is not visible by default. It can be custom-activated by checking the box against Accountable. For more on Subscription Types, see Subscription Type.

Adding Accountable Subscription Type
Multiple Subscriptions
You can control whether users can have multiple subscriptions for a single Fact Sheet. By default, a user can subscribe to a Fact Sheet multiple times under different Subscription Roles. It can be limited to one subscription per user per Fact Sheet by selecting Disabled.
Data Privacy
You can adjust the data privacy level for subscriptions by choosing between 'Normal' and 'Relaxed.' In 'Relaxed' mode, users can view other subscribers in the subscription filter of the Inventory and use it to filter the Fact Sheets. However, in 'Normal' mode, users will not see other subscribers in the filter. For more, see Managing Data Privacy.
User Segments
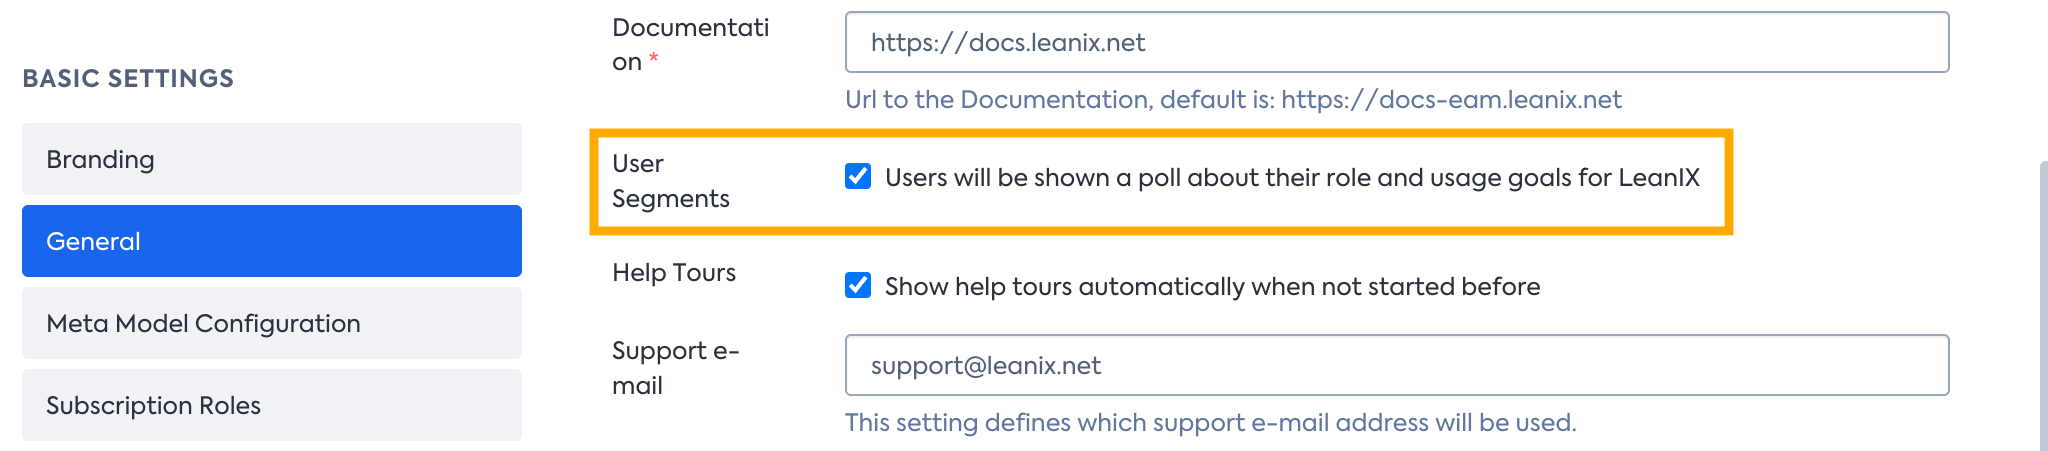
Choosing User Segments Insights
Choose whether you want to gather insights from SAP LeanIX users within your organization regarding their job roles and for what purpose they use SAP LeanIX. When selected, a form will prompt users to share their details during login. They have the choice to defer or decline to answer. They can edit the submitted details from their settings at any point in time. As Admins, you can access the compiled data via Gainsight Shared360.
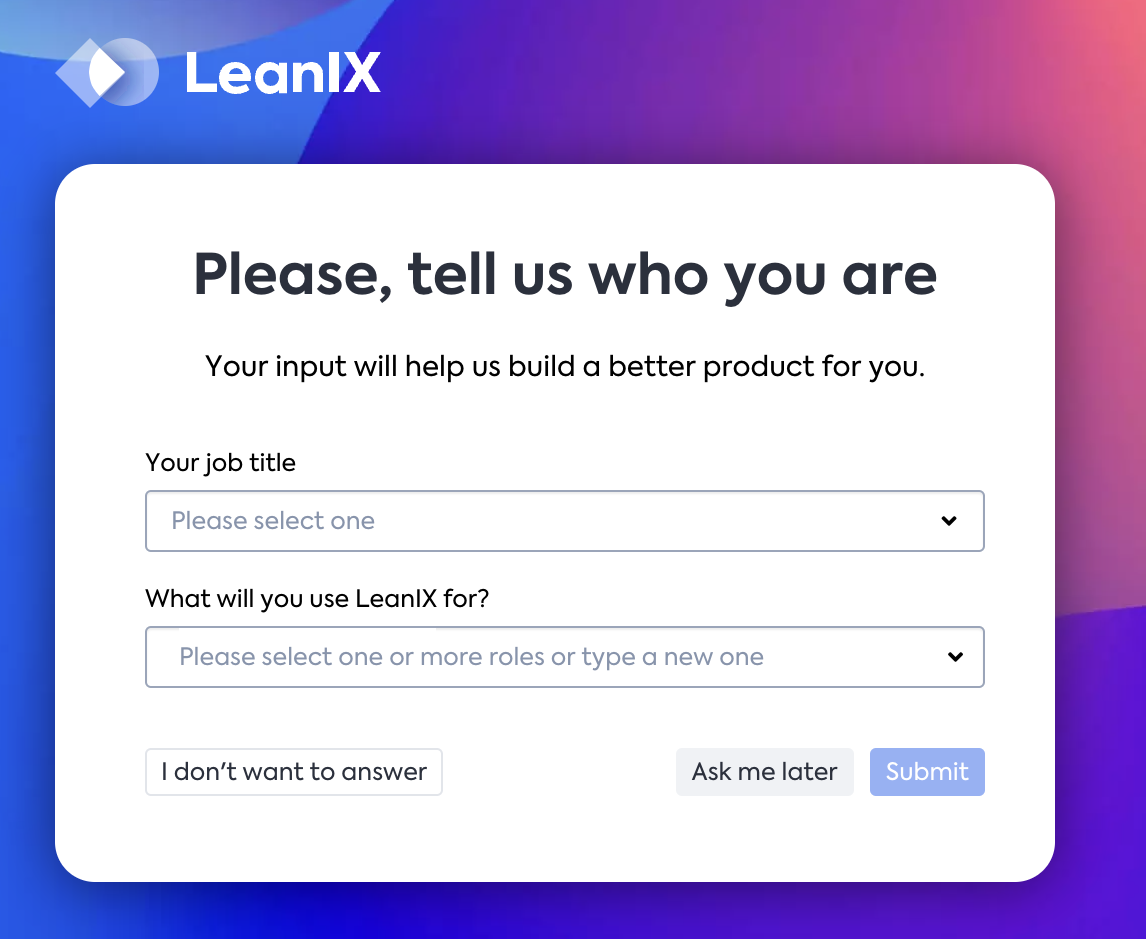
User Segments Insights Form at Login
The following roles are available for selection from the drop-down menu:
| Roles | Examples of Jobs To Be Done |
|---|---|
| Enterprise Architect | Establish architecture transparency and practices |
| Domain/Solution/Data/IT Architect | Analyse as-is architecture Plan to-be architecture Create and share visualizations (architecture, process, etc.) |
| Product/Application/IT Owner | Document or update information on products, applications, or tech stack |
| CIO/CTO/IT Management | Get aggregated results and KPIs on IT Generate insights to make data-driven decisions |
| Business Owner/ Functional Owner/ Regional Owner | Check which platform and applications support my function Contribute data to Fact Sheet as a business owner |
| Project/Program Manager | Plan and track projects |
| Security/Data Privacy Champion | Check compliance of IT |
| Business Analyst | Learn about (application) roadmaps Understand business capabilities |
| Software Engineer/Developer | Find information about used technologies Find information about recommended technologies |
| Other role in business (Users are prompted to add a custom entry for this selection) | Find a contact person for my work Analyse how business is supported by IT |
| Other role in IT (Users are prompted to add a custom entry for this selection) | Other |
Support Channels
You can configure support channels using the following settings:
- Support e-mail: The email address to be used when clicking the Support button that appears in the lower-right corner of the screen. If relevant, you can specify your organization's internal email address, which enables you to review support requests internally before submitting them to SAP LeanIX.
- Support URL: The URL of the website that opens when clicking the Support button. We recommend using the following URLs:
- https://www.leanix.net/support: SAP LeanIX support portal. If this default URL is used, then the SAP LeanIX support plug-in opens in the lower-right corner of the screen.
- https://me.sap.com/: Customer portal for SAP customers. If you're an SAP customer, use this URL.
Using a combination of these settings, you can configure how support channels work:
- To hide the Support button, leave both Support e-mail and Support URL empty.
- To point the Support button to a specific email address, leave the Support URL field empty and specify the address in Support e-mail.
- To point the Support button to a specific URL, leave the Support e-mail field empty and specify the URL in Support URL.
Additional Settings
In addition to the options mentioned above, you can configure the following settings:
- Data Privacy: You can choose whether you are able to search for user subscriptions on name basis ("Relaxed") or if you just see them while looking explicitly on the Fact Sheet ("Normal").
- Completion Score: Toggle to enable or disable the visibility of the Fact Sheet completion score in your workspace. Learn more on Completion score and data quality here.
- Getting Started Guide: Link that leads you to information on how to getting started with SAP LeanIX. By default it will lead you to the SAP LeanIX product documentation. But you are able to link your own content.
- Documentation: Link will by default lead you to the SAP LeanIX product documentation. You could change this link, although we strongly recommend to keep it, as this page is a valuable source and will be updated regularly.
- Help Tours: If you check this box, every user will be guided through our "Help Tour", if this has not been started before.
Maintenance Mode
When applying significant changes to your workspace, you can temporarily enable maintenance mode to prevent non-admin users from accessing the workspace. To minimize disruption to user workflows, consider conducting maintenance outside of regular business hours.
- Non-admin users can not access the workspace during maintenance mode. A corresponding message (which you can customize) is displayed on the sign-in page. For those non-admin users who are currently signed in, a maintenance mode banner is displayed at the bottom of the screen. If a user signs out during maintenance mode, they will be unable to access the workspace until maintenance mode is disabled.
- Admin users can still access the workspace during maintenance mode. A corresponding banner is displayed at the bottom of the screen.
To enable maintenance mode for a workspace, follow these steps:
-
Navigate to the Settings section of the administration area.
-
In the Maintenance Mode section, turn on the Enable Maintenance mode toggle.
-
Optional: Customize the maintenance mode message that will be displayed to non-admin users on the sign-in page. You can preview how the message will appear while editing it.
You can include custom text and HTML links in your message. Any other HTML elements will be removed.
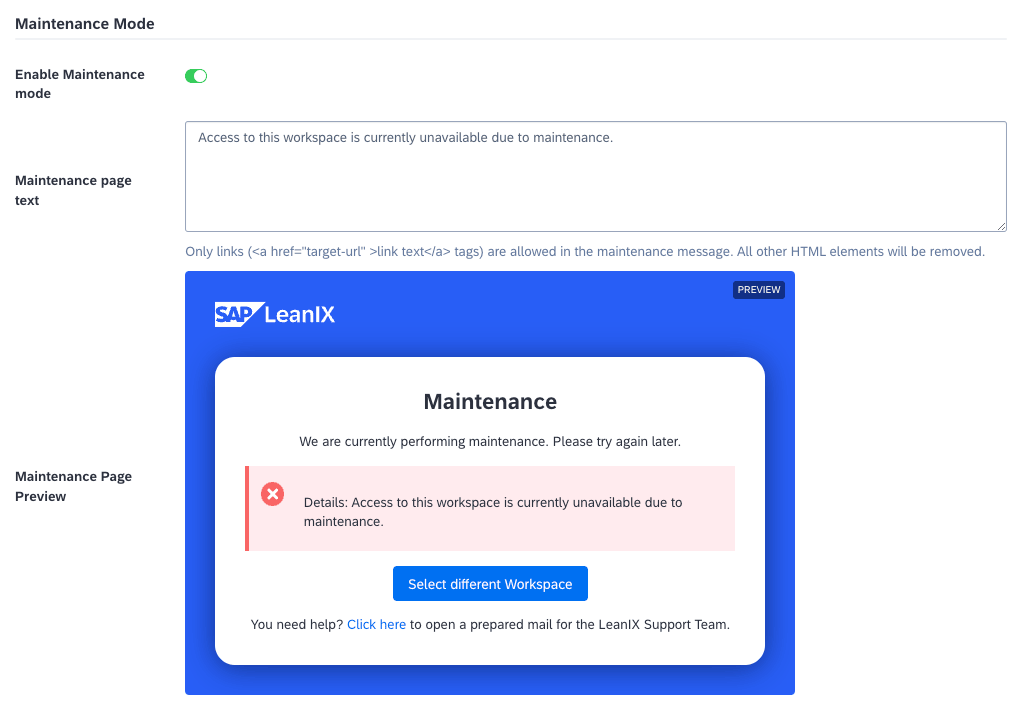
Enabling Maintenance Mode for a Workspace
-
Click Save.
Once you’ve finished adjusting the necessary workspace settings, you can disable maintenance mode. To do that, turn off the Enable Maintenance mode toggle, then click Save.
Data Breach Contact
In the Data Breach Contact section, provide the contact person details who should be informed in the event of a data breach..
Data Breach Contact Information Fields
Workspace Snapshot
To create a snapshot of your current workspace and clone all your data into a sandbox workspace, you must check the checkbox against Workspace Snapshots. Only when the checkbox is checked can Customer Support write data from another workspace into this workspace.

Workspace Snapshot Import Confirmation
Attention:
- To prevent unintentional writing of snapshot data into a workspace, the box is unchecked by default.
- If you need sandbox workspaces as an add-on, please request them from your dedicated Customer Success Manager. For new contracts, sandbox workspaces are available as a paid feature.
Updated 29 days ago