
Configuring Collibra Integration
Setting up the integration between SAP LeanIX and Collibra involves configuring authentication (Basic Auth or OAuth 2.0) and ensuring credentials validity for secure access.
Configuring Collibra Integration
Admins can configure Collibra integration in the administration area by providing the credentials needed to connect with their Collibra instance. On a high level, it includes the following steps:
- Setting up the authentication for Collibra integration.
- Mapping conceptual data layer from Collibra to SAP LeanIX.
- Mapping fact sheet from SAP LeanIX to Collibra.
- Mapping relations from SAP LeanIX to Collibra.
- Triggering synchronization run.
To begin configuring Collibra integration:
- In the Administrationarea, select Integrations.
- Click Add integrations. All available integrations are shown on the resulting page.
- Against Collibra, click Configure.
- Set up the authentication by providing either Basic Auth or OAuth 2.0 credentials, as described below.
Setting Up Authentication
For SAP LeanIX to communicate with your Collibra instance, you need to set up credentials.
The integration supports the following authentication types:
- Basic Auth: Enter the credentials of a Collibra user. This mode is less secure compared to OAuth 2.0.
- OAuth 2.0: Authenticate with your IdP (Identity Provider) and use the bearer token issued by your IdP to communicate with Collibra. This is the recommended and more secure authentication mode.
Basic Auth
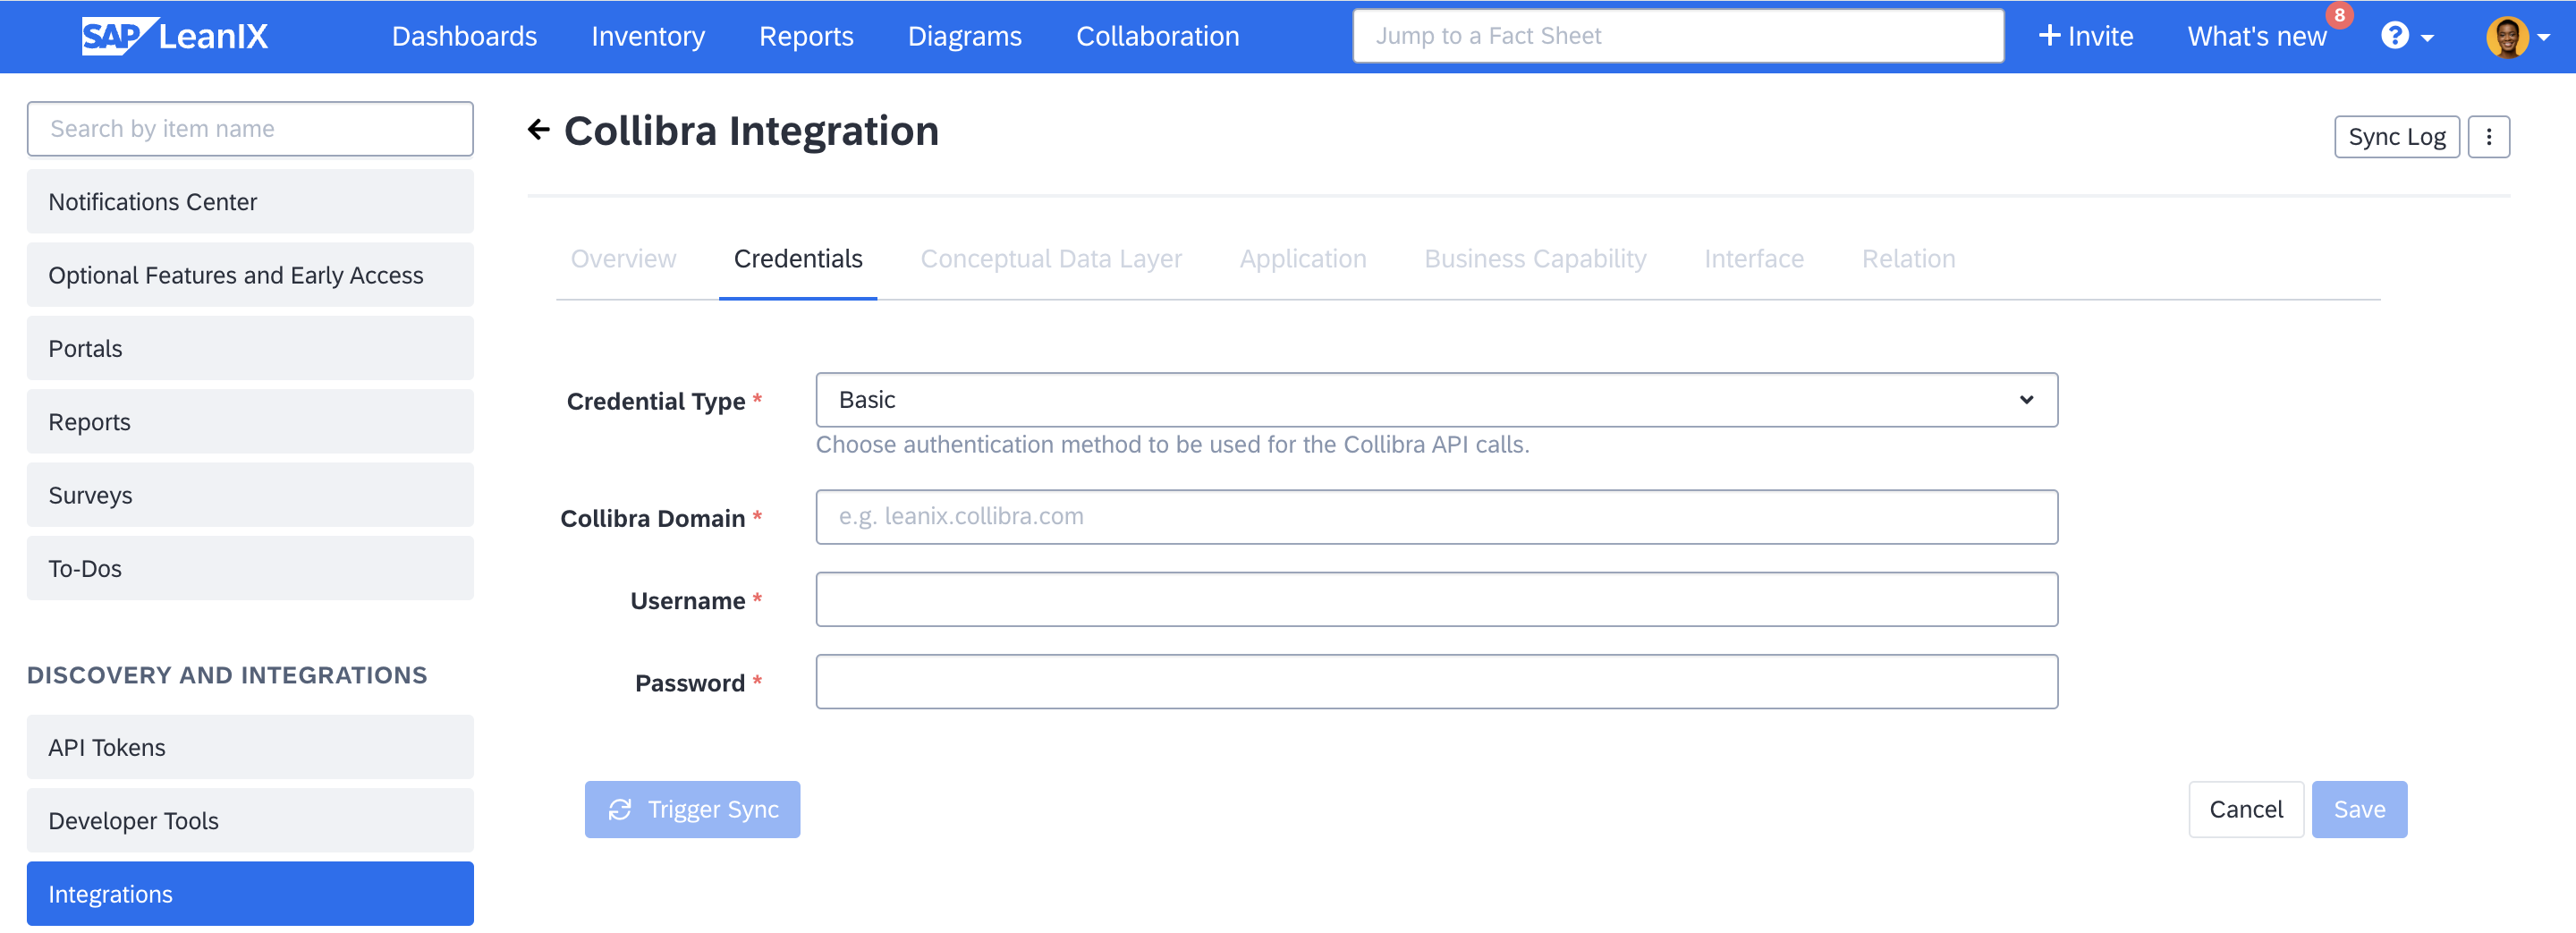
Setting up Basic Auth
To configure this authentication method, it is recommended to create a dedicated user in Collibra and use those credentials.
- Collibra Domain: Your Collibra instance domain without schema or trailing slashes. For example, if your Collibra instance is accessed on the browser via [https://my-own.collibra.com], then just enter my-own.collibra.com
- Username: The username of the user in Collibra that is being used for this integration.
- Password: The password of the user
OAuth 2.0
OAuth 2.0 allows the integration to authenticate via your IdP. It uses a bearer token from your IdP to securely communicate with Collibra. We recommend using the OAuth 2.0 authentication over Basic Auth as it is more secure.
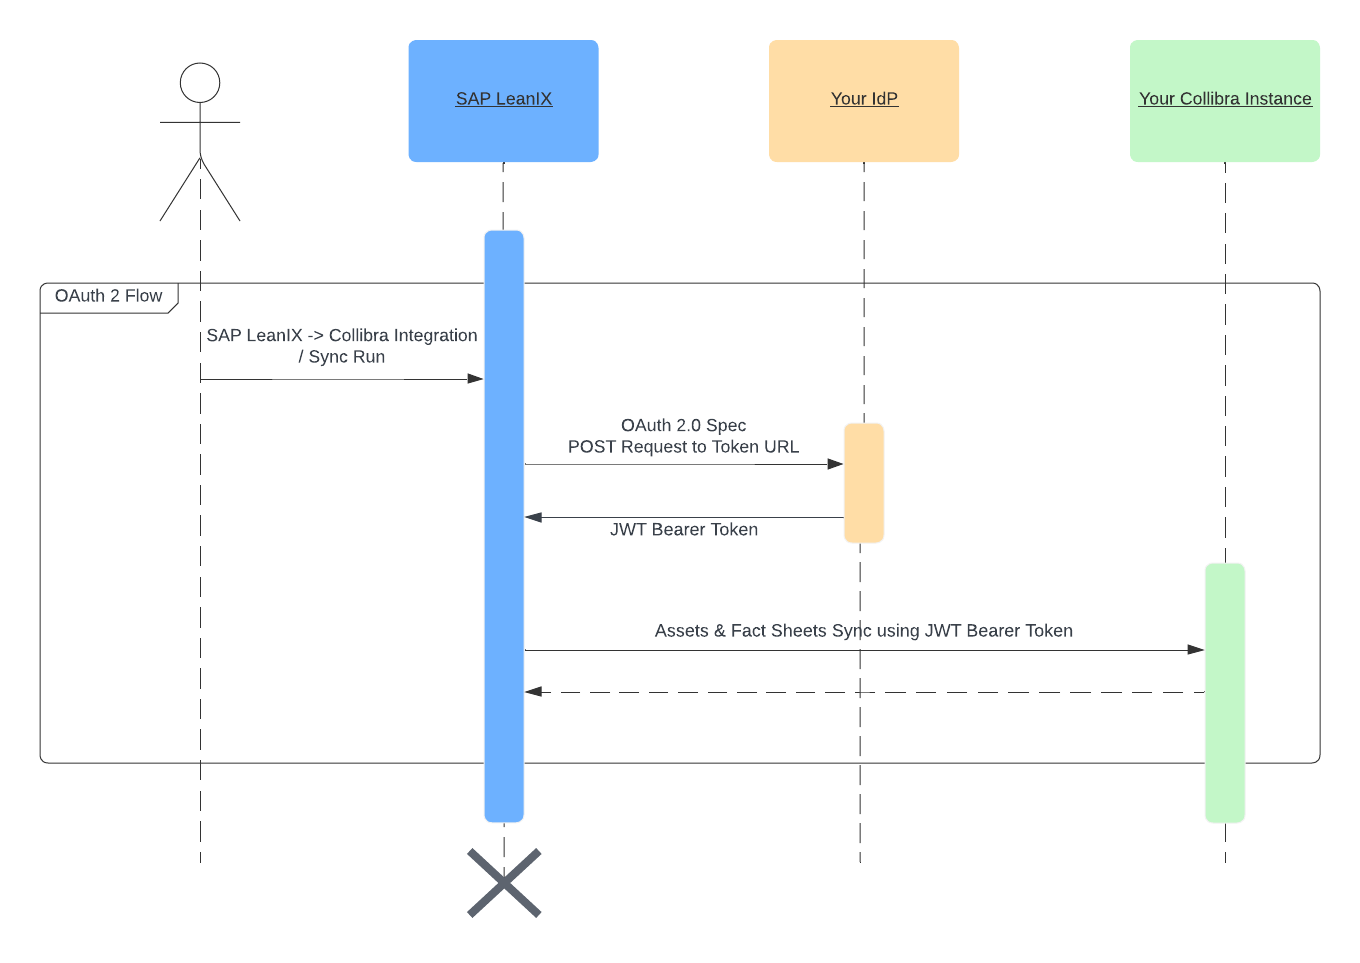
OAuth 2.0 Authentication
To configure authentication via OAuth 2.0, please make sure your Collibra instance is configured to allow authentication with a bearer token issued by your IdP.
Recommendation
Take help from your IT administration to configure your Collibra console and set up JWT (JSON Web Token) with your IdP. To learn more, see Collibra JSON Web Token authentication.
Once you have configured the appropriate JWT settings in Collibra, enter the following credentials in your SAP LeanIX workspace:
- Collibra Domain: Your Collibra instance domain without schema or trailing slashes. For example, if you access your Collibra instance in the browser with [https://my-own.collibra.com], enter my-own.collibra.com.
- Token URL: The endpoint in your IdP that is used to issue an OAuth 2.0 bearer token.
- Client ID: The client ID with which the bearer token is to be issued.
- Client Secret: The client secret credential to issue the bearer token.
- Scopes: Scopes required for accessing the Collibra endpoint. The bearer token is issued with the provided scopes.
- Credentials Location: Select where to place credentials in the request:
- Authorization Header: Credentials are sent as a Base64-encoded basic authorization header.
- URL Encoded Body Request: Credentials are sent in the request body as URL-encoded parameters.
- Request Body Parameters: A set of key/value pairs to include in the request body.
- Request Query Parameters: A set of key/value pairs to include as query parameters.
Credentials Validity
Your credentials are validated with Collibra in these scenarios:
- Saving or updating credentials: Upon saving or updating new credentials, the integration always verifies them with Collibra. If the provided credentials are invalid, an error message is shown, and the credentials will not be saved.
- Synchronization Runs: The integration always verifies your credentials with Collibra before a synchronization run is started/scheduled. If the credentials are invalid, sync runs are automatically aborted, and it shows up as erroneous in the Sync Log.
You can verify the result of validation in the Overview tab. If there are any issues with credential verification, the credential status is shown as Invalid.
Trigger Synchronization
Once the initial configuration is complete, you can trigger a manual synchronization run by clicking on the Trigger synchronization button. This allows you to verify your configuration and view results immediately. Additionally, you can manually trigger synchronization runs whenever you change configuration. Scheduled synchronization runs occur automatically every 4 hours.
You can view the result of the latest synchronization run in the Overview tab with the following possible statuses:
- Synced: The latest run was completed successfully.
- Error: There is an issue in the latest run, causing the synchronization to be aborted.
- Disabled: There are no active mappings configured
To see more details on the status, click on Sync Log at the top.
Updated about 2 months ago