
Creating a Survey
Learn how to create surveys, from defining the scope and designing questions to using advanced fields and templates. Learn how to make questions mandatory, add links and descriptions, and import/export surveys.
Introduction
By default, surveys can be created by users with admin rights. However, admins can configure permissions to allow non-admins to create surveys, collect responses, and access survey results. To learn how to configure survey permissions, see Configuring Survey Permissions for Non-Admin Roles.
To start creating a survey, follow these steps:
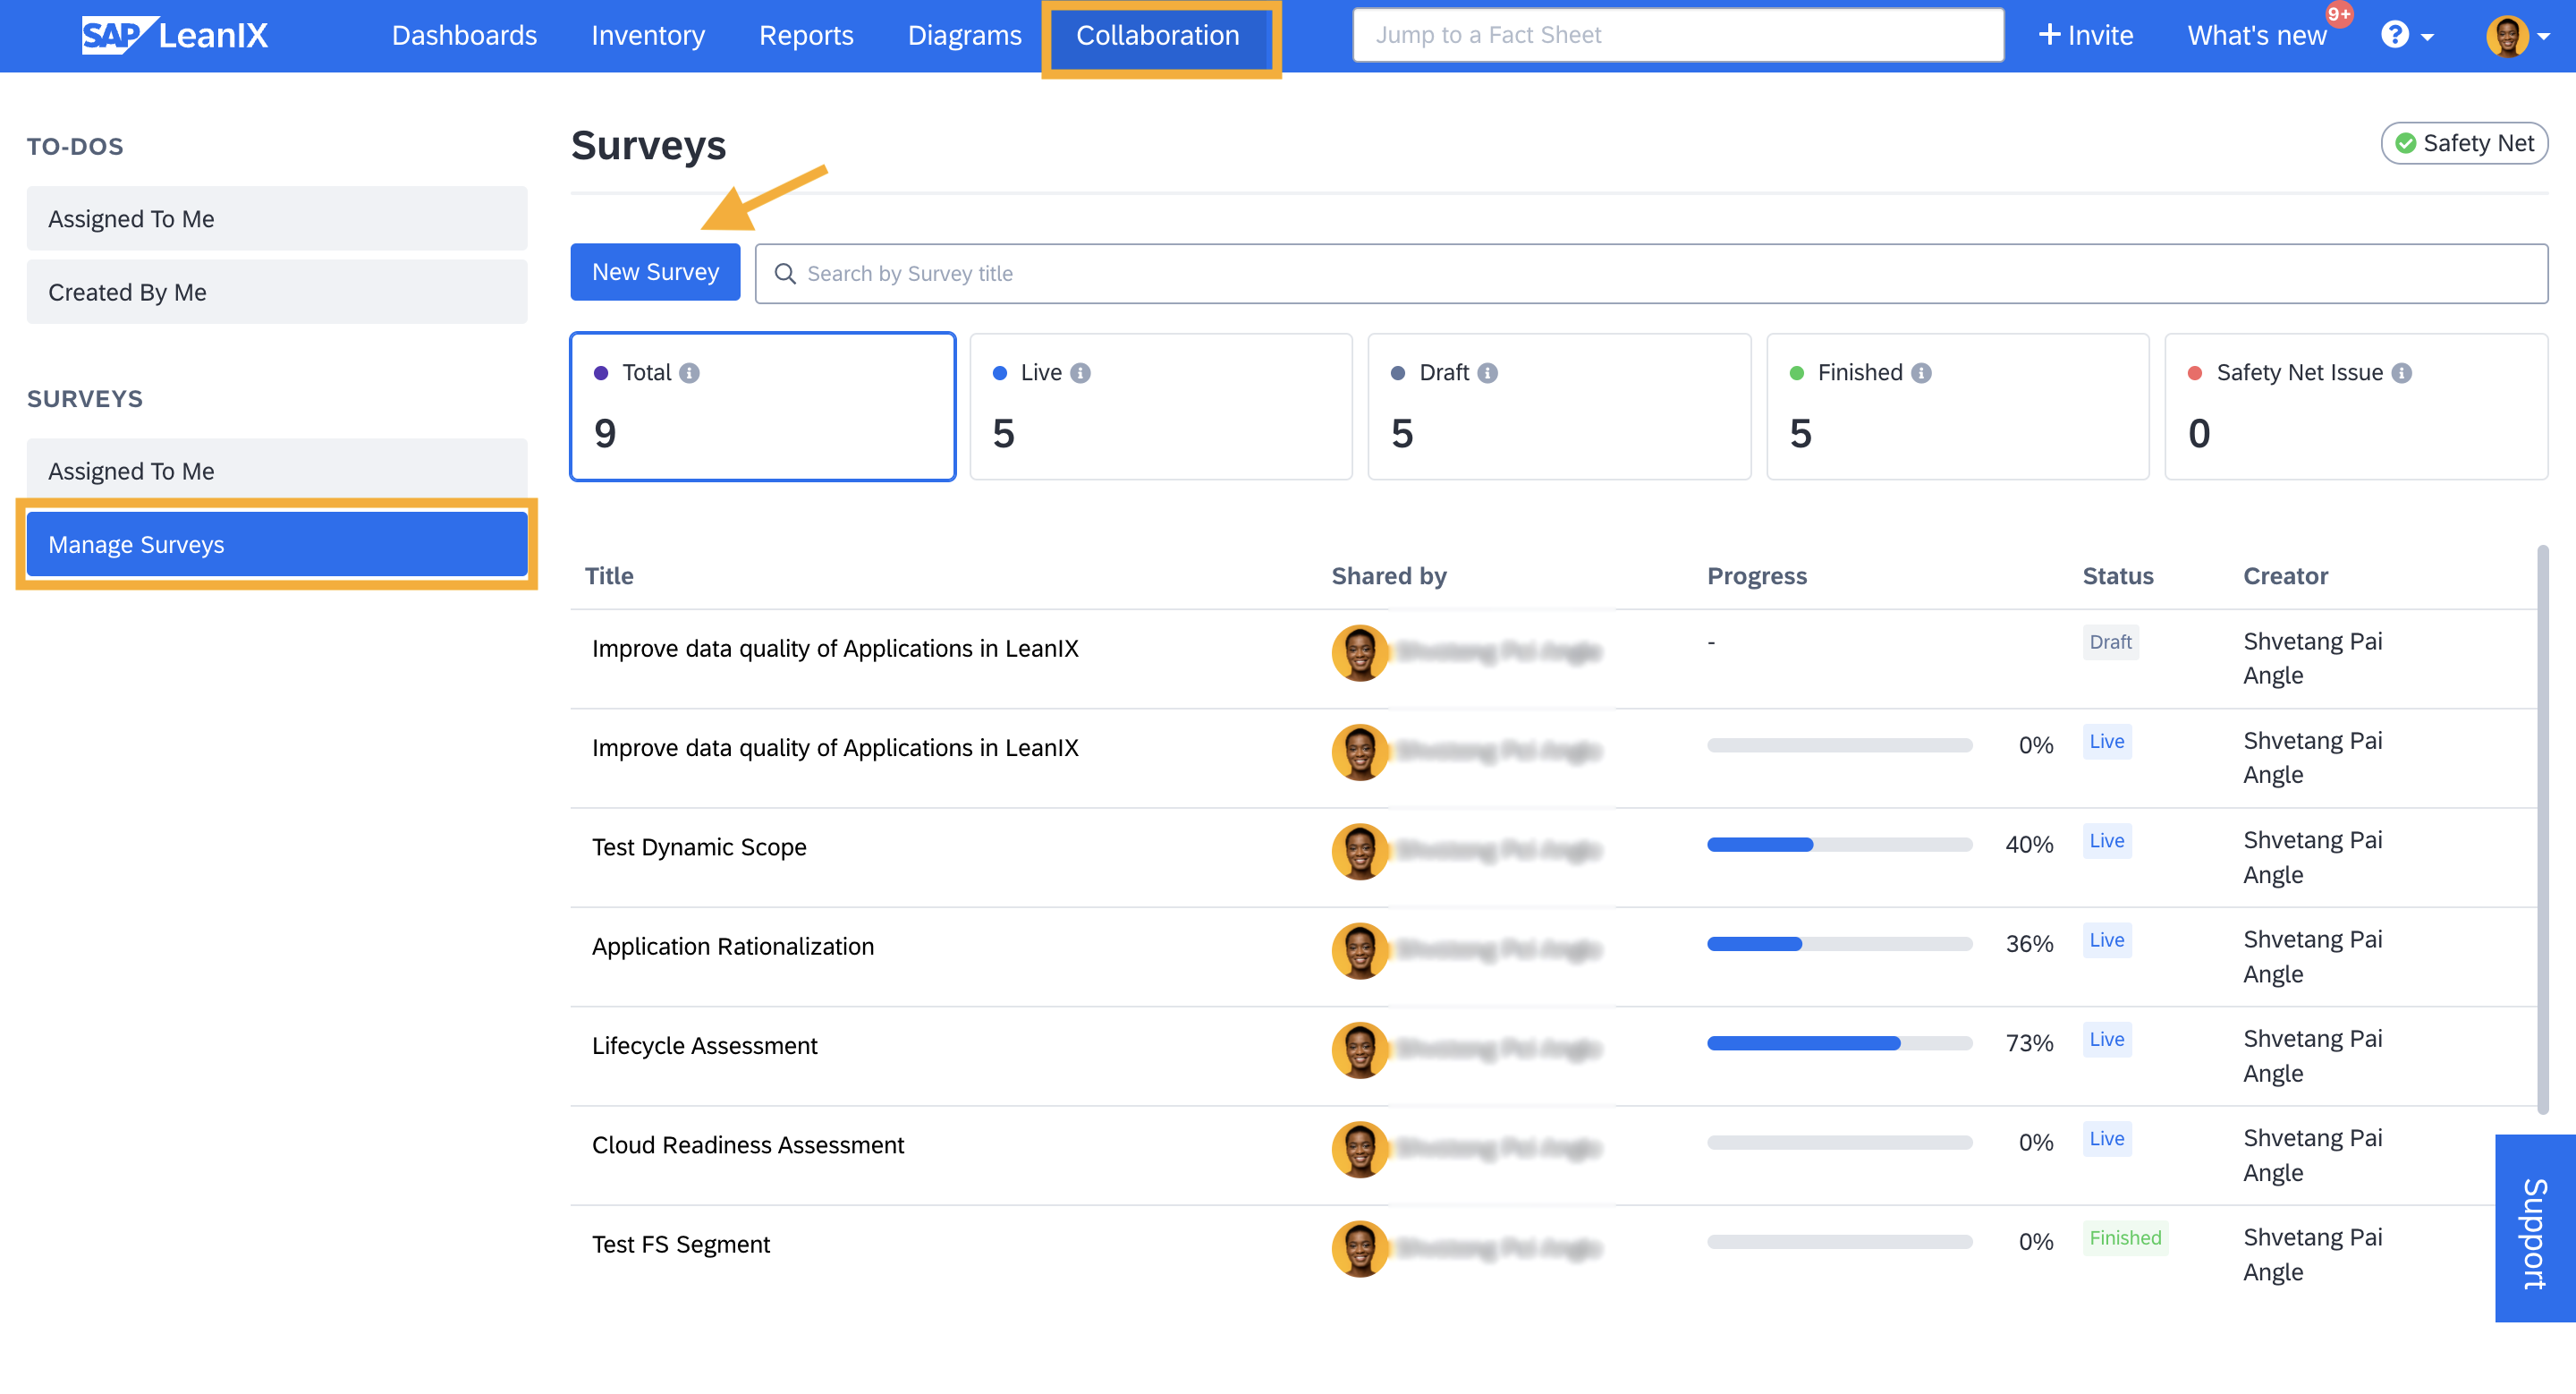
- Navigate to the Collaboration tab.
- In the left side pane, under Surveys, select Manage Surveys.
- Click New Survey.
Creating a New Survey
Clicking on New Survey opens the survey editor, where you can define the survey scope by selecting relevant fact sheets, design the survey form by forming questions, preview the designed form, and curate recipients before sending it out. At the top of the screen, the navigation bar features five tabs: Scope, Design, Preview, Share, and Insights, each representing essential stages of the user journey and providing you the structured guidance.
On the left side of the navigation bar, you can name the survey by clicking on Untitled Survey.
Auto Save
Once you start creating a survey, until it goes live, your progress is automatically saved as a draft.
Defining the Scope of a Survey
Define the scope of the survey by selecting the relevant fact sheets that you want to include in the survey. To do so, follow these steps:
- Click on Open Fact Sheet Filters
- Select the needed fact sheets or apply filters to narrow down the scope
- Click Use Fact Sheet Filter to include the filtered list, or click Use Selected Fact Sheets to select only the needed fact sheets from the list.
- The selected fact sheets are now displayed as a list. If you need to modify the list of selected fact sheets, you can do so by clicking on change at the top.
- Click Next to finish.
You can also make the survey's scope dynamic or static using the toggle at the top of the list.
- Dynamic: Fact sheets meeting the specified filters will be included in the survey as long as the survey is in a running status. Conversely, any fact sheets that do not meet the applied filters will be excluded. For example, if a lifecycle filter is applied, new fact sheets are added or removed from the survey as their lifecycle changes The survey will also continuously monitor changes in fact sheet subscriptions. If a subscription is added to a fact sheet associated with an ongoing survey, the subscriber will be invited to participate.
- Static: The survey scope is restricted to the fact sheets shown in the list. No new fact sheets will be added/ removed from the survey, regardless of any future changes to fact sheets or subscriptions.
Designing a Survey
After defining the scope, you are directed to the Design tab. Designing a survey involves forming the questions and structuring the overall format to gather the necessary information effectively. Here, you have two options for designing your survey:
(a) You can start from scratch and design a new survey.
(b) Alternatively, you can import an existing survey from your workspace or select a survey template available in the SAP LeanIX store to modify and use.
Designing a Survey From Scratch
In the Design tab, you can easily design the survey form by dragging and dropping different types of input fields from the left pane onto the survey editor. There are three primary categories of input fields available for designing survey questions: Fact sheet fields, basic fields, and conditional fields.
Fact Sheet Fields
This type of input field is directly linked to a specific field of a fact sheet. Any responses provided in these fields are automatically integrated into the corresponding fact sheet’s field. You can include different fact sheet fields, such as relations, fields on relations, tag groups, and subscriptions. Tags are shown as a dropdown if they are single-select and as a multi-tag picker if they are multi-select.
Best Practice
- Include only essential fields in surveys to avoid overwhelming participants and impacting completion rates. Focus on fields that directly contribute to your survey objective.
- You can use survey to identify and collect fact sheet contributors and add them as fact sheet subscribers. To learn how, see Leveraging Surveys to Collect Fact Sheet Contributors.
Adding Fact Sheet Fields to the Survey
Conditional Attributes
Conditional attributes configured to restrict certain field or relations will still be shown in surveys. To learn more about conditional attributes, see Conditional Attributes.
Basic Fields
From this category, you can create questions that accept various types of inputs, including text, number, date, single-select, and multi-select answers. These questions are independent and are not linked to any specific fact sheet fields; thus, they do not update any fact sheets.
The Radio element enables you to create single-select questions, where respondents can choose only one answer. The Checkbox element allows you to create multi-select questions, where respondents can choose multiple answers. Additionally, the Question group element allows you to organize and group multiple sub-questions under a single category.
Advanced Fields
The advanced field allows you to incorporate conditional questions and calculated fields into the surveys.
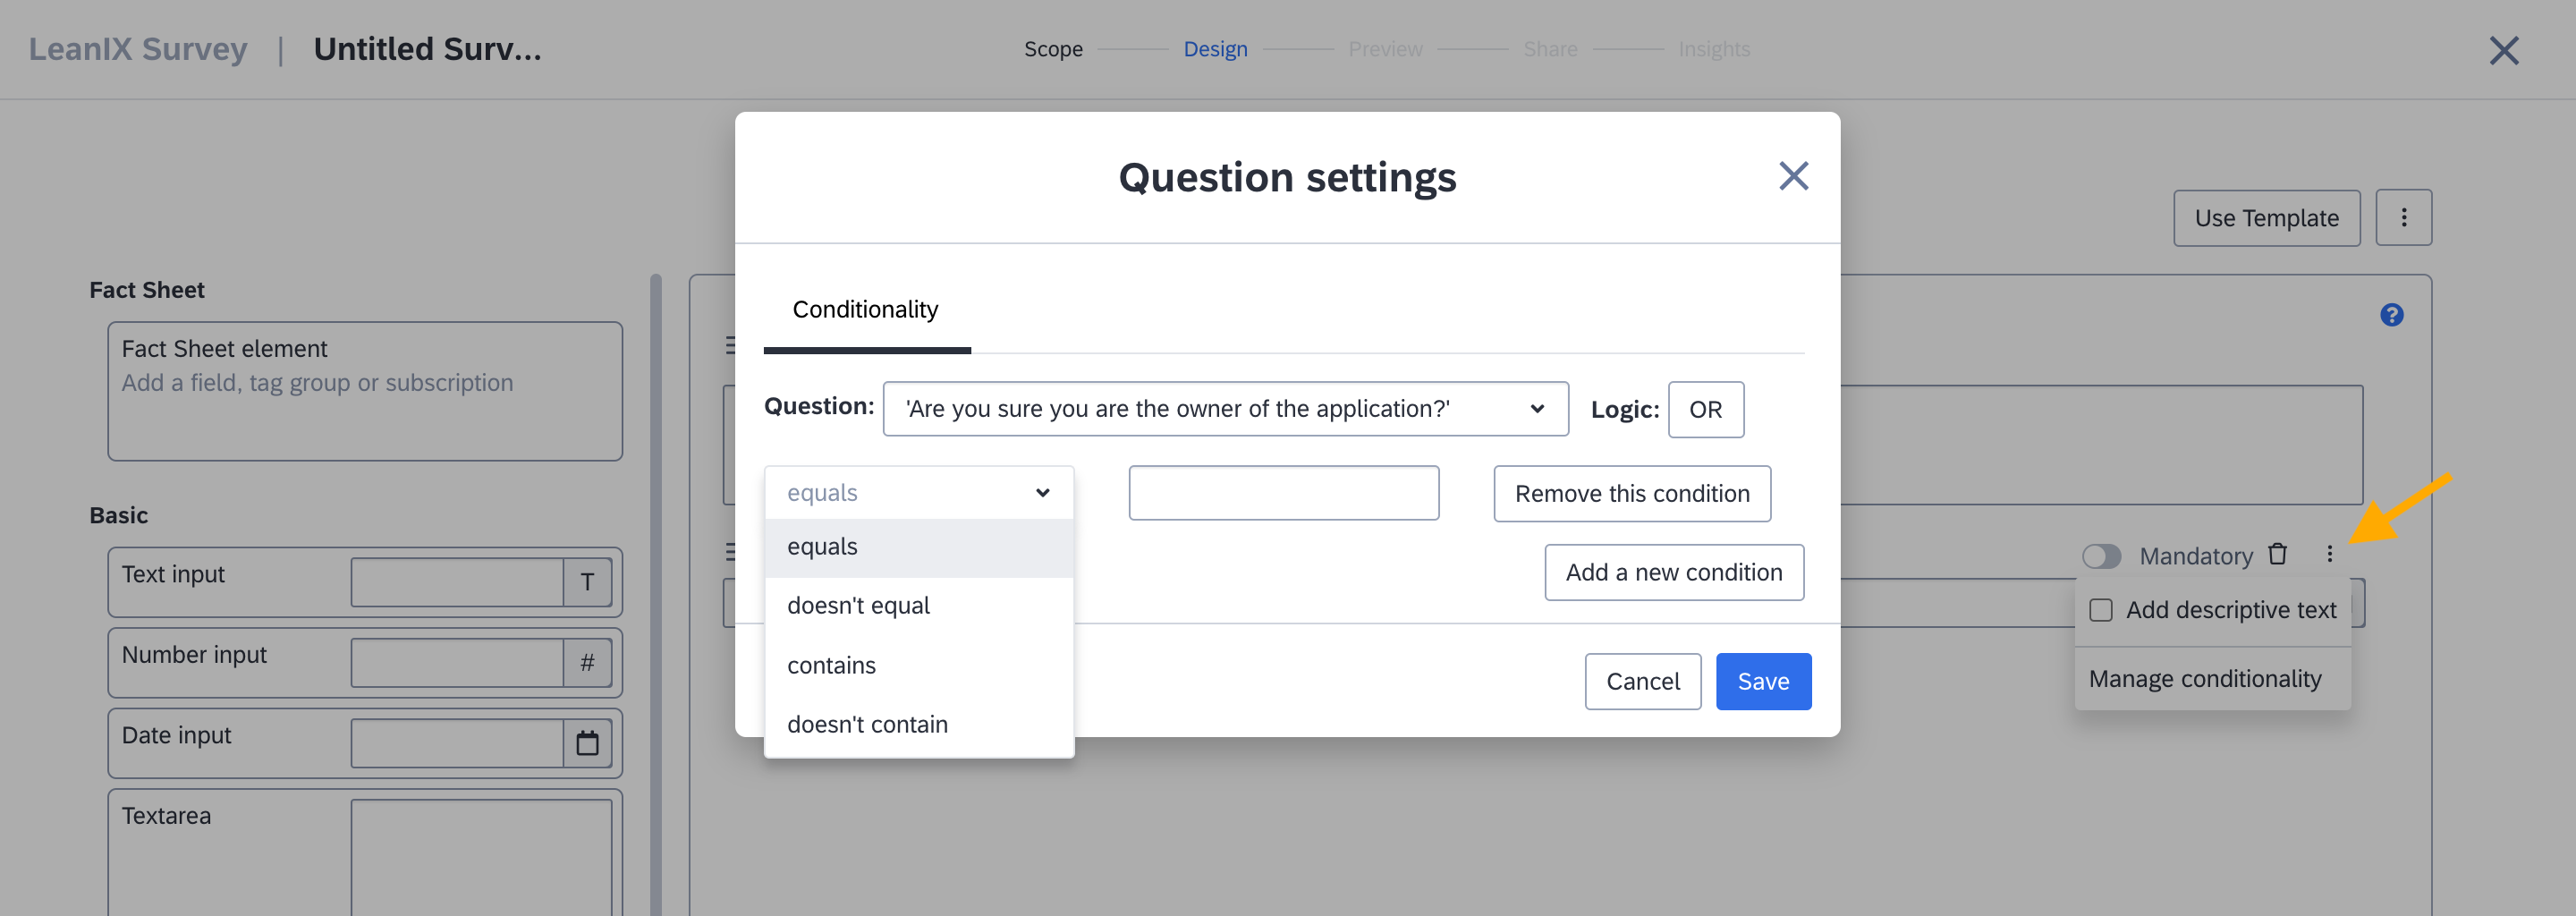
Conditional questions: They allow you to display or skip a question based on a response given earlier. To set up a rule, select the question to which the rule should apply and then define the specific conditions. For example, you can create a conditional question like "Are you sure you are the owner of the application?" Based on the response, you can choose whether follow-up questions should be displayed or skipped.
To make a question conditional, follow these steps:
- From the question’s menu in the top right corner, select Manage conditionality.
- Define the condition by clicking Add a new condition.
- Click Save to apply the condition.
Making a Question Conditional
Calculated fields: They enable you to quantify survey results by deriving a specific score by aggregating or quantifying answers provided in other questions. This functionality accepts standard JavaScript as input and is designed to return an integer. For more information, see Calculated Fields in Surveys.
Adding Links and Descriptions
While creating survey questions for any of the input fields, you can also insert links by typing the display text in square brackets ‘[...]’ and typing the link right after it inside parenthesis '(...)'.

Inserting Link in Survey Questions

Inserted Link Displayed in the Survey Form.
The descriptive text field provides extra information or context for your questions. It supports clickable URLs and is limited to 250 characters. Providing a description helps respondents understand the questions better and increases the chances of getting accurate answers. It also ensures a clear separation between the survey question and its additional description. Similarly, you can also add comments to single-select and multi-select answers to provide more clarity for the survey responders.
To add a description for a question, select the Add descriptive text checkbox from the question’s menu in the top right corner and write the description in the field that appears.
Making a Question Mandatory
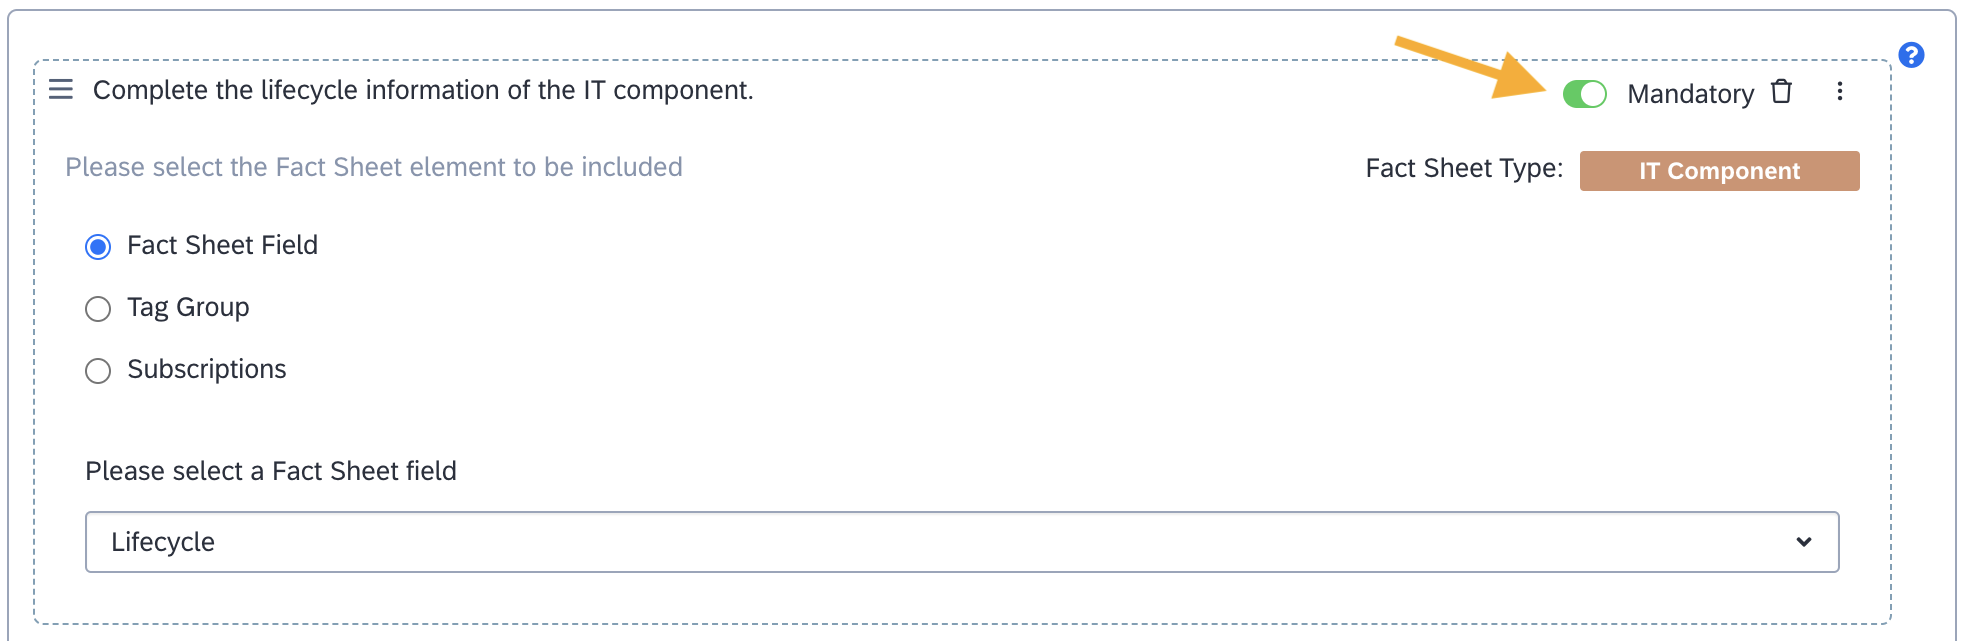
You can make a question mandatory by toggling the Mandatory switch on at the top right of the question. When a question is mandatory, respondents must answer it before submitting the survey. This ensures that critical information or key insights are collected from all participants, maintaining the integrity and completeness of the data, which is vital to the survey's objectives.
Making a Question Mandatory
Deleting Questions
You can delete an individual question by clicking the delete icon at the top right of the question. To clear all questions in the survey, click the menu icon at the top right of the survey and select Clear Questions.
Designing a Survey from Existing Survey and Survey Template
Importing and Exporting a Survey
Instead of designing a survey from scratch, to save time and simplify the survey creation, you can import an existing survey from various sources:
- Import an existing survey from the workspace.
- Use a survey template from the SAP LeanIX store.
- Import a previously exported survey in JSON format or directly paste the JSON code during import.
To import a survey, do the following:
- Click Use Template in the top right corner of the survey editor. This action opens an overlay with options for importing.
- In the overlay, choose whether to import from the workspace, SAP LeanIX store, or a saved survey file.
- Click Import.
Using Templates From the SAP LeanIX Store
Before you can choose SAP LeanIX store templates from the drop-down list, you need to import them from the SAP LeanIX store. To do this, click the Browse SAP LeanIX Store button in the import overlay.
If you've already added some templates but want to add more, visit the SAP LeanIX store from your workspace to select and add additional survey templates. To learn how, see Adding SAP LeanIX Store Templates to the Workspace.
Similarly, you can export a survey as a JSON file for future use or to use in another workspace, by selecting Export from the menu next to the Use Template button.

Importing and Exporting Surveys
Adding SAP LeanIX Store Templates to the Workspace
To add the survey templates from the SAP LeanIX store, do the following:
-
From the workspace menu, select Store.
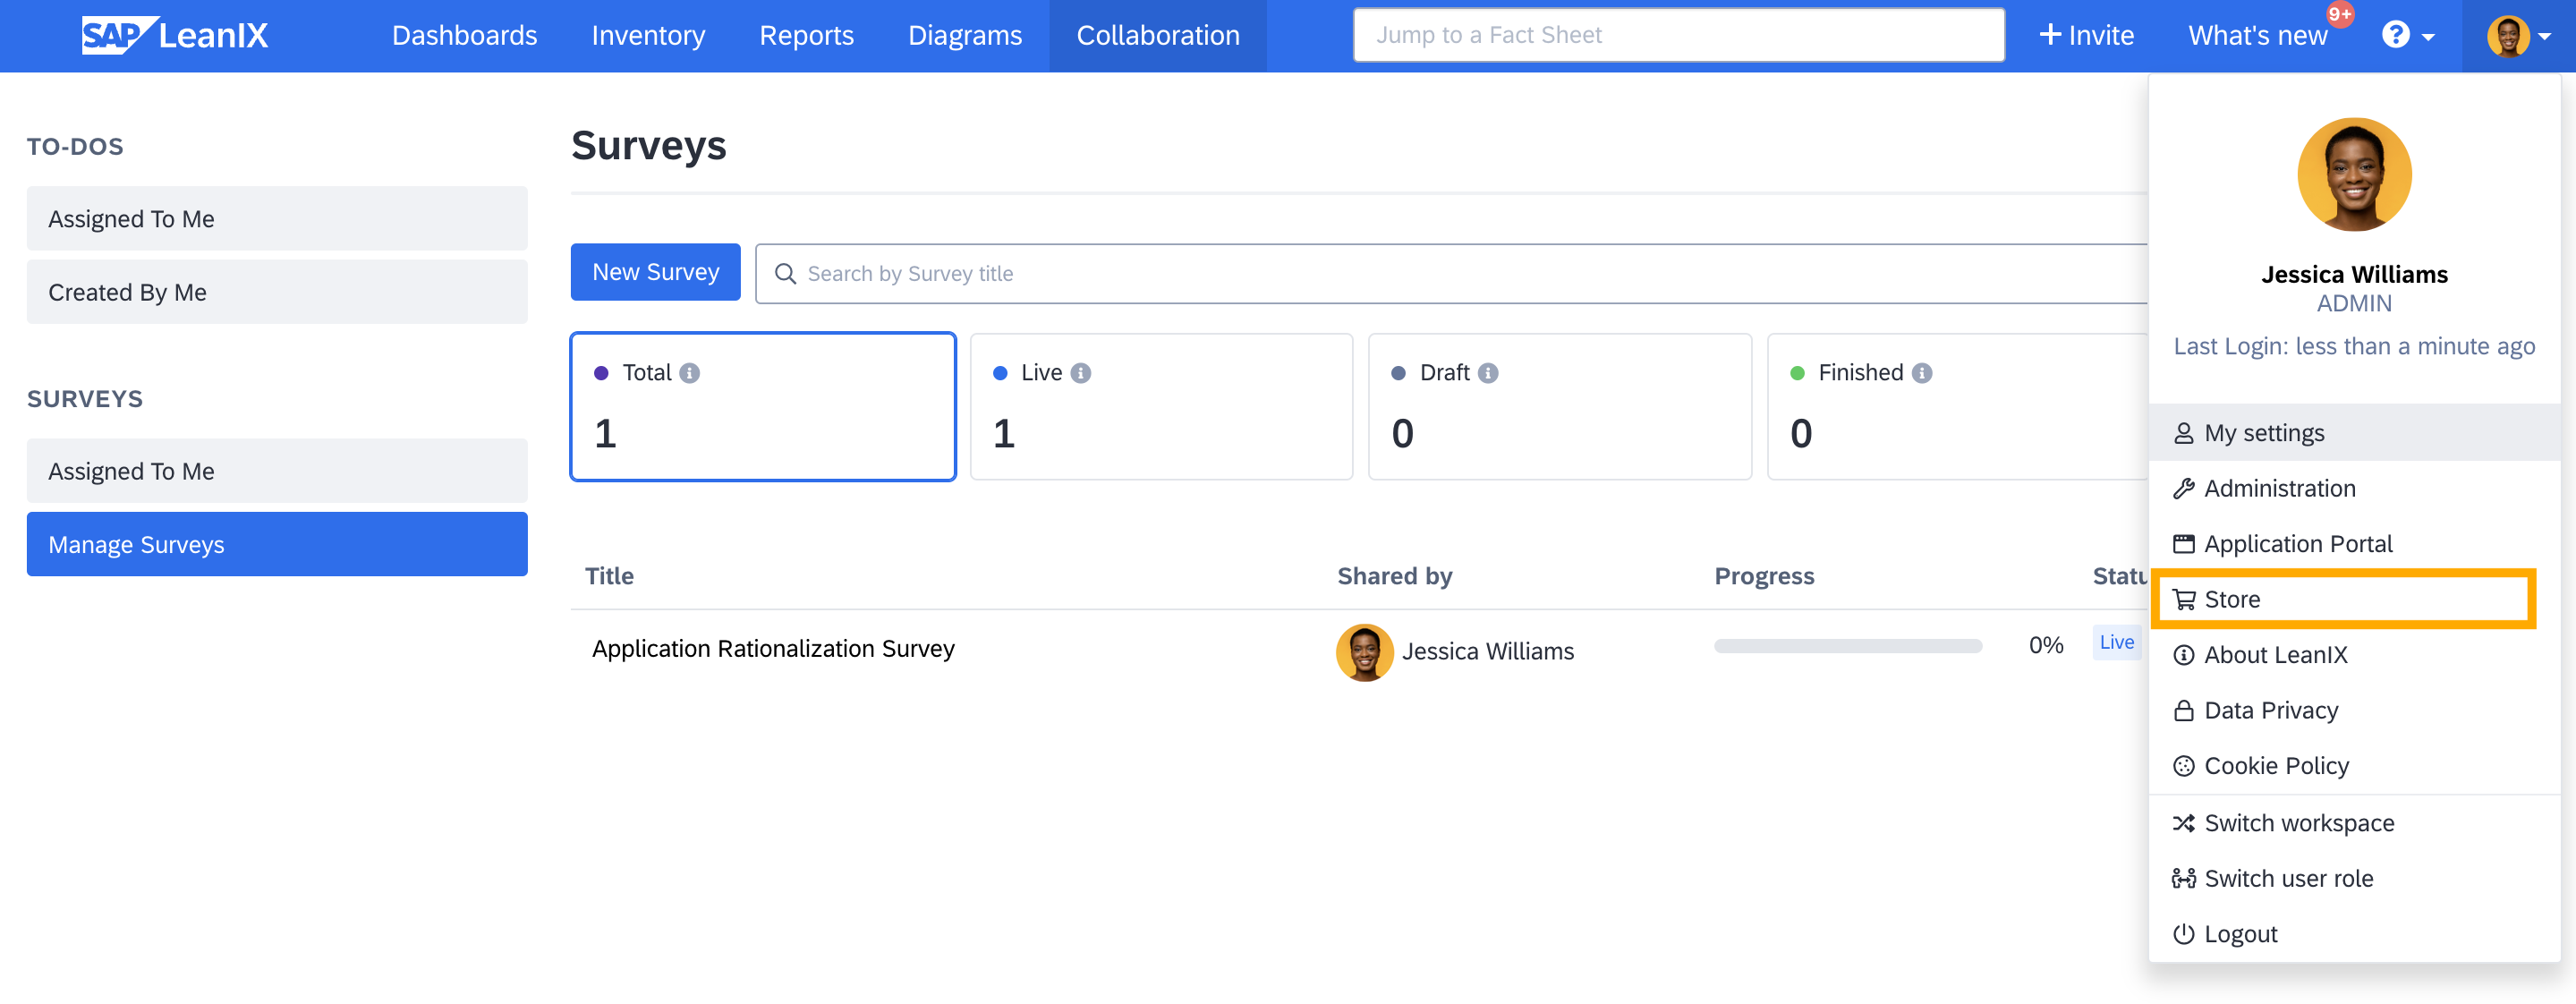
Adding SAP LeanIX Store Templates to the Workspace
-
In the SAP LeanIX store, navigate to the Surveys section.
-
Select the survey to add and click Add to Workspace.
Creating a Fresh Survey Run from a Finished Survey
Instead of designing a new survey from scratch, you can always reuse, modify, or extend a previously used survey questionnaire by creating a fresh survey run from a finished survey. This allows you to keep collected data up-to-date, capture new insights, and reflect updated conditions or feedback.
When creating a fresh survey run, you can adjust the scope, design, recipients, or other settings via the tabs at the top to ensure the survey configurations are up-to-date and aligned with your current needs.
To create a fresh survey run, do the following:
- Select the finished survey from the Manage Surveys section.
- If needed, adjust the scope, design, recipients, or other settings by navigating through the tabs at the top.
- In the Share tab, click Go Live.
Updated 22 days ago