
Tagging
This guide covers the essential steps for managing tags, including creating tag groups, adding and editing tags within those groups, and deleting tags and tag groups.
Introduction
Tags in SAP LeanIX are a powerful way to classify and categorize fact sheets to gain quick and valuable insights. They enable easy filtering and fast access to relevant information, support precise analyses, and allow for customized reporting, helping you generate meaningful insights effectively.
To learn about various aspects of using tags in SAP LeanIX, including assigning and managing them, understanding when and when not to use them, as well as leveraging tags for filtering and reporting, see Tags. This guide focuses on how admins can create, edit, and delete tag groups and tags.
Creating and Managing Tag Groups and Tags
Creating a Tag Group
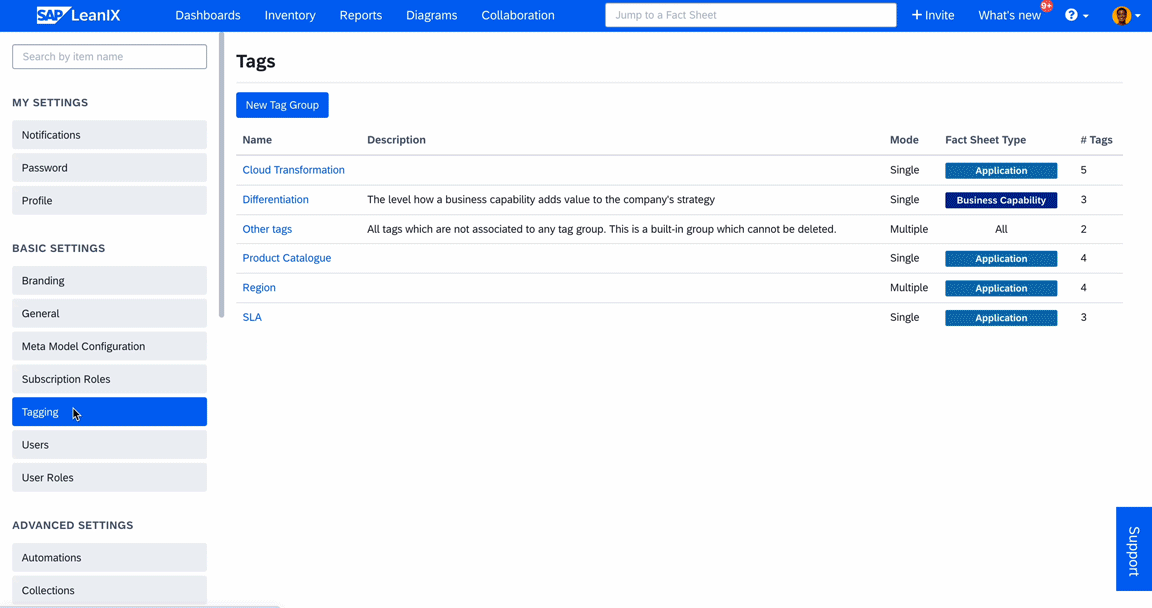
For tags to be available in the fact sheet header, admins must first create tag groups and tags in the administration area. Both members and admins can then assign these tags to fact sheets.
To create a tag group, do the following:
- In the administration area, open the Tagging section.
- Click New Tag Group.
- Fill in the needed information, including name, fact sheet type, and mode. Selecting a fact sheet type ensures that the tag group is available only for that type. You can select multiple fact sheet types or even all. The mode of the tag group defines whether it is single-select or multi-select. Providing a description is a good practice as it makes it easier for other users to understand.
- Click Add.
You can edit a tag group to change mode, fact sheet type, and more. To learn, see Editing a Tag Group.
Creating and Editing Tags in a Tag Group
To create tags in a tag group, follow these steps:
- Select the tag group in which tags need to be created.
- Select the Tags tab.
- Click + Add Tag.
- Provide a name and click OK.
You can edit a tag to change the color, tag group, name, and description. To edit, do the following:
- Select the tag that needs to be edited.
- Make the necessary changes.
- Click Save.
Editing a Tag Group
You can edit a tag group to expand the scope of the tag group to more fact sheet types. However, to reduce the scope, you must first remove all instances of tags assigned to fact sheets of that type, including those on archived fact sheets.
Similarly, you can change the mode from single-select to multi-select. However, to switch from multi-select to single-select, you must first remove all instances of multiple tags assigned to fact sheets, including those on archived fact sheets.
An efficient way of doing this is to filter the fact sheets in the inventory and either update the data across multiple fact sheets in table view or by exporting fact sheet data as an Excel file, making the update in the spreadsheet, and importing it back. To learn more, see Bulk Updating Data in Inventory Table View and Bulk Updating Data Through Excel File.
To edit a tag group, do the following
- Select the tag group that needs to be edited.
- Make the necessary changes.
- Click Save.
Deleting Tags and Tag Groups
To delete a tag, all instances of that tag assigned to fact sheets must first be removed, including those from archived fact sheets. An efficient way to do this is to filter the fact sheets in the inventory using the particular tags, then either delete the tags across multiple fact sheets in table view or by exporting fact sheet data as an Excel file, deleting the tags in the spreadsheet, and importing it back. For more details, see Bulk Updating Data in Inventory Table View and Bulk Updating Data Through Excel File.
Once the tags are removed, follow these steps to delete the tag:
- Open the tag group and select the tag that needs to be deleted. You can see how many fact sheets, if any, are still assigned with that tag.
- Click Delete. If the tag is still assigned to any fact sheet, you will see Remove from Tag Group instead of the delete option. Removing a tag moves the tag to Other tags, a default tag group for all tags without a tag group, such as those created on the fly. For more details on on-the-fly tag creation, see Tagging Mode.
To delete a tag group, all tags in that group must either be deleted or removed from the tag group. Once all the tags are either deleted or removed, do the following:
- Select the tag group that needs to be deleted.
- Click Delete. If any tags from the tag group are still in use, the delete option remains disabled.
Updated 10 months ago