
Microsoft Entra ID Integration for SaaS Discovery
Set up an integration with Microsoft Entra ID to streamline the discovery of your SaaS applications.
Introduction
Microsoft Entra ID is a cloud-based identity and access management service from Microsoft. It enables employees to sign in and access:
- External resources, such as Microsoft 365, the Azure portal, and thousands of other SaaS applications.
- Internal resources, such as apps on your corporate network and intranet, as well as custom cloud applications developed by your organization.
Hence it is used to identify and catalog all SaaS applications in use to easily build your application inventory.
With Microsoft Entra ID integration, SAP LeanIX identifies services by reading servicePrincipal, which is visible under the Enterprise Registration blade in Azure Active Directory (AAD). For SaaS identification, SAP LeanIX relies on the Gallery Template used, specifically the IDs of the underlying applications (Application IDs). Additionally, SAP LeanIX collects the unique identifiers (External IDs) and names (External names) of the applications, although detection is not based on these collected attributes. External IDs and external names are used to detect multiple instances of SaaS. For more information, see Detecting Multiple Instances of SaaS.
Note
- SAP LeanIX does not collect any login or user data, ensuring compliance with data privacy regulations.
- If you intend to manually review and link each discovered application to fact sheets, deactivate automatic linking in the SaaS discovery inbox settings before configuring the integration. For details, see Automatic Linking.
Implementation Details
The integration uses servicePrincipals instead of the application endpoint, allowing us to discover applications across different tenants rather than being limited to those within the current tenant. For a detailed guide on discovering and managing service principals and applications, see Microsoft's documentation Application and Service Principal Objects.
SAP LeanIX integration supports two regions - Global and China, with API calls directed to different URLs depending on the region. For details on handling national cloud deployments, including URIs specific to national clouds, see Authentication for National Clouds.
Authorization and permissions are managed using OAuth 2.0 client credentials grant flow, as outlined in OAuth 2.0 Client Credentials Grant Flow. The required scope for API access is specified by .default within the https://graph.microsoft.com/resource. For information on managing permissions and consent for the applications, see Permissions and Consent Overview.
If you want to cross-check the discovered services, you can do so by navigating to Enterprise applications | All applications > All applications. Ensure you do not apply any filters.

Cross-Checking the Discovered Services
| Integration Categories | Authentication Mechanism | Supported Regions | API Endpoints Used |
|---|---|---|---|
| Single Sign-On Systems (SSO) | REST API - OAuth | Global China | For API authentication: /<tenantID>/oauth2/v2.0/tokenFor SaaS discovery: /servicePrincipals |
Discovery Capabilities
Microsoft Entra ID integration offers the following capabilities:
| Available Capabilities | Description | EntraID Resource |
|---|---|---|
| SaaS Discovery (Standard) | SaaS discovery automatically identifies your organization's SaaS applications. | Discovered apps |
| Usage Indication (Optional) | Provides insights into how users in your organization access applications. This helps you make informed decisions about adding discovered applications to the inventory. | Sign-ins (past 30 days) |
Note
To get usage information, you need the permission
Reports.Read.All. For guidance, see Grant Permissions to SAP LeanIX. To learn more about Microsoft Entra ID API reference, see Application sign-in.
You get the following information about the discovered SaaS:
| Field | Description |
|---|---|
| Description | Description of the SaaS. |
| Account Enabled | If this option is set to "Yes", assigned users can sign in to the application. If set to "No", no users can sign in, even if they are assigned. |
| Preferred SSO Mode | Single sign-on (SSO) adds security and convenience when users sign on to applications in Microsoft Entra ID by allowing them to access all assigned applications with a single set of credentials. The preferred SSO mode can be SAML, password-based, OIDC, Not Supported, or null. |
| Successful Sign-ins* | Indicates how many successful sign-ins occurred in the past 30 days |
| Failed Sign-ins* | Indicates how many failed sign-ins occurred in the past 30 days. |
| Success Rate* | Indicates the success rate of successful sign-ins of all sign-ins in the past 30 days. |
| Created from Entra Gallery | Indicates whether an application was configured in Entra ID using a template from the gallery or not. If an application was not created using a template, it is considered to be a custom application and won’t match with the SAP LeanIX reference catalog. |
| Creation Timestamp | Indicates when the application was created in Entra ID. |
*Shown only if you enable Usage Indication capability in the configuration settings. For more guidance, see Enter the Copied Credentials in SAP LeanIX.
Note
The sign-in usage indication data is retrieved from EntraID's application activity report. To learn more about it, see Usage and Insights Report in Microsoft Entra ID.
Setting up Microsoft Entra ID Integration
Register SAP LeanIX in Microsoft Entra ID
- Based on the region, sign in to either the Global Azure portal or the China Azure portal. Use the Azure administrator account that is also a member of the Global Administrator directory role in your Microsoft Entra ID tenant.
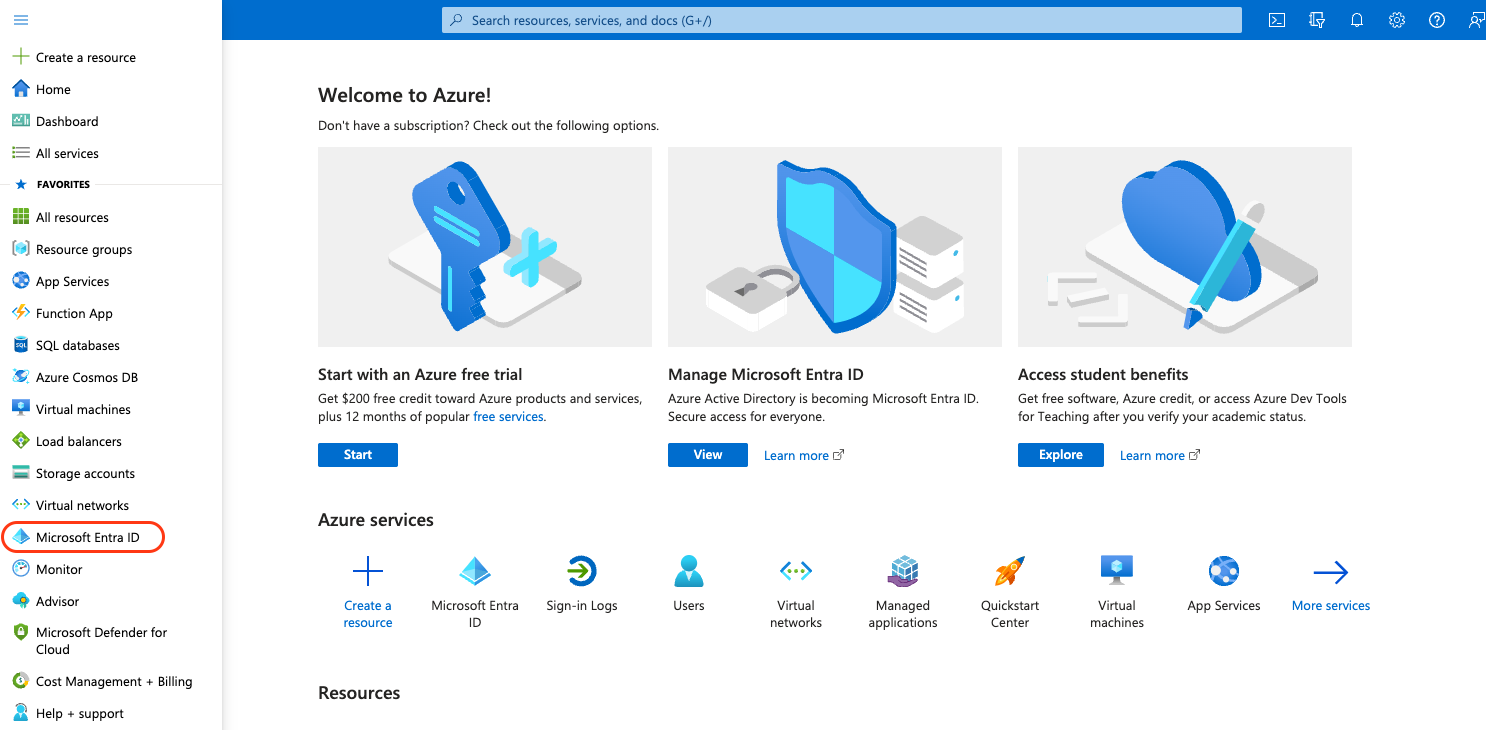
- On the left navigation pane, click Microsoft Entra ID.
Azure Portal
-
On the Microsoft Entra ID page, click App Registrations.
-
On the app registrations page, in the toolbar on the top, click New registration.
-
In the resulting page, do the following:
- Enter a name for the integration.
- Under Supported account types, select Accounts in this organizational directory only (Default Directory only - Single tenant).
- Click Register at the bottom of the screen.
Grant Permissions to SAP LeanIX
After registering SAP LeanIX, the next step is to grant the necessary permissions to call APIs.
-
On the left pane, click API permissions.
-
Click Add a permission.
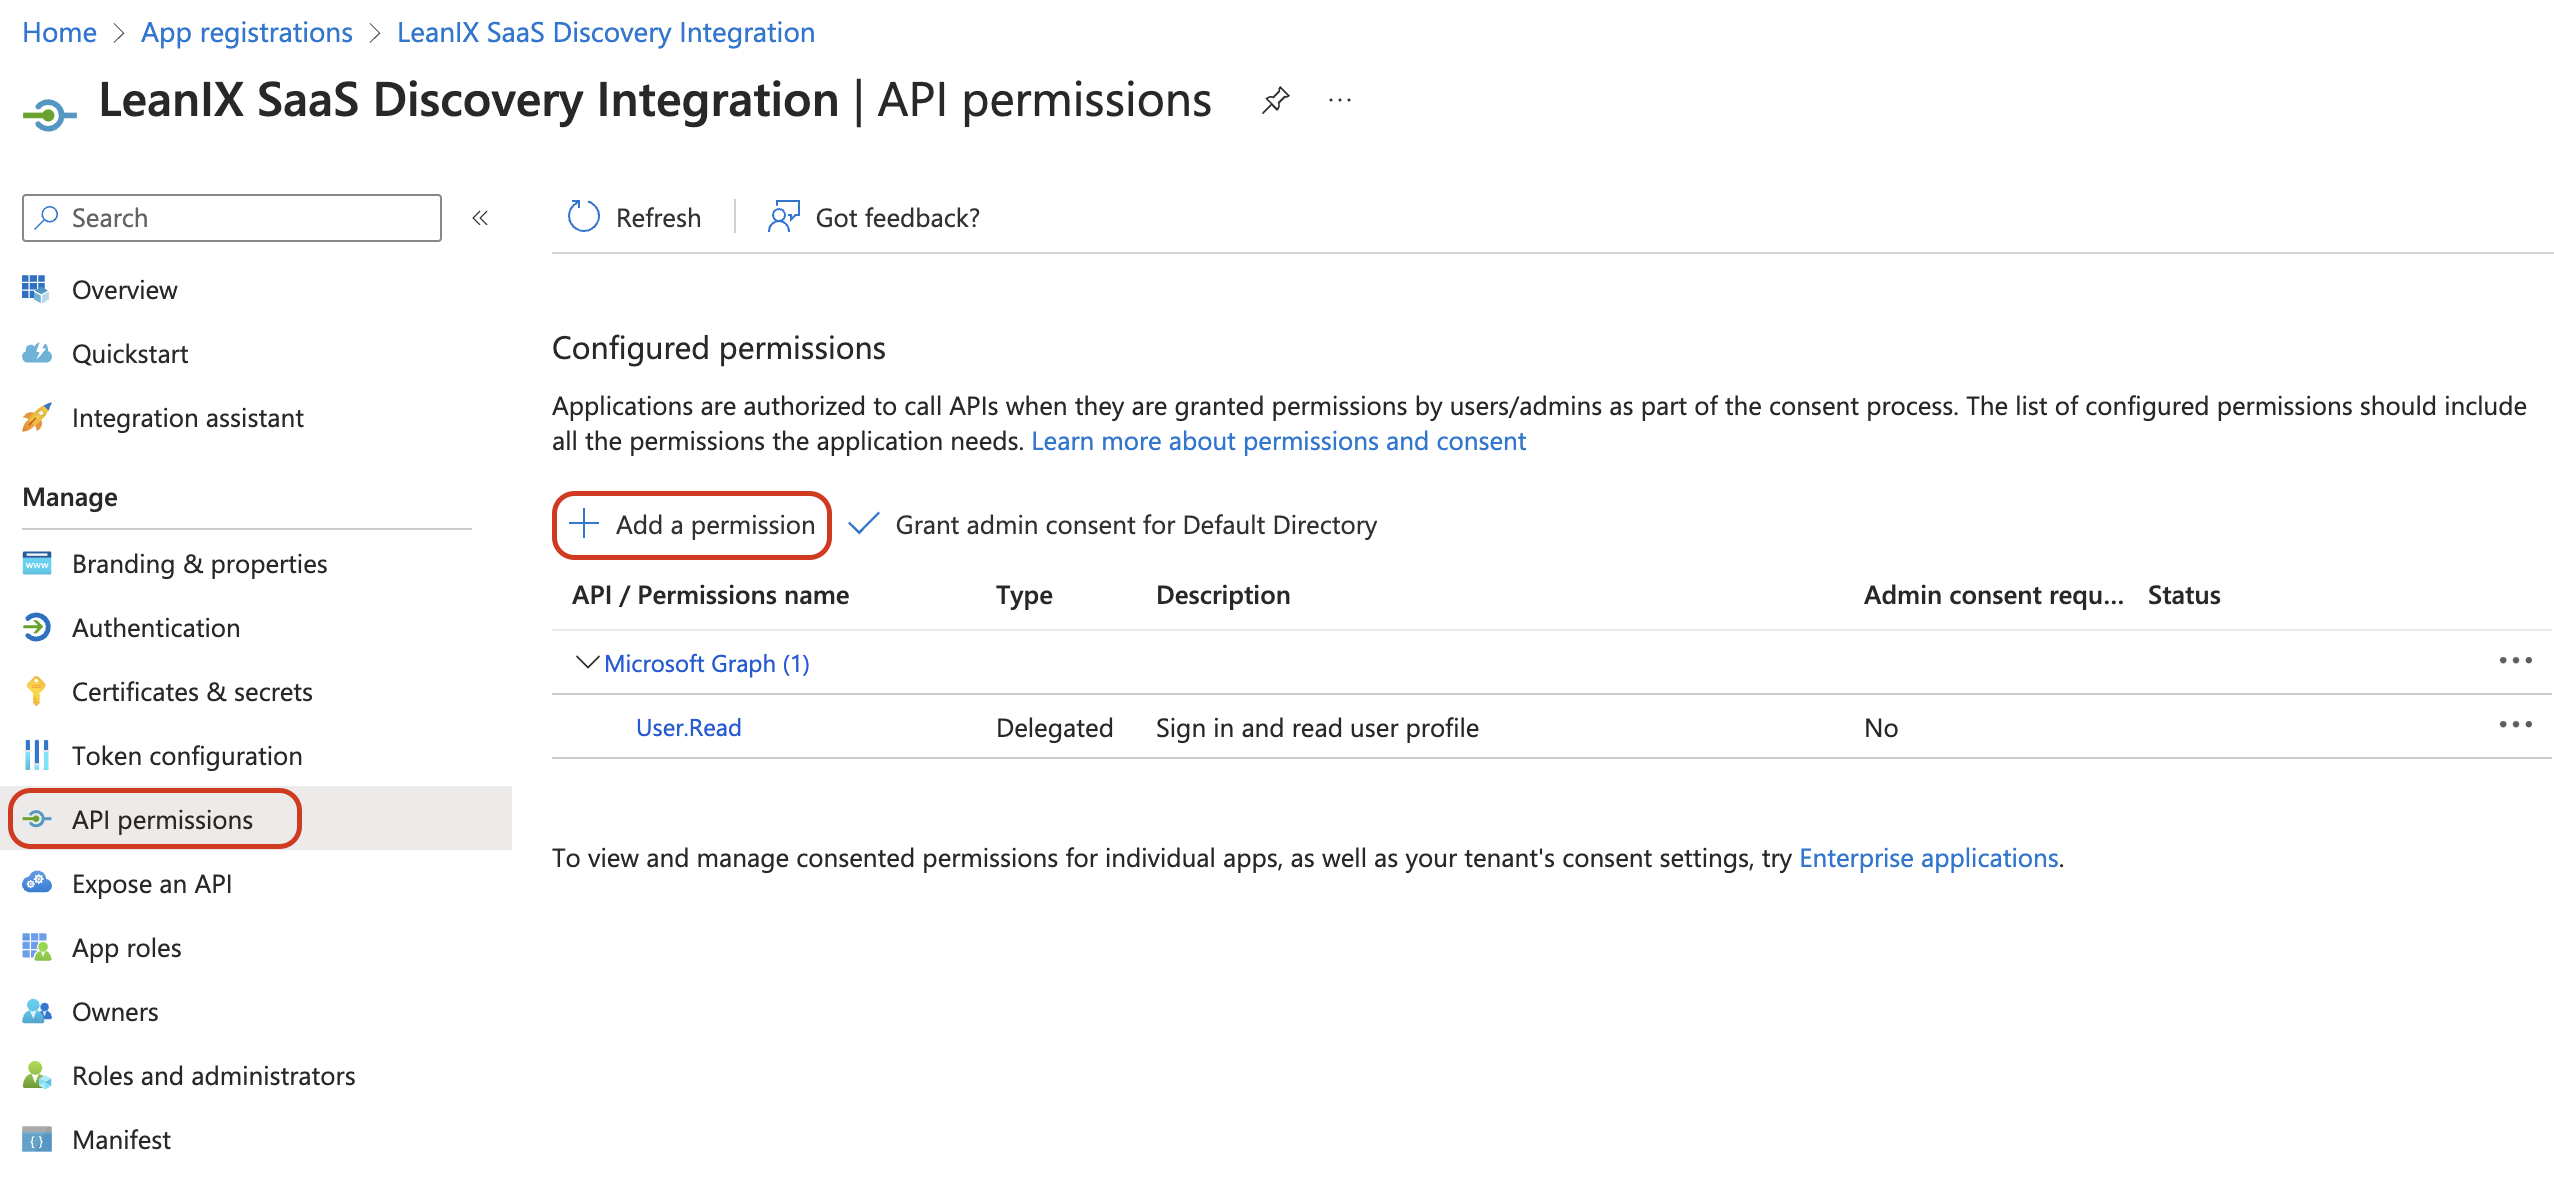
Granting API Permission
-
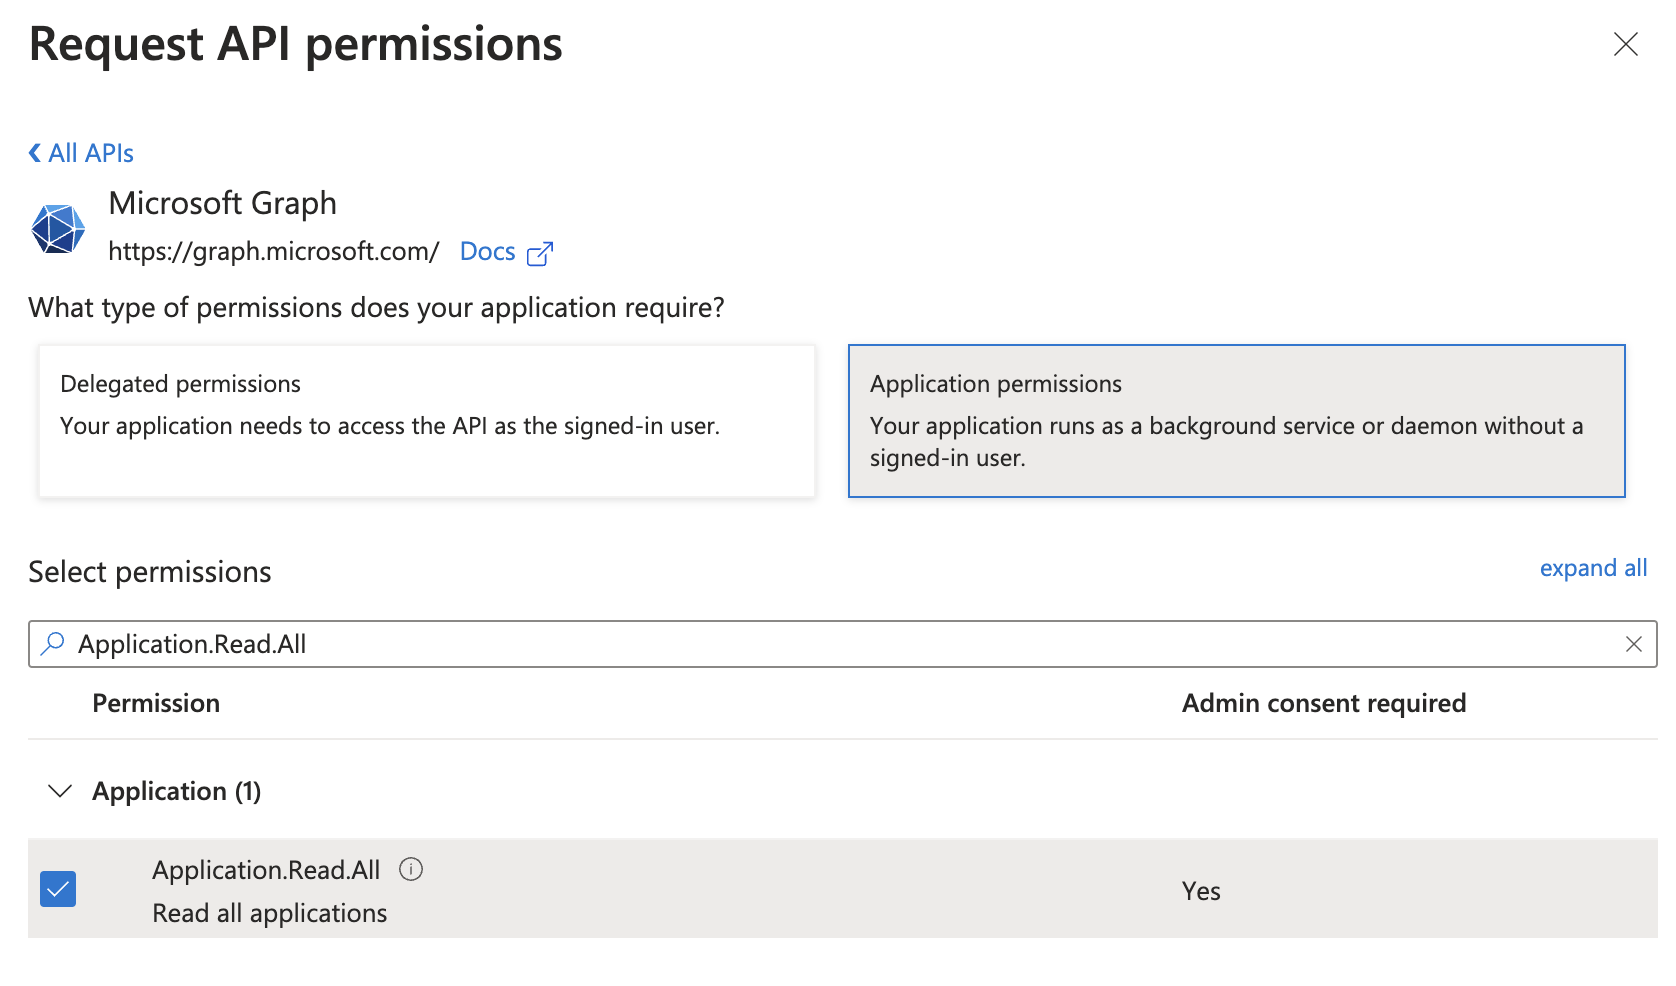
In the overlay for requesting API permissions, search and select the Microsoft Graph API.
-
Select Application permissions at the top, then search and select Application.Read.All permission from the list below.
-
If you need usage indication capability, make sure to search for and select the Reports.Read.All permission as well.
-
Click Add permissions at the bottom to assign permission to SAP LeanIX.
-
On the API permissions page, click Grant admin consent for Default Directory to enable configured permissions.
-
Click Yes and grant consent for the requested permissions.
-
The permission status indicator in the API permissions page will change to approved.
Gather Configuration Settings
-
Return to the application overview section (App registrations > Created app) and gather the following identifiers: Application (client) ID and Directory (tenant) ID.
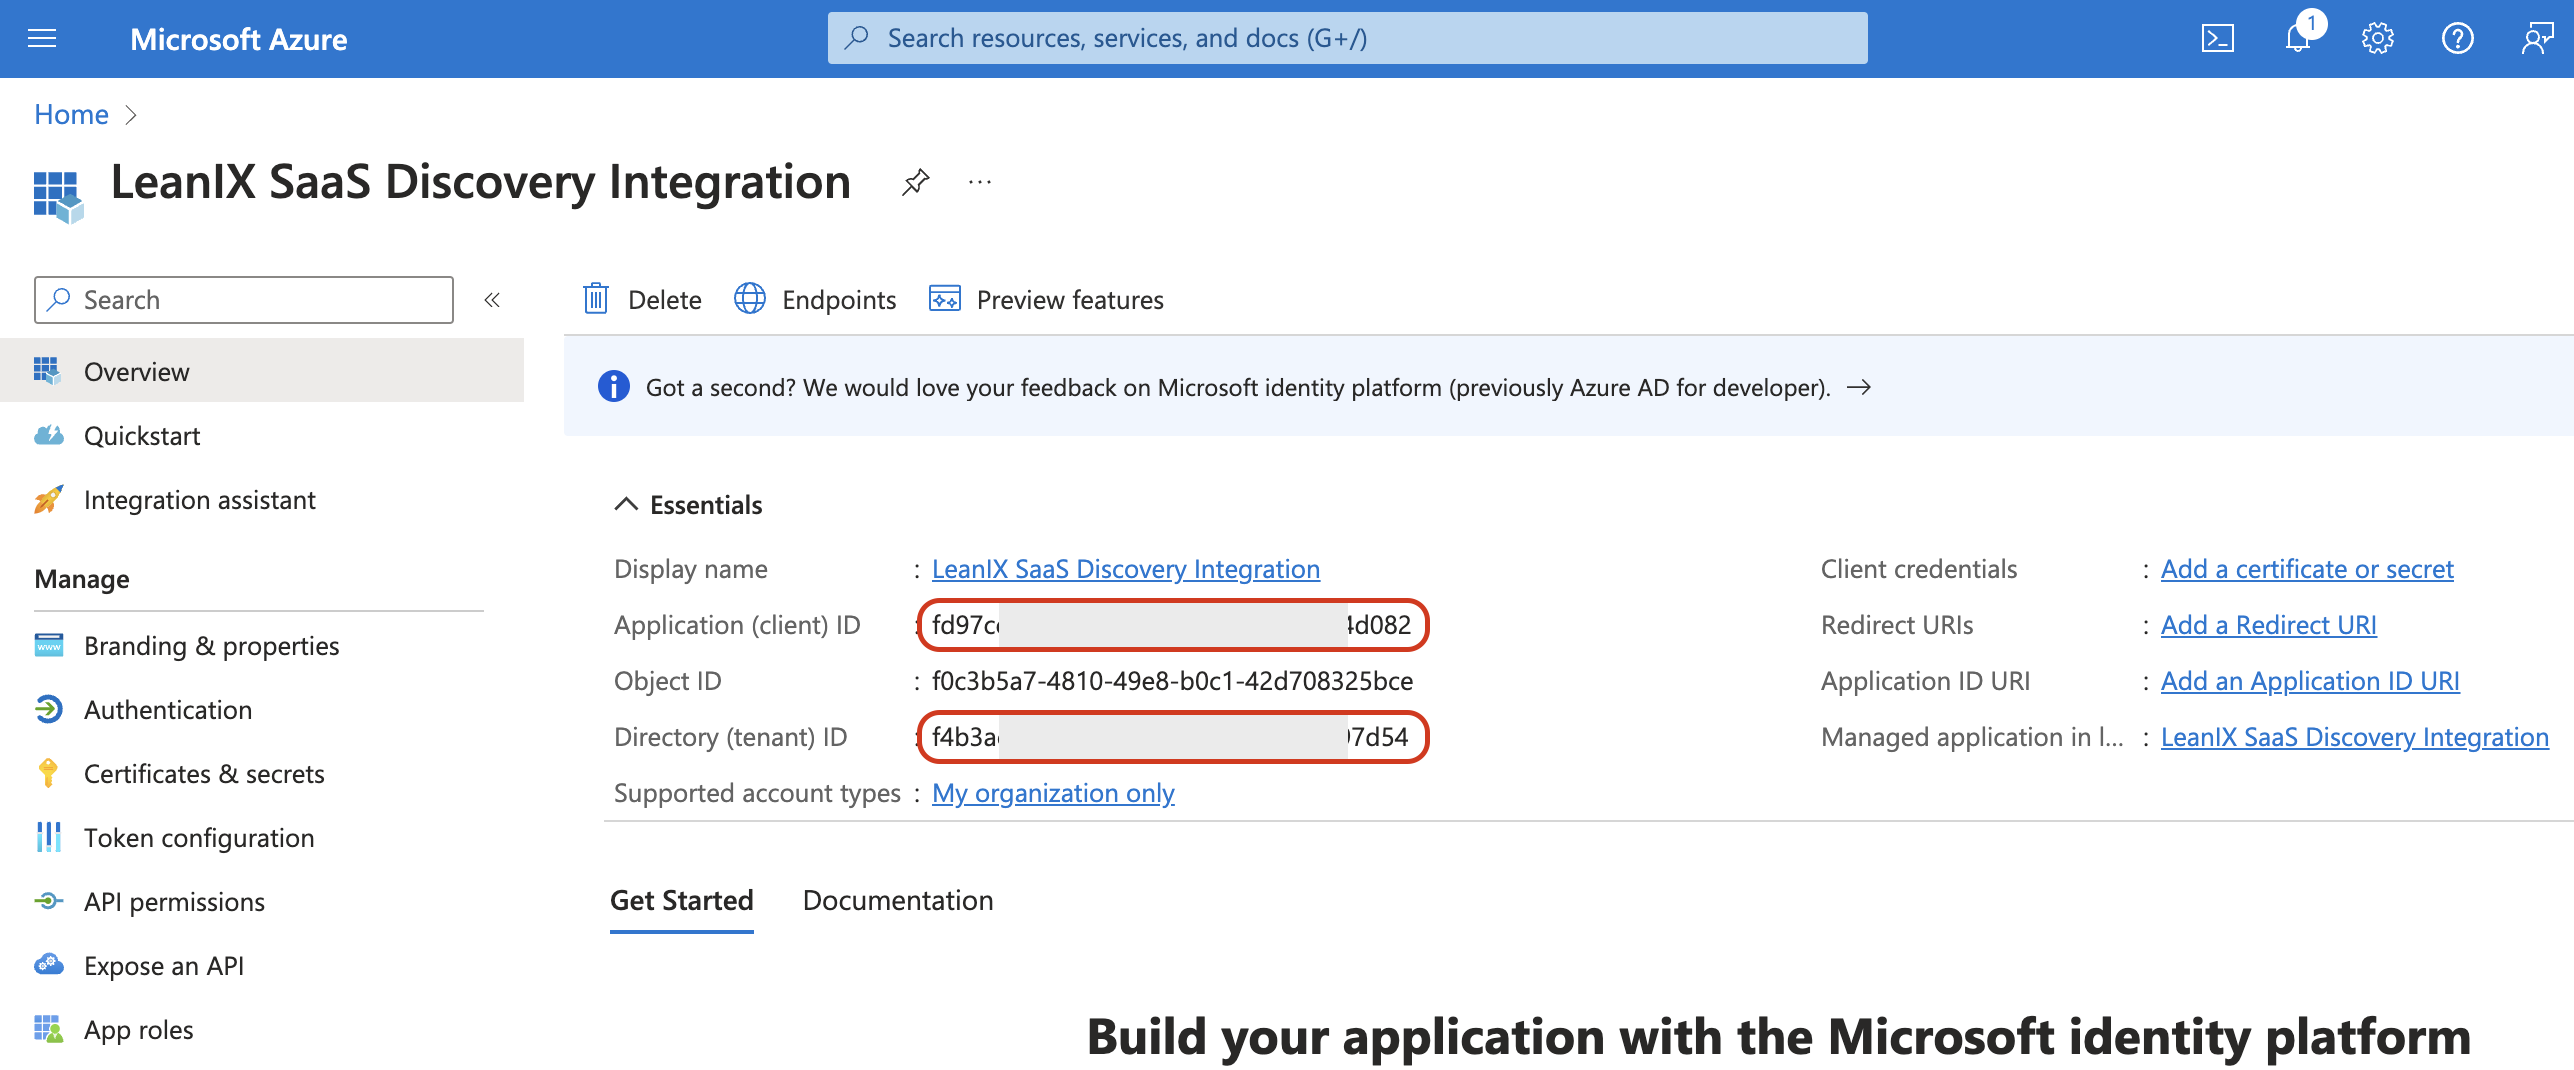
Gathering Application and Directory Tenant IDs
-
From the left pane, open the Certificates & secrets section. Here, generate a client secret (also called the application password) by following these steps:
-
Click New client secret to create a new password.
-
Optionally, enter a description for the client secret.
-
Select the expiration length of the secret. Once the expiration date of the created client secret is reached, you need to create a new one and reconfigure the integration in SAP LeanIX.
-
Click Add.
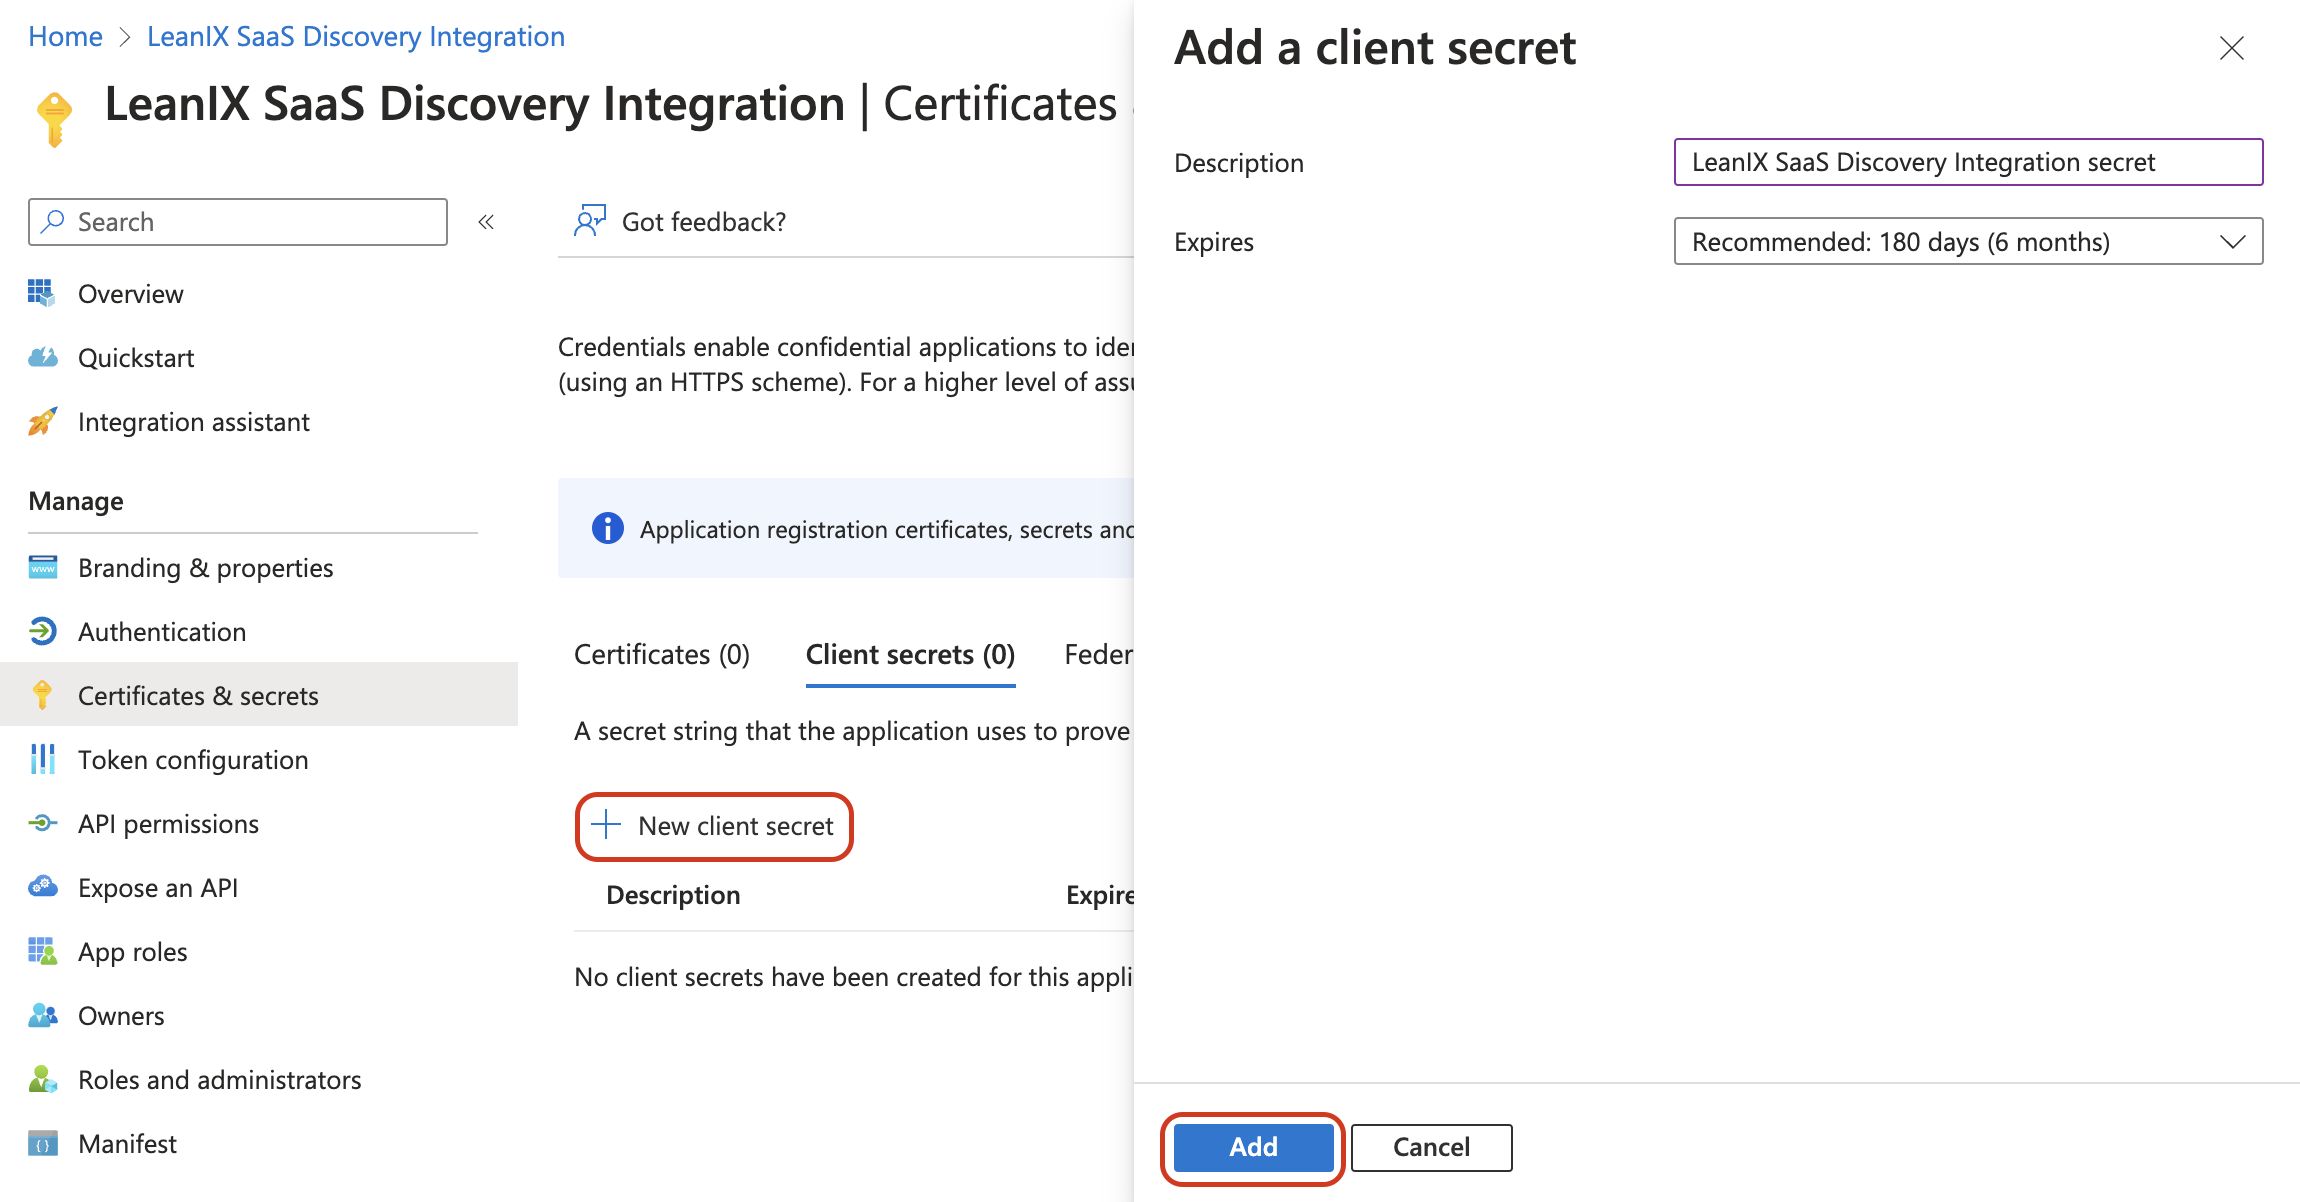
Adding a Client Secret
-
-
Copy the client secret value to your clipboard.
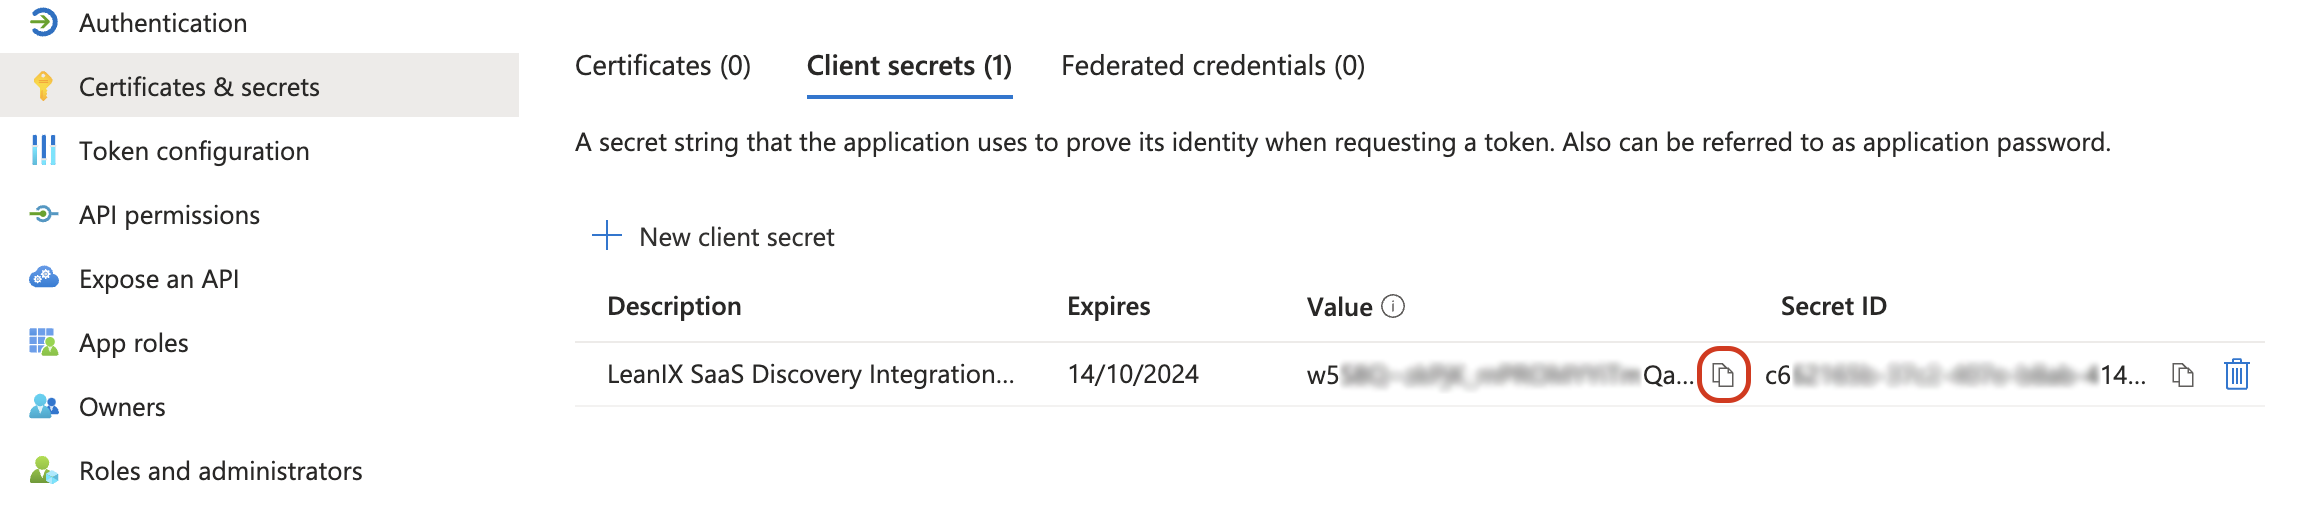
Copying the Client Secret Value
Note
Make sure to note down the client secret value as soon as it is revealed. Once you navigate away from the Certificates & secrets panel, the value will be masked.
Enter the Copied Credentials in SAP LeanIX
-
Add the Entra ID integration in SAP LeanIX. For more, see Setting-up Out-of-the-Box Integrations.
-
In the configuration, choose a name for the integration and select the type of capabilities or data you want to get from Microsoft Entra ID. SaaS Discovery is enabled by default, and you can optionally enable Usage Indication.
-
Enter the credentials copied from the Azure admin portal into the corresponding fields.
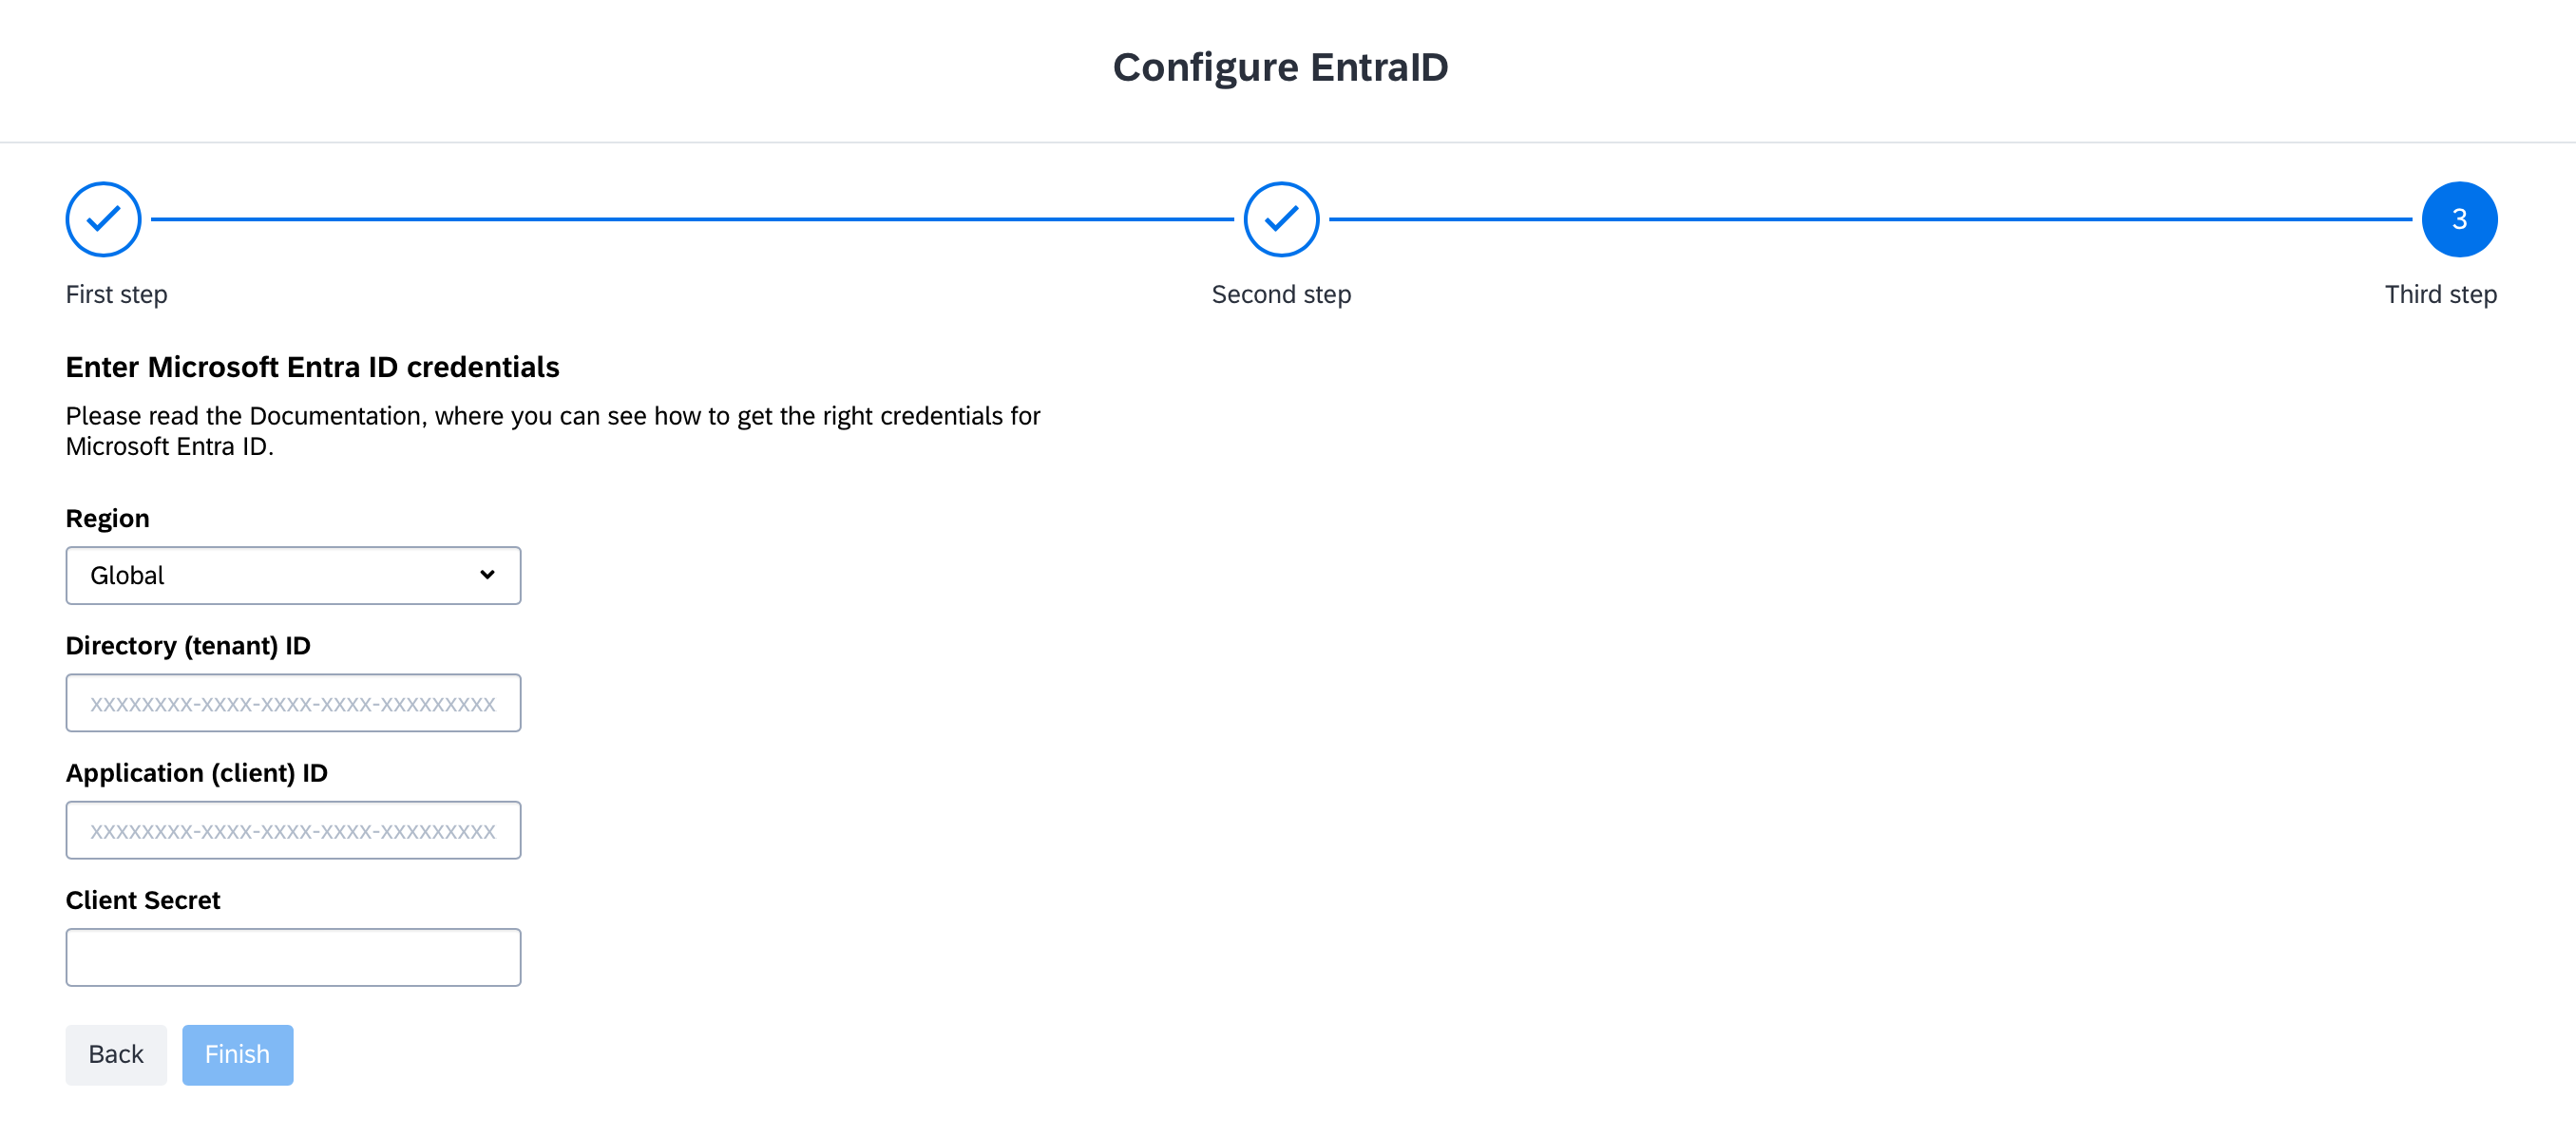
Entering the Required Credentials in SAP LeanIX
-
Click Finish and wait for the connection to be established.
Updated about 1 month ago