
Presentations
Use presentations to share enterprise architecture insights from reports and diagrams with your organization, without the need to export data to external presentation tools.
Introduction
Presentations enable you to create, share, and present insights from your reports and diagrams (free draw or data flow) directly within SAP LeanIX, without the need to export data to external presentation tools such as Microsoft PowerPoint. You can think of presentations as curated collections of insights tailored to specific audiences or topics. Whether you aim to highlight crucial trends, show reports and diagrams, or present strategic initiatives, presentations enable you to create engaging narratives with ease.
To access presentations, navigate to the Reports or Diagrams section in your workspace, then select Presentations under Personal in the left-side pane.
Note
In presentations, only free draw and data flow diagrams are supported. Currently, Lucidchart diagrams are not supported.
Benefits
- Efficiency: Streamline your communication process by consolidating relevant information into presentations directly within SAP LeanIX.
- Collaboration: Foster collaboration among your team members by coauthoring presentations and sharing knowledge seamlessly.
- Engagement: Keep your audience engaged with interactive reports and diagrams, ensuring you effectively convey your message.
- Accuracy: Share the most up-to-date information with your stakeholders, providing them with accurate insights for decision-making.
Limitations
The following features are not supported in presentations:
- Advanced design customization
- Integration with other applications
- Data export
- Creation of reports and diagrams
Creating a Presentation
Follow these steps:
-
In the Reports or Diagrams section of your workspace, in the left-side pane, select Presentations under Personal.
-
On the Presentations page, click New Presentation.
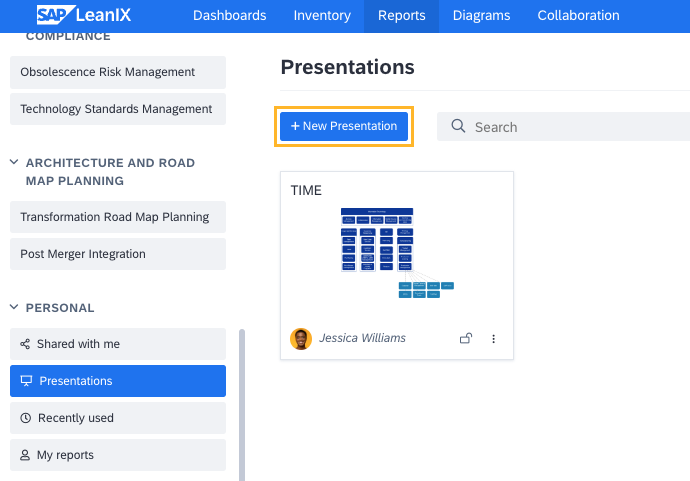
Creating a New Presentation from the Presentations Page
-
Enter a name for the presentation and, optionally, a description, then click Create Presentation. You land on the intro slide of the presentation.
-
On the intro slide, edit the title and subtitle of the presentation to provide sufficient context to viewers.
-
To add slides to the presentation, do the following:
-
Click the plus button in the left-side pane. Alternatively, hover over the area below the slide and click the plus icon that appears.

Adding a Slide to a Presentation
-
In the dialog that appears, select reports and diagrams that you want to add to the presentation, then click Add. You can add multiple reports and diagrams at once. Each of them is added as a separate slide.
Note
To add a report or diagram to a presentation, ensure that it's accessible to all workspace users. If a report or diagram is missing from the list, modify its permissions to either unrestricted or write-restricted. To learn more, see Changing Permissions for Reports and Diagrams.
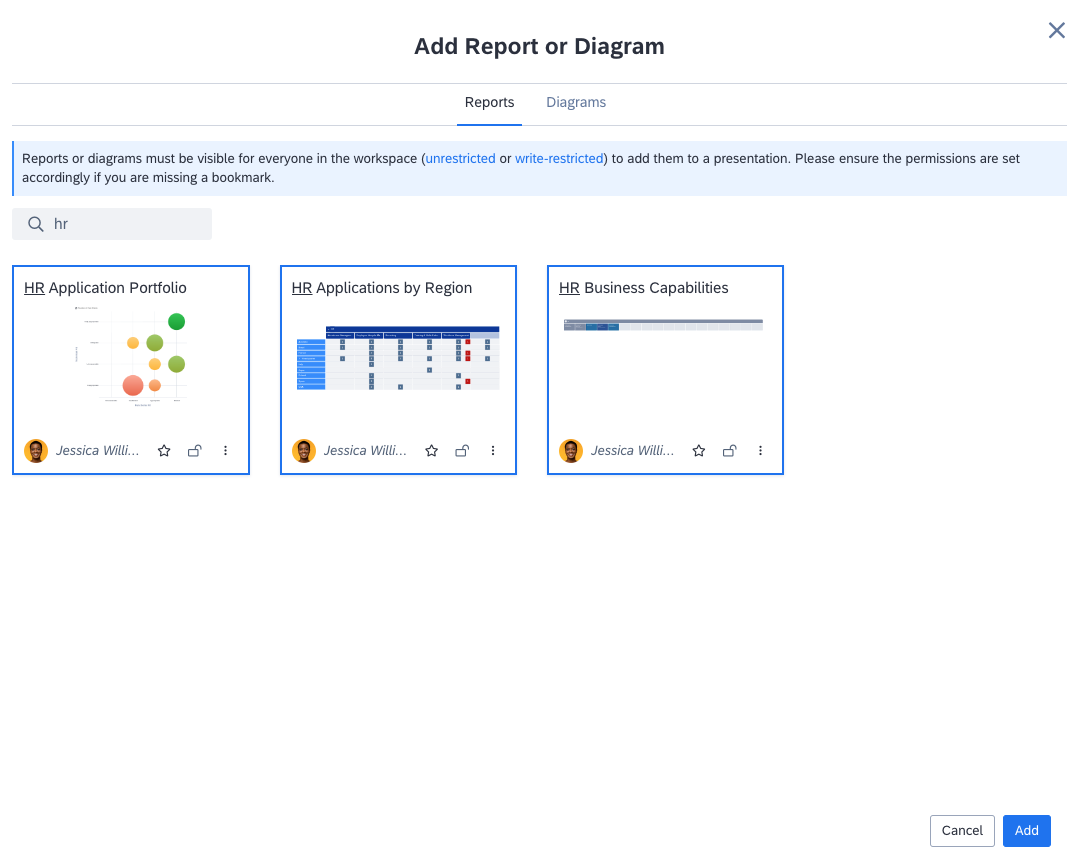
Selecting Reports and Diagrams to Add to a Presentation
-
-
Optional: Once you’ve added slides to the presentation, you can edit their titles. By default, the report or diagram title is used as the slide title. The slide titles are not synchronized with the report and diagram titles.
-
Optional: To provide additional context and descriptions for each report or diagram, add notes (annotations) to slides. To do that, select a slide, click Edit notes, then enter your notes in the text field that appears. To learn more, see Adding Notes to Slides.
The presentation is automatically saved. Now you can preview the presentation or continue editing it. You can add more slides, rearrange them, or delete unnecessary slides. For more information, see Adding, Rearranging, and Deleting Slides.
Note
If a report or diagram is deleted or its permissions are changed to read and write restricted, it becomes unavailable in presentations. To delete an empty slide, click Delete Slide.
Adding Notes to Slides
To provide more context and details on each report and diagram, you can add notes to slides (except for the intro slide). Notes are also displayed when you preview or start the presentation. You can show or hide these notes as needed, ensuring clarity and focus during your presentation.
To add notes to a slide, select it, click Edit notes in the right-side panel, then enter your notes in the text field that appears.
Adding Notes to a Slide
To show or hide notes for a specific slide, select the slide in the left-side pane, then enable or disable the Notes toggle as needed.
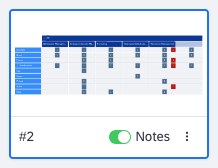
Notes Toggle on the Slide Preview
Adding, Rearranging, and Deleting Slides
You can add, rearrange, and delete slides from a presentation.
-
Adding slides: To add slides after a specific slide, hover over the area below the slide, then click the plus icon that appears. To add slides after a slide that is currently selected, you can also click the plus button in the left-side pane.
You can add a report or diagram to a presentation from the overview page listing reports or diagrams. To do that, on the report or diagram preview, click the three-dot icon > Add to presentation, then select a presentation. A new slide is added to the end of the presentation. The report or diagram must have unrestricted or write-restricted permissions.
-
Rearranging slides: To rearrange slides, drag and drop them within the left-side pane.
-
Deleting slides: To delete a slide, select it in the left-side pane, click the three-dot icon in the lower-right corner, then click Remove.
The intro slide can’t be moved or deleted.
Changing Permissions for Reports and Diagrams
To add a report or diagram to a presentation, ensure that it's accessible to all workspace users. If a report or diagram is missing from the list, modify its permissions to either unrestricted or write-restricted.
- Report: To change report permissions, in the upper-right corner of the report page, click the three-dot icon > Report details. On the report details page, navigate to the Permissions tab, then update permissions to either unrestricted or write-restricted. To learn more, see Report Permissions.
- Diagram: To change diagram permissions, in the upper-right corner of the diagram page, click the three-dot icon > Diagram details. On the diagram details page, navigate to the Permissions tab, then update permissions to either unrestricted or write-restricted. To learn more, see Diagram Permissions.
Note
A report or diagram whose permissions are changed to read and write restricted becomes unavailable in presentations.
Previewing and Starting a Presentation
You can preview a presentation and then start it in full-screen presenter mode.
- Preview mode: To preview a presentation, click Preview in the upper-right corner of the presentation. To exit the preview mode, click Close.
- Full-screen mode: To start a presentation in full-screen presenter mode, click Preview, then click the full-screen mode icon
 at the bottom of the presentation. To go back to the preview mode, click the full-screen mode icon once again or press Esc.
You can navigate between the slides by:
- Using the Right Arrow and Left Arrow keyboard keys
- Clicking the arrow icons at the bottom of the presentation
Previewing a Presentation
Presentation Details
To navigate to the presentation details page, click the three-dot icon on the presentation, then click Presentation details. Here, you can do the following:
- Change the presentation name, description, and owner
- Delete the presentation
- Change permissions for the presentation
- Share the presentation with other users and view users with whom it was shared
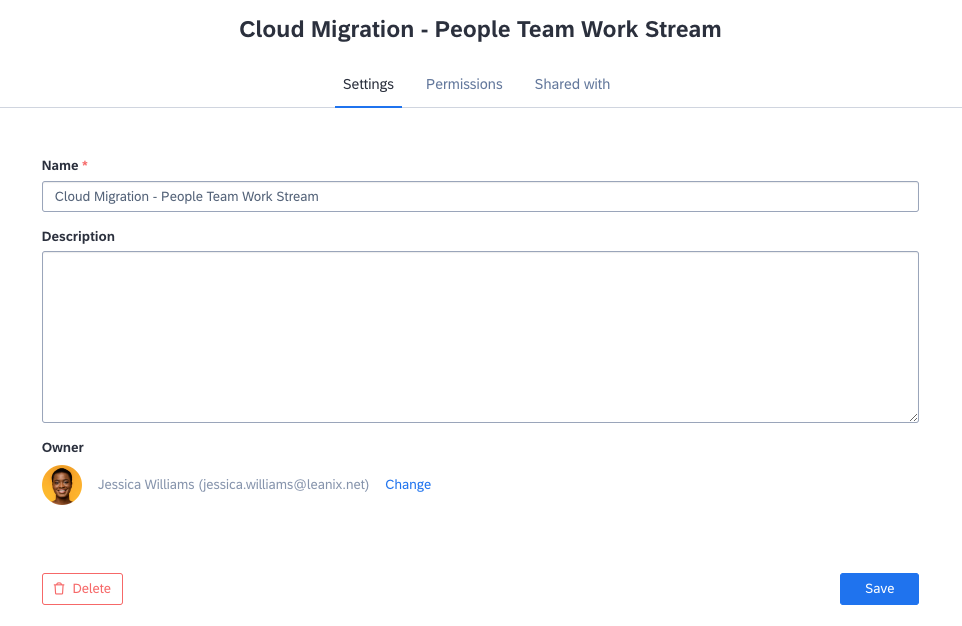
Presentation Details Page
Presentation Permissions
By default, presentations are created as unrestricted, which means that all workspace users can view and edit them. You can change the permission type of presentations to restrict viewing and editing permissions to specific users. The presentation owner always has editing permissions.
You can modify permissions for all presentations for non-admin roles in the User Roles and Permissions section of the administration area. For more information, see Role-Based Permissions.
The following table lists presentation permissions for standard user roles.
| Action | Admin | Member | Viewer |
|---|---|---|---|
| Create a new presentation | Yes | Yes | No |
| Edit a presentation | Yes | Yes | No |
| Delete a presentation | Yes | - Yes: User’s own presentations and shared presentations for which the user has write permission. - No: Shared presentations for which the user doesn’t have write permission. | No |
| Share a presentation | Yes | Yes | Yes |
Note
Users with custom user roles may not have permissions to create or edit presentations. To request presentation permissions for users with custom roles, please contact SAP LeanIX Support or, if you're an SAP customer, submit a request from the SAP for Me portal.
You can configure custom user roles only if you're managing roles within your single sign-on identity provider. For more information, see:
Permission Types
The following permission types are available for presentations:
- Unrestricted: All workspace users can view and edit the presentation.
- Write Restricted: All workspace users can view the presentation, but only specific users who are granted editing permissions can edit it.
- Read & Write Restricted: Only you can view and edit the presentation. Only specific users who are granted viewing or editing permissions can view or edit the presentation.
Changing Presentation Permissions and Ownership
You can change the permission type and ownership for a presentation on the presentation details page. Changing ownership may be required when a user leaves the organization. To learn more about editing presentation details, see Presentation Details.
In the list view, you can change ownership for presentations in bulk. To learn more, see Managing Presentations in Bulk.
Sharing a Presentation
You can share a presentation with other users to foster collaboration and efficient communication on your insights. Follow these steps:
- Open the presentation that you want to share, then click Share in the upper-right corner.
- In the dialog that appears, enter the names or email addresses of users to share the presentation with, then click Share. From here, you can also copy the presentation link.
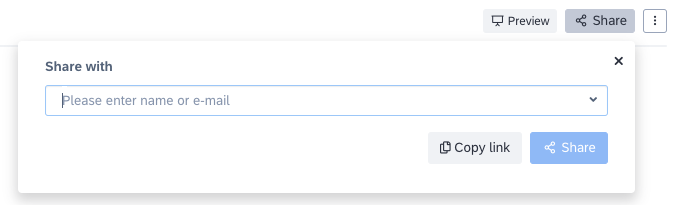
Sharing a Presentation from the Presentation Page
You can also share a presentation from the presentation preview or the presentation details page.
Managing Presentations in Bulk
To manage presentations in bulk, switch to the list view by clicking the hamburger menu icon in the upper-right corner of the presentations page.
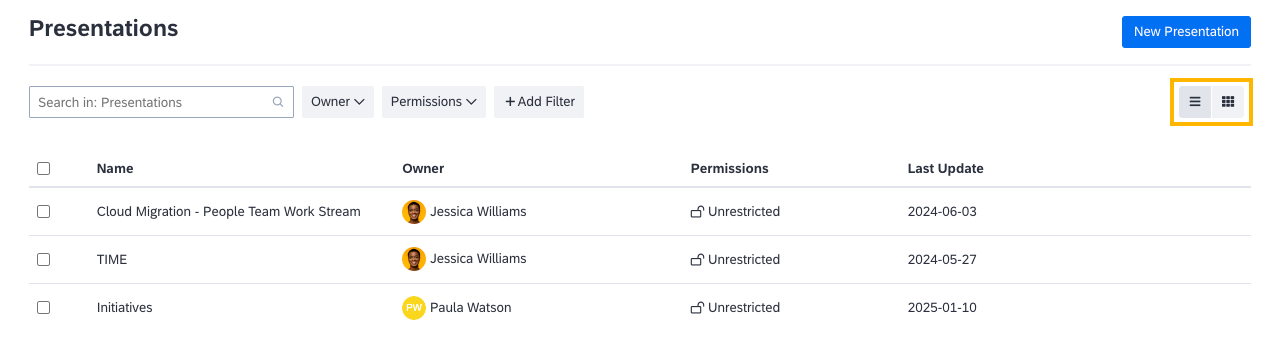
Switching Between the List and Grid Views in Presentations
In the list view, you can share presentations in bulk. If you have sufficient permissions, you can also change ownership or delete presentations in bulk.
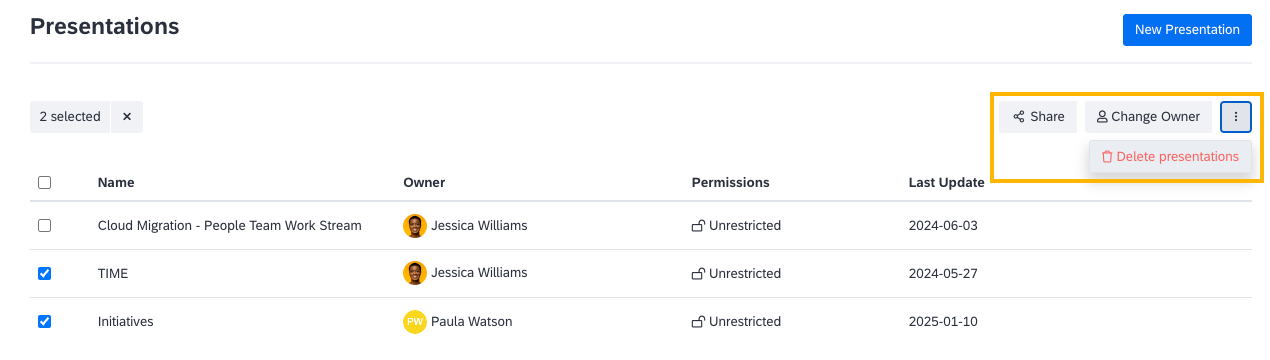
Managing Presentations in Bulk from the List View
Presentation permissions depend on your user role and ownership. Admin users can access all presentations and can grant full permissions for presentations to non-admin roles. The presentation owner always has editing permissions. For more information, see Presentation Permissions.
Updated about 2 months ago