
To-Dos
To-dos facilitate task delegation, collaboration, and governance and can be used to ensure data integrity and quality through transparent task management.
Overview
To-dos provide an effective way of delegating tasks and responsibilities. They allow users to create and assign tasks, ask questions, set due dates, add descriptions, and receive notifications for task updates or reminders. To-dos foster effective collaboration, ensuring tasks are completed transparently and play an important role in maintaining the overall integrity and quality of data in SAP LeanIX.
Tasks such as approving quality seals, filling in mandatory fields, or requesting application owners to conduct risk assessments are some examples of how to-dos contribute to data quality and governance.
You can assign to-dos to an individual or multiple people, including yourself. To-dos can be created manually or generated through automation. Moreover, to-dos are used to complete manual tasks within automated workflows, facilitating administrators to enforce and track governance workflows.
Types of To-Dos
There are the following types of to-dos:
- Action Item: This type of to-do is for general task creation and assignment. It allows users to create and assign tasks by providing needed information and context about the tasks. The responsible person simply finishes the task and marks it as complete.
- Ask Question: The purpose of the ask question to-do is to raise inquiries, seek clarification, or obtain information on specific topics.
- Approval To-Do: An approval to-do allows users to review and respond to tasks with approval or rejection. Admins can preset the approval or rejection decisions to automatically complete certain actions in the fact sheets. It streamlines decision-making and enables them to enforce and track governance workflows. Furthermore, users have the option to provide comments on their approval to-do tasks, offering additional context and explanations for their decisions.
Note
Every user can create action item and ask question to-dos, while approval to-dos can only be created by admins through automation.
Creating To-Dos
Creating Action Items and Asking Questions
Every user can create action item and ask question to-dos. The process of creating these two types of to-dos is similar. Follow these steps to create a to-do item:
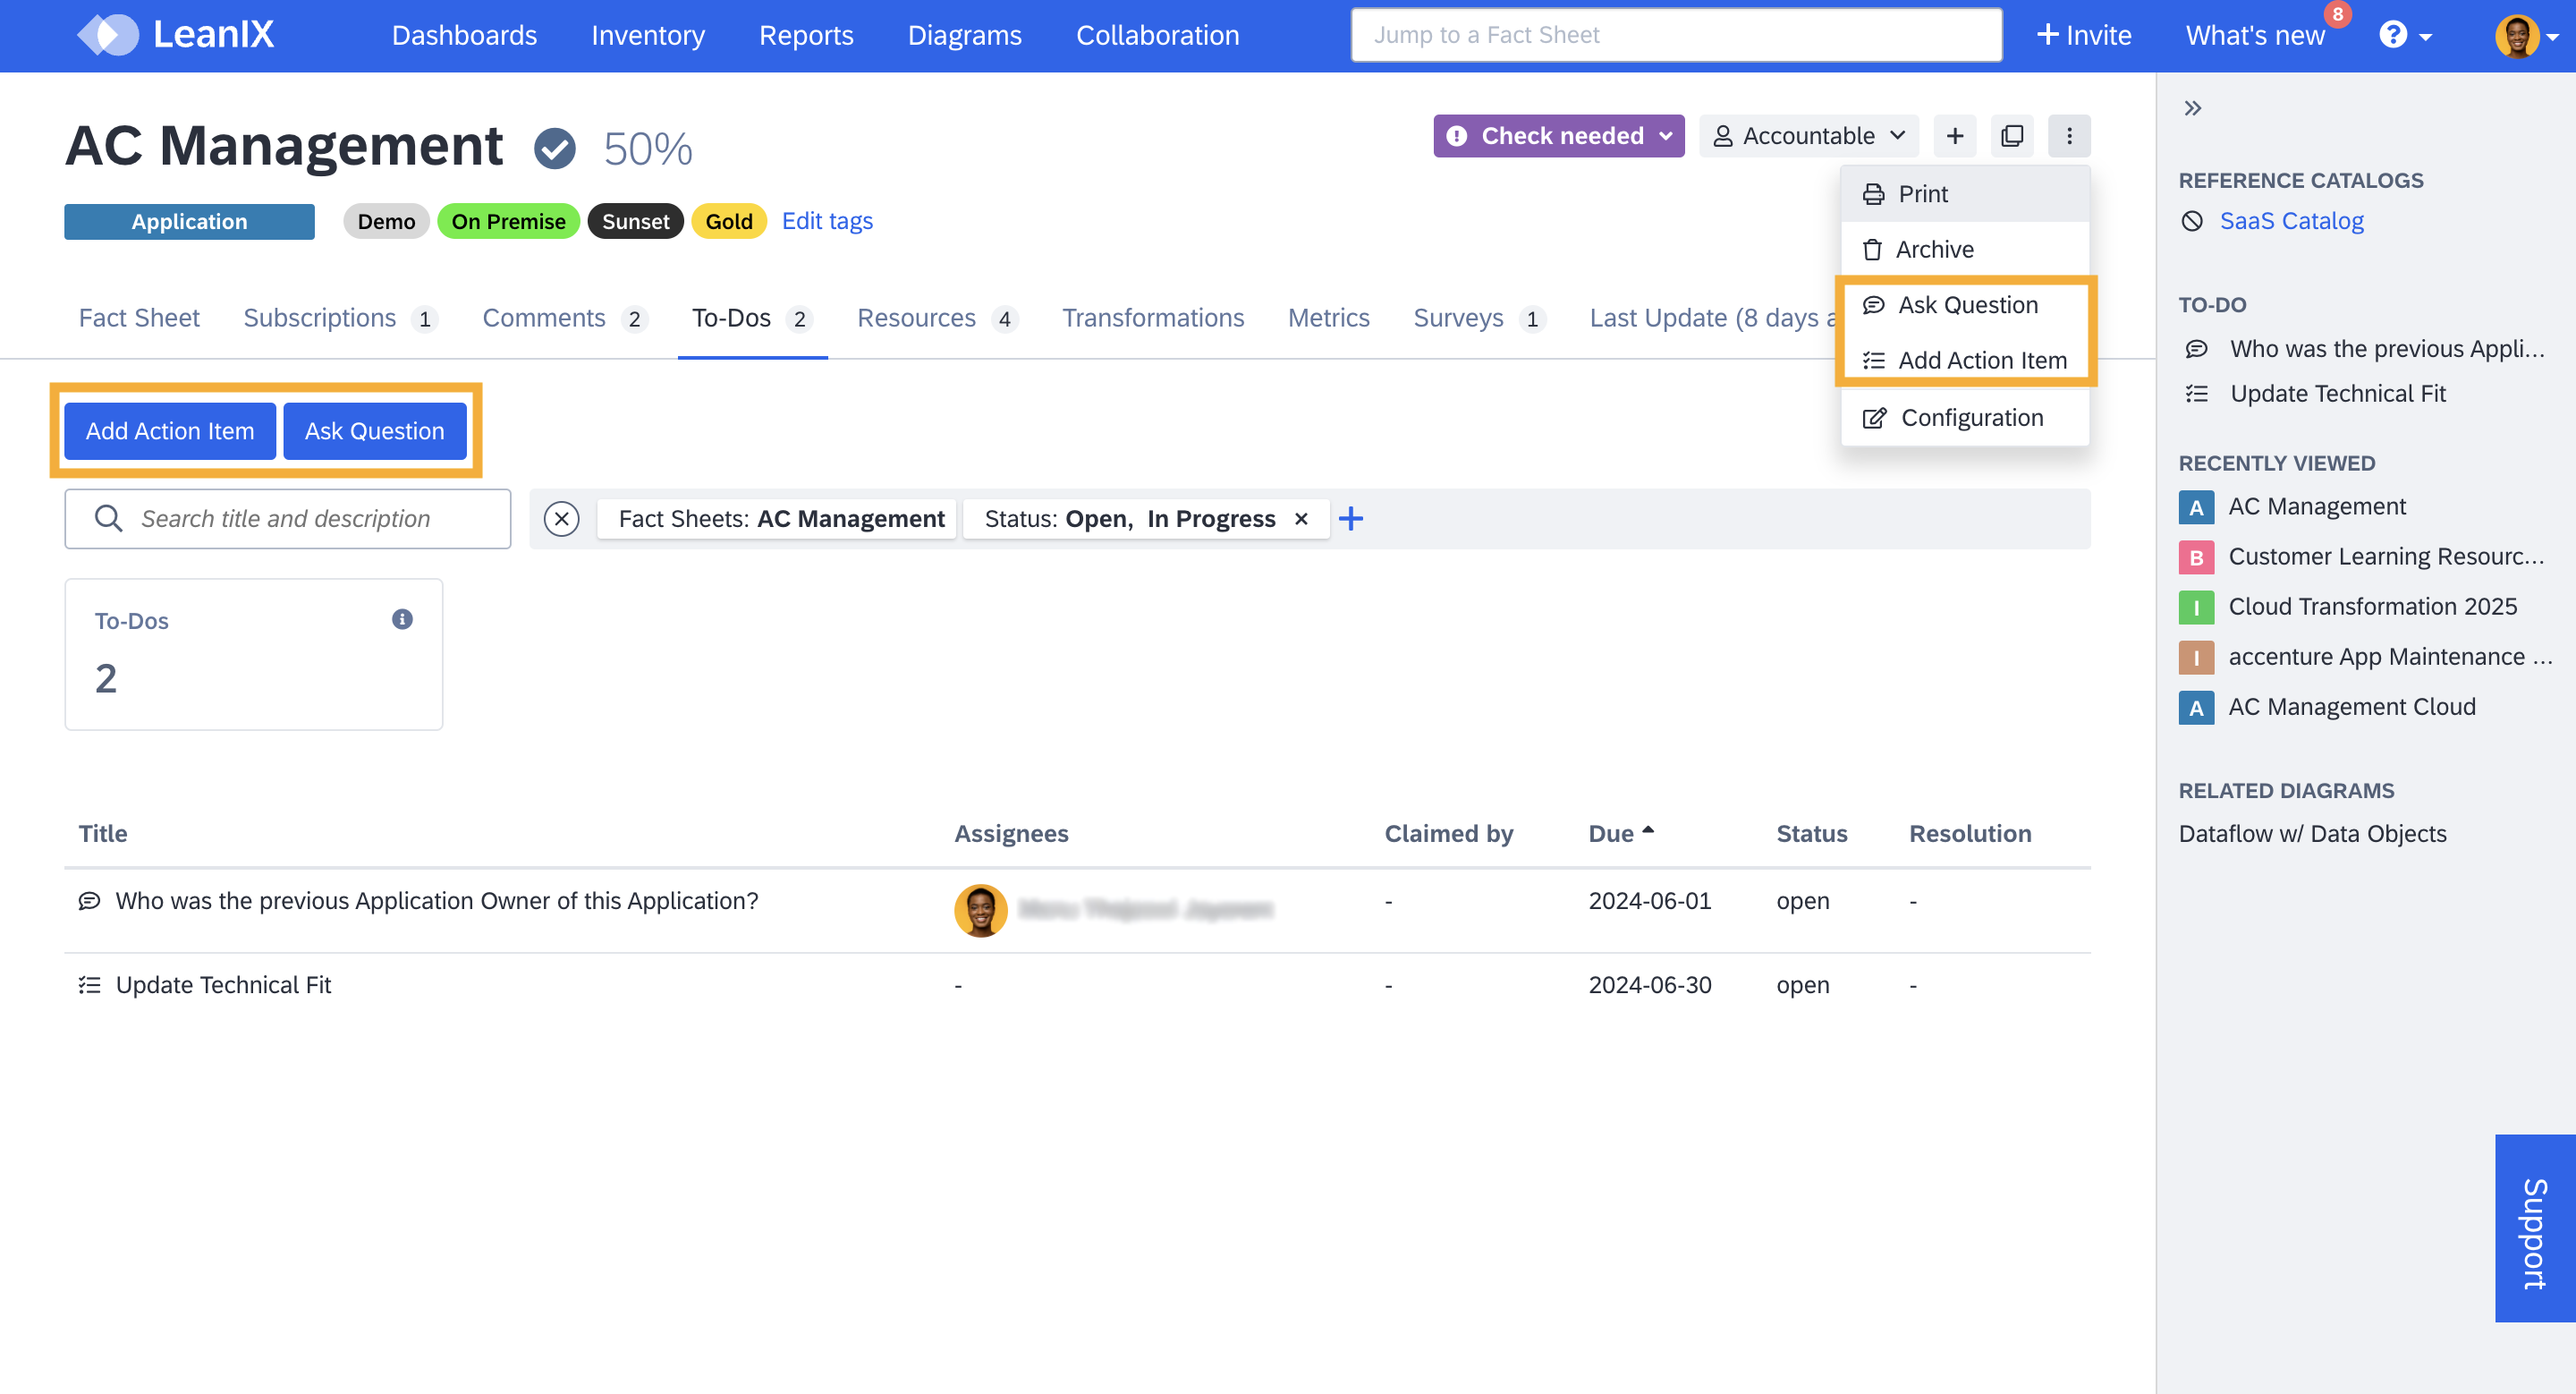
- Open the fact sheet in which the to-do item needs to be created and select the To-Dos tab.
- In the To-Dos tab, select Add Action Item or Ask Question, as needed. This action opens a modal where you can define your task or state your question.
Tip
You can also access the Add Action Item or Ask Question options from the More actions menu (represented by 3 dots) at the top right of the fact sheet. This provides quick and easy access without the need to navigate to the To-Dos tab.
Creating Action Item and Ask Question To-Dos
-
In the modal, provide a title, add a description, and due date. If the responsible person is known, assign them to the task.
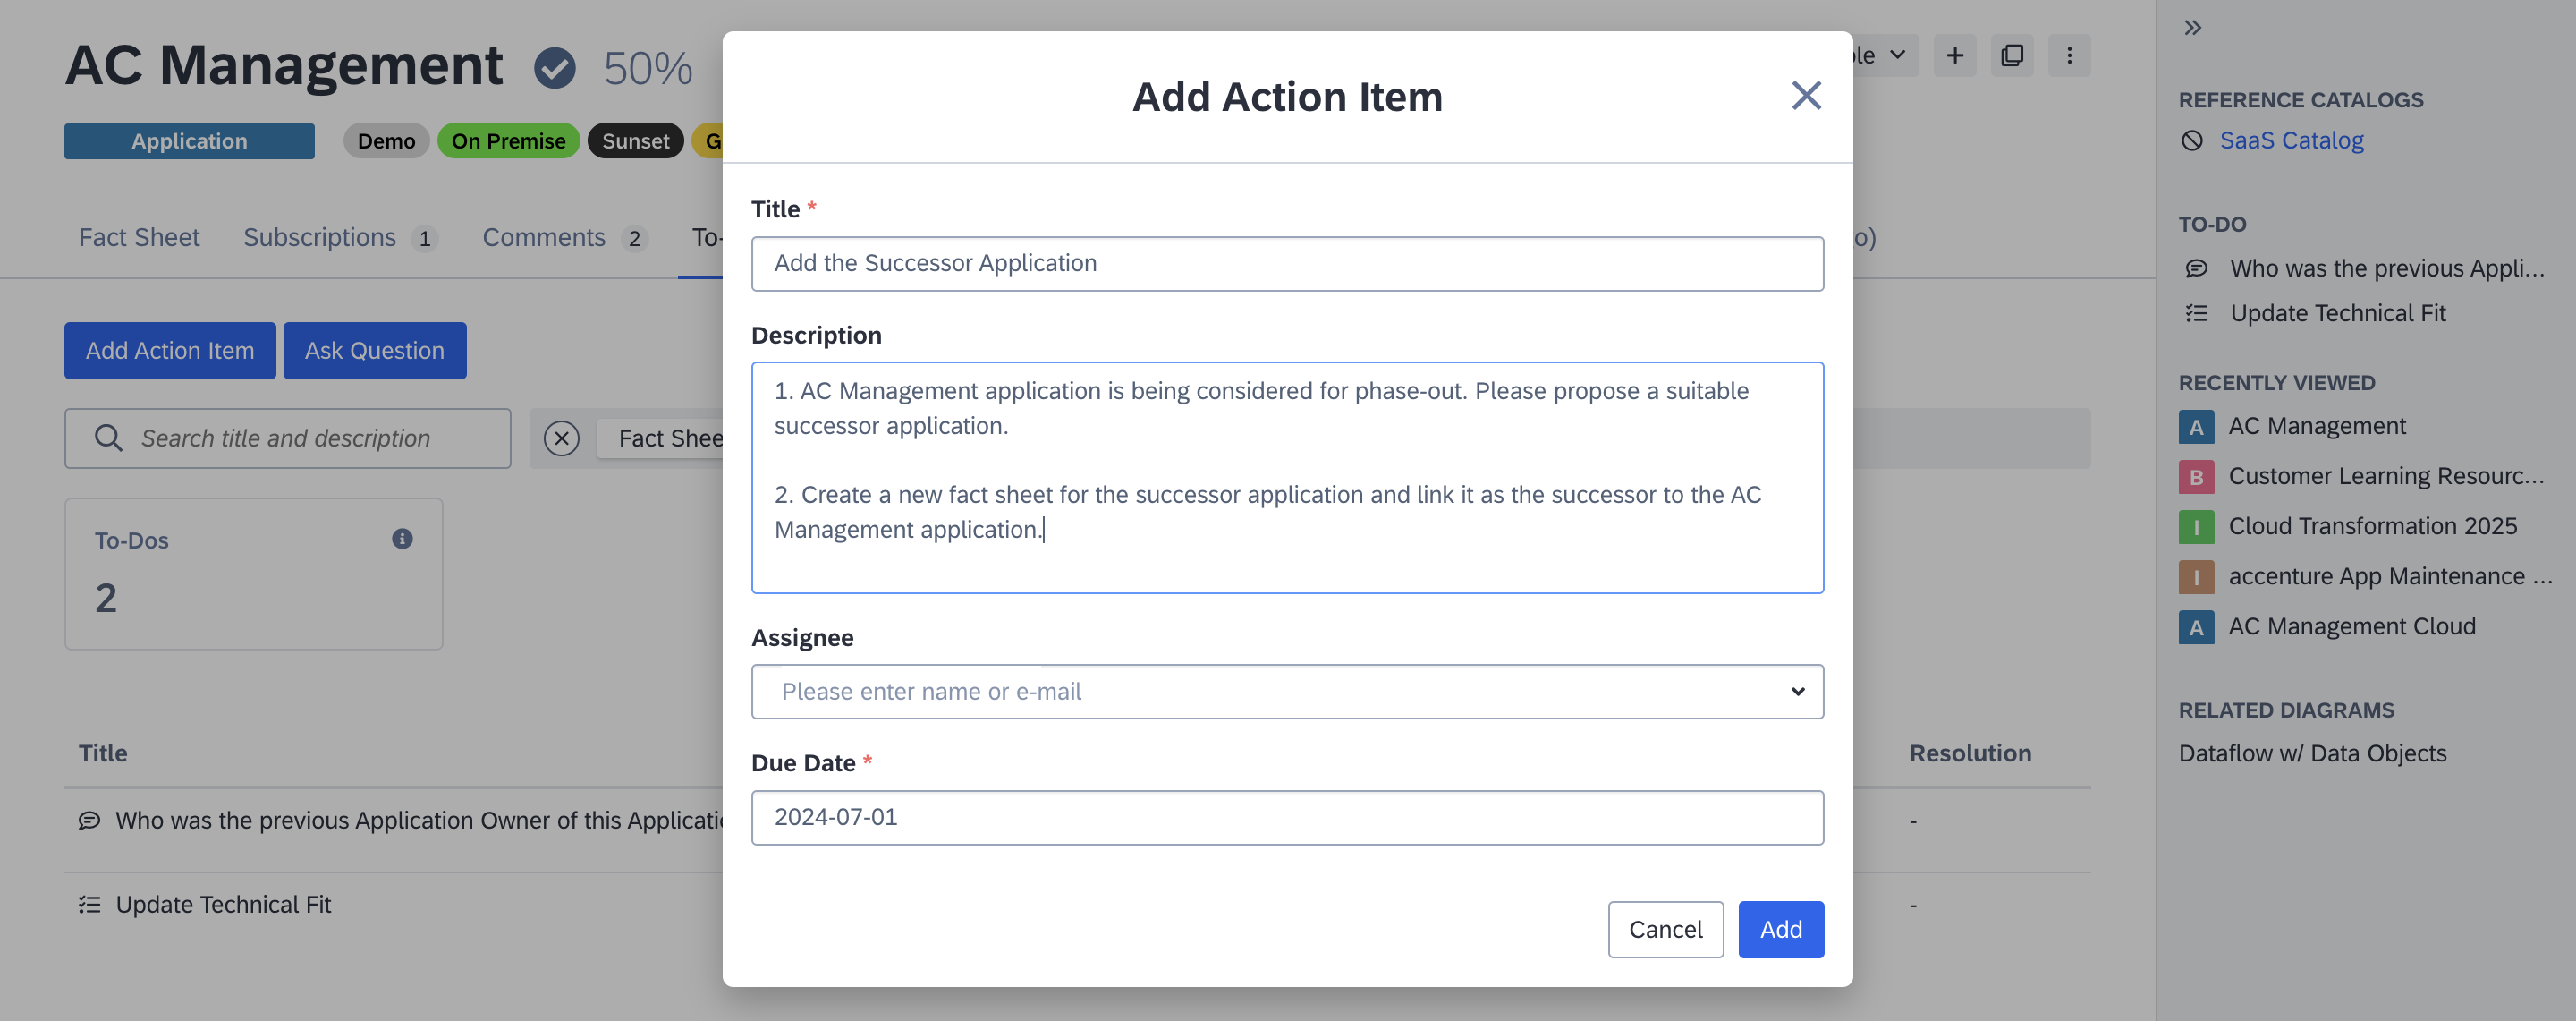
Defining a To-Do item
-
Click Add. This action saves the new to-do item in the To-Dos tab of the fact sheet.
Creating Approval To-Dos
Only admins can create approval to-dos. Approval to-dos are created through the automation feature in the administration area. When the automation is triggered, defined approval to-dos are automatically created and assigned to relevant users, making it an efficient means of governance. To learn how to create an approval to-do, see Creating Approval To-Dos.
Accessing To-Dos
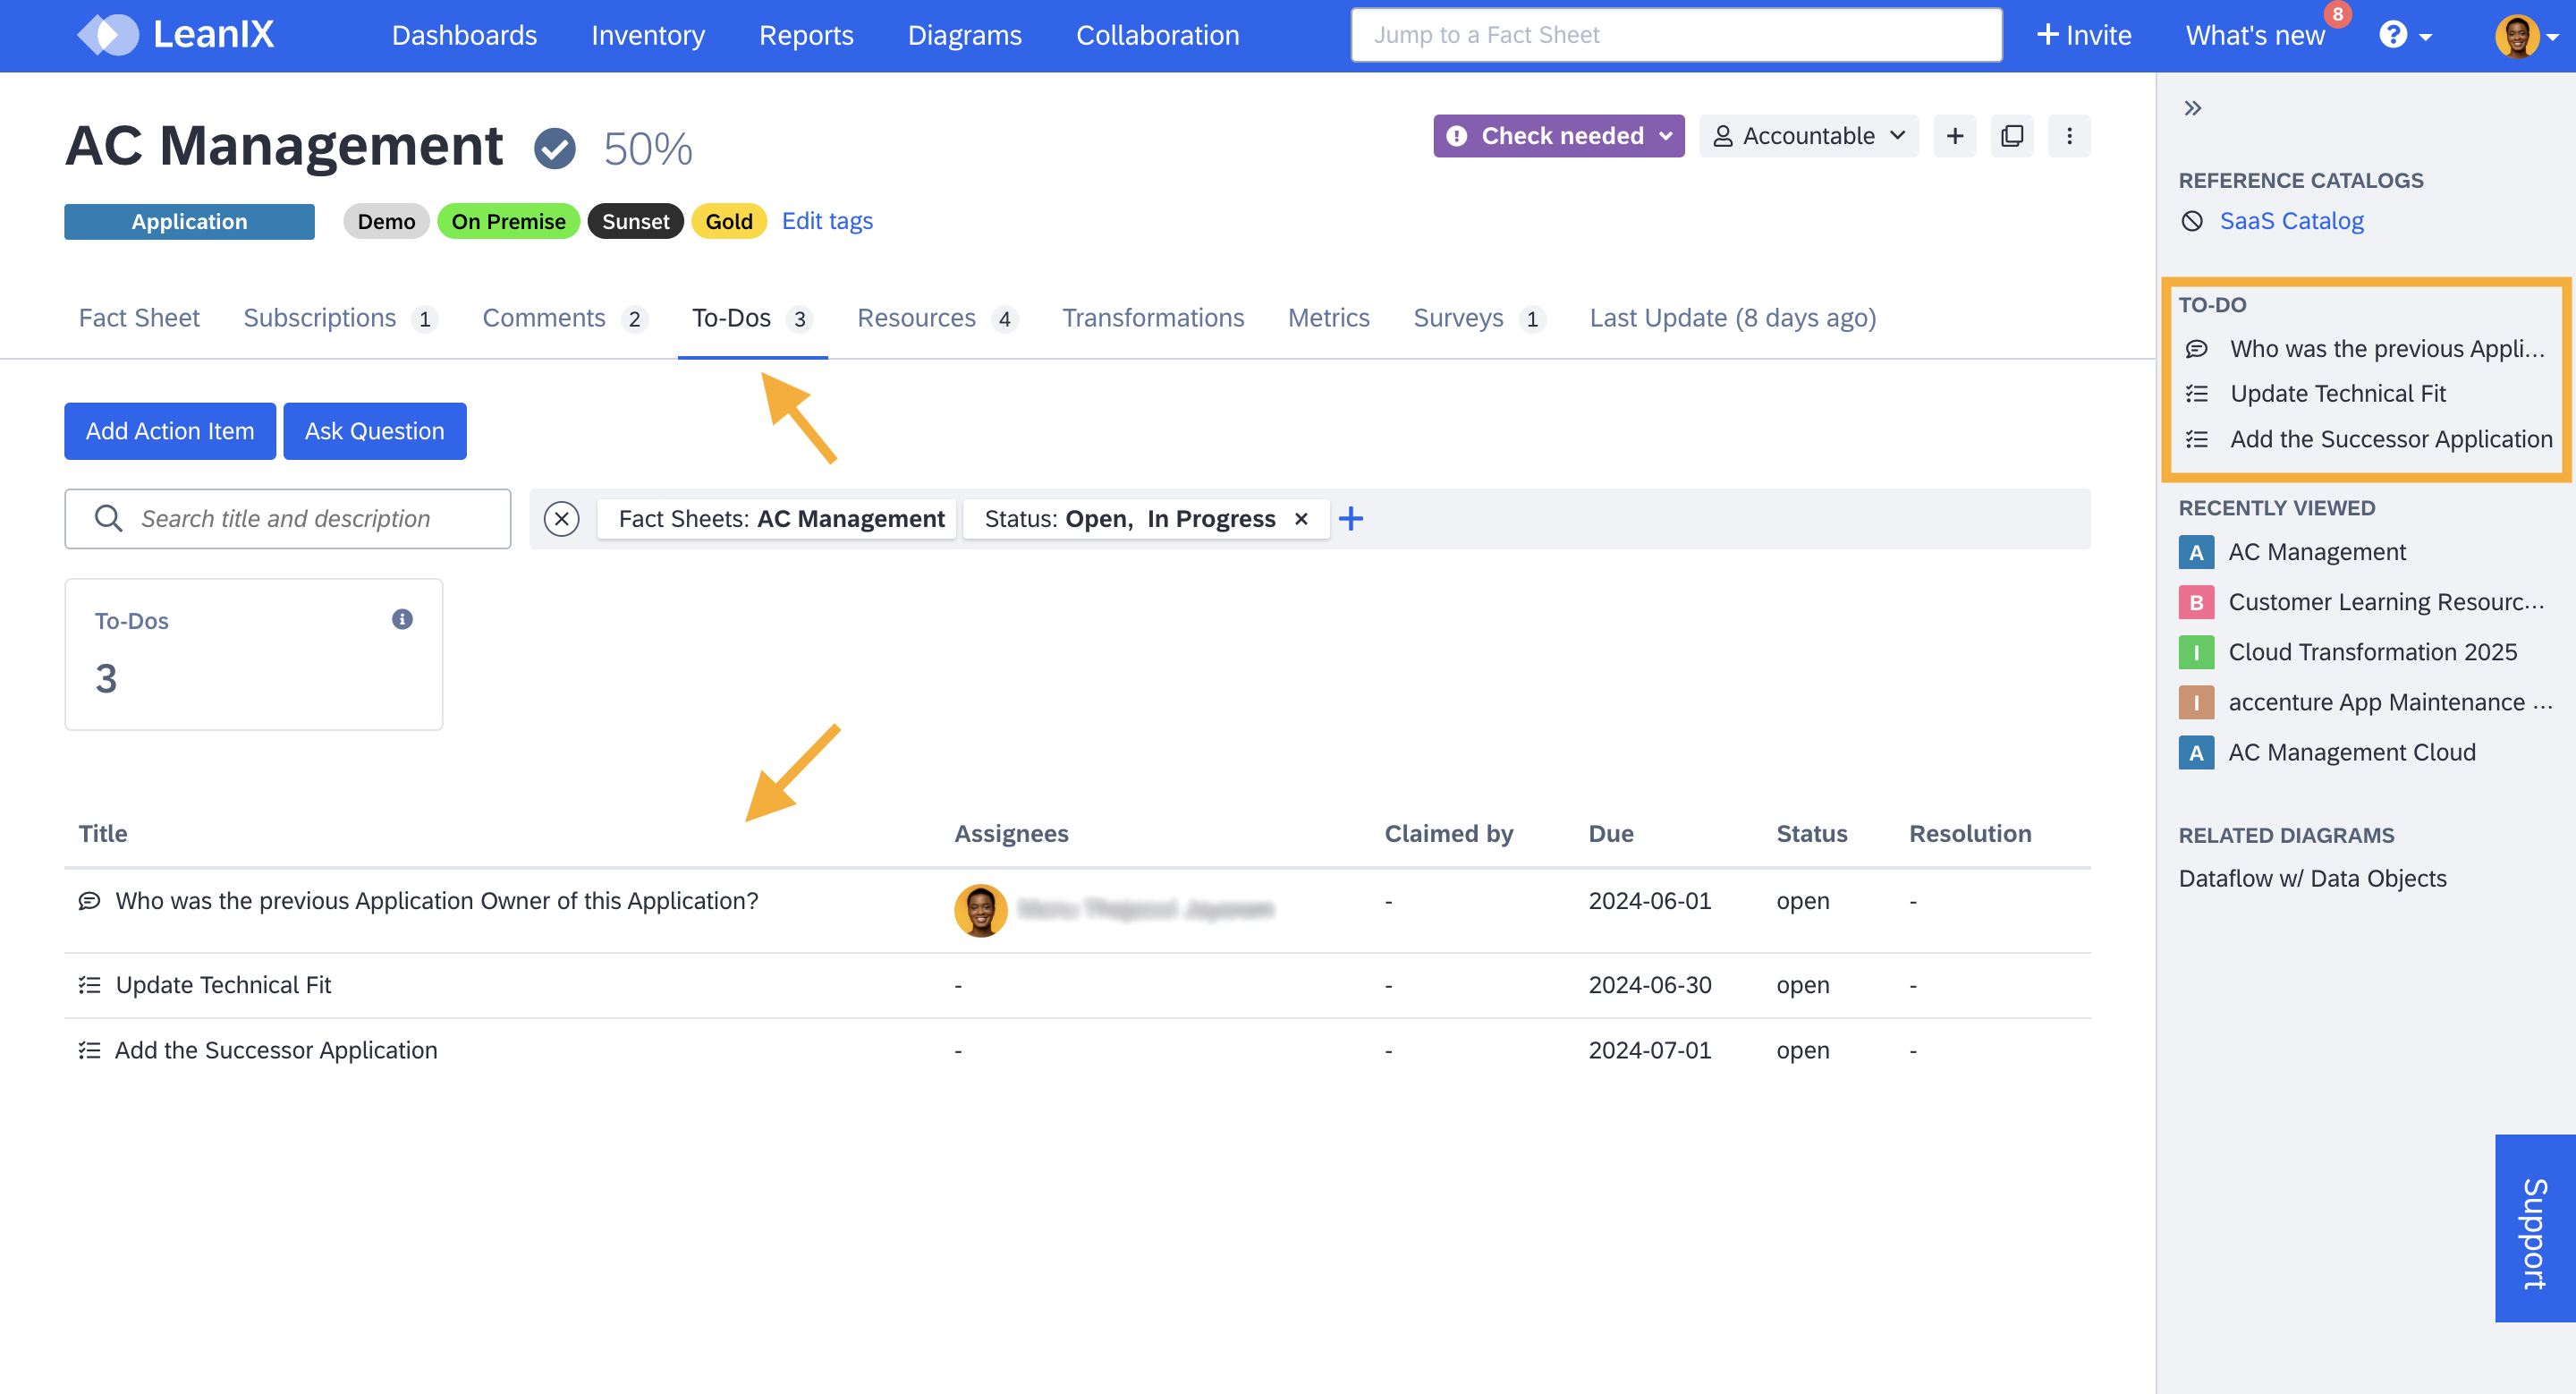
Accessing To-Do Items in the Fact Sheet
In the fact sheets, to-do items are accessed in the dedicated To-Dos tab. To-dos also have a prominent place on the right-side panel of fact sheets for quick access.
Accessing To-Do items in the Fact Sheet
Accessing the To-Do Items in the Dashboard
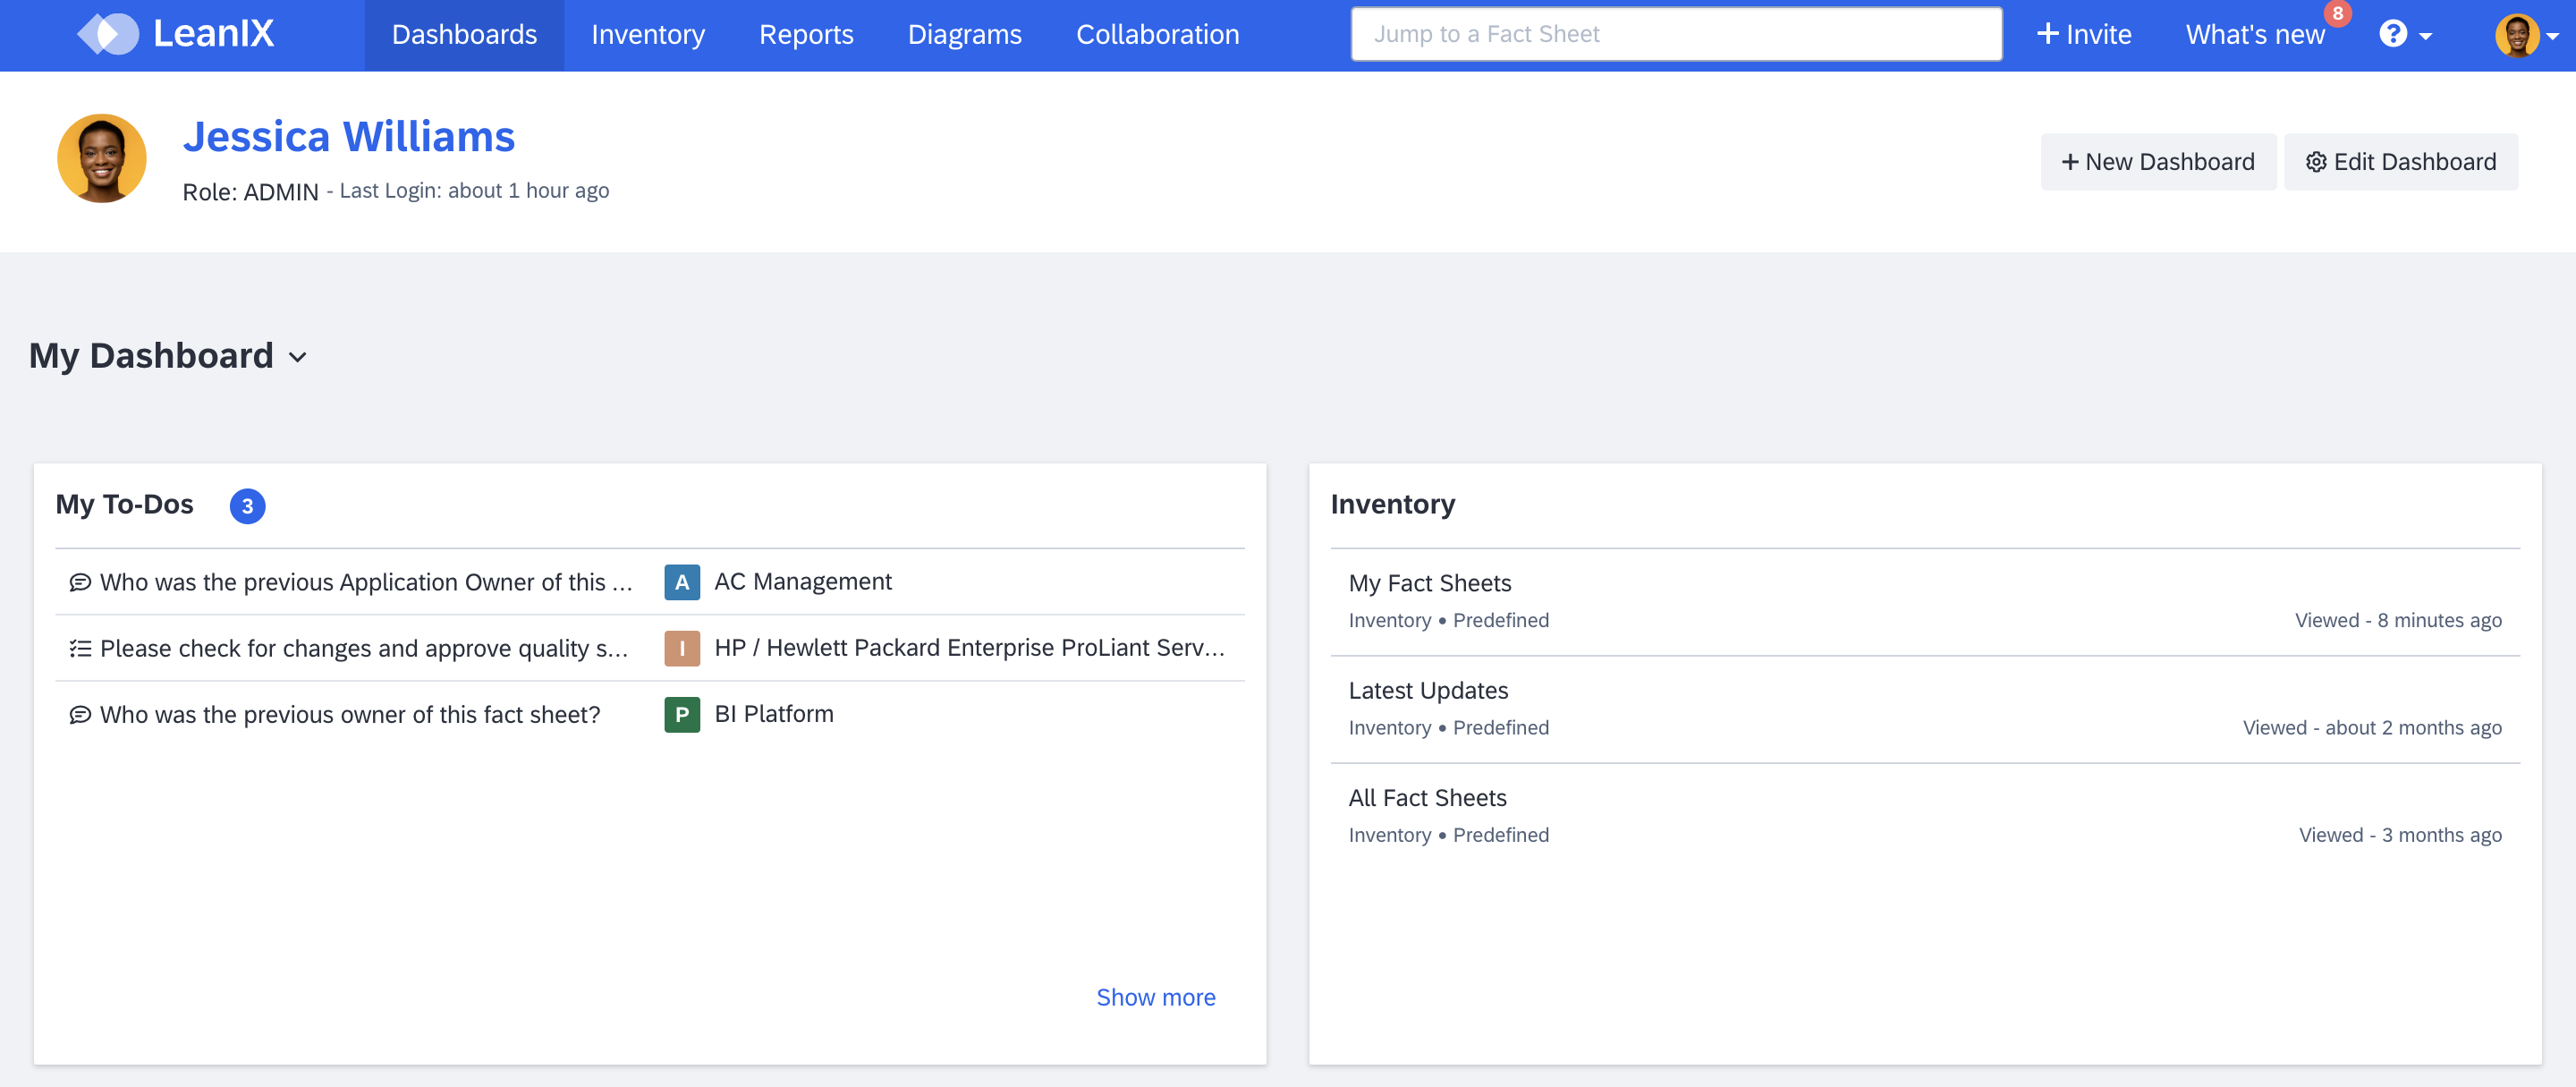
My To-Dos panel on the dashboard provides easy access to all to-dos assigned to you. This allows you to quickly access them without navigating through multiple pages or sections. It offers a clear overview of pending tasks, helping you prioritize and complete them in a timely manner. Selecting any of the to-do items or clicking on Show more takes you to the Collaboration tab. There, you can view, act on, or modify the to-dos.
My To-Dos Panel in the Dashboard
Note
If the My To-Dos panel is not visible in the dashboard, it is likely because the dashboard has been customized or a custom dashboard has been set as the default by your admin.
To learn how to add the My To-Dos panel or any other available panel, see Dashboards.
Accessing the To-Do Items in the Collaboration Tab
The collaboration tab is the centralized location for you to access all the to-dos assigned to you or created by you. You can search, sort, and filter the items to streamline your workflow and find the tasks you need to focus on.
In the collaboration tab you can view and act on the tasks that are assigned to you and modify the to-do items that were created by you.
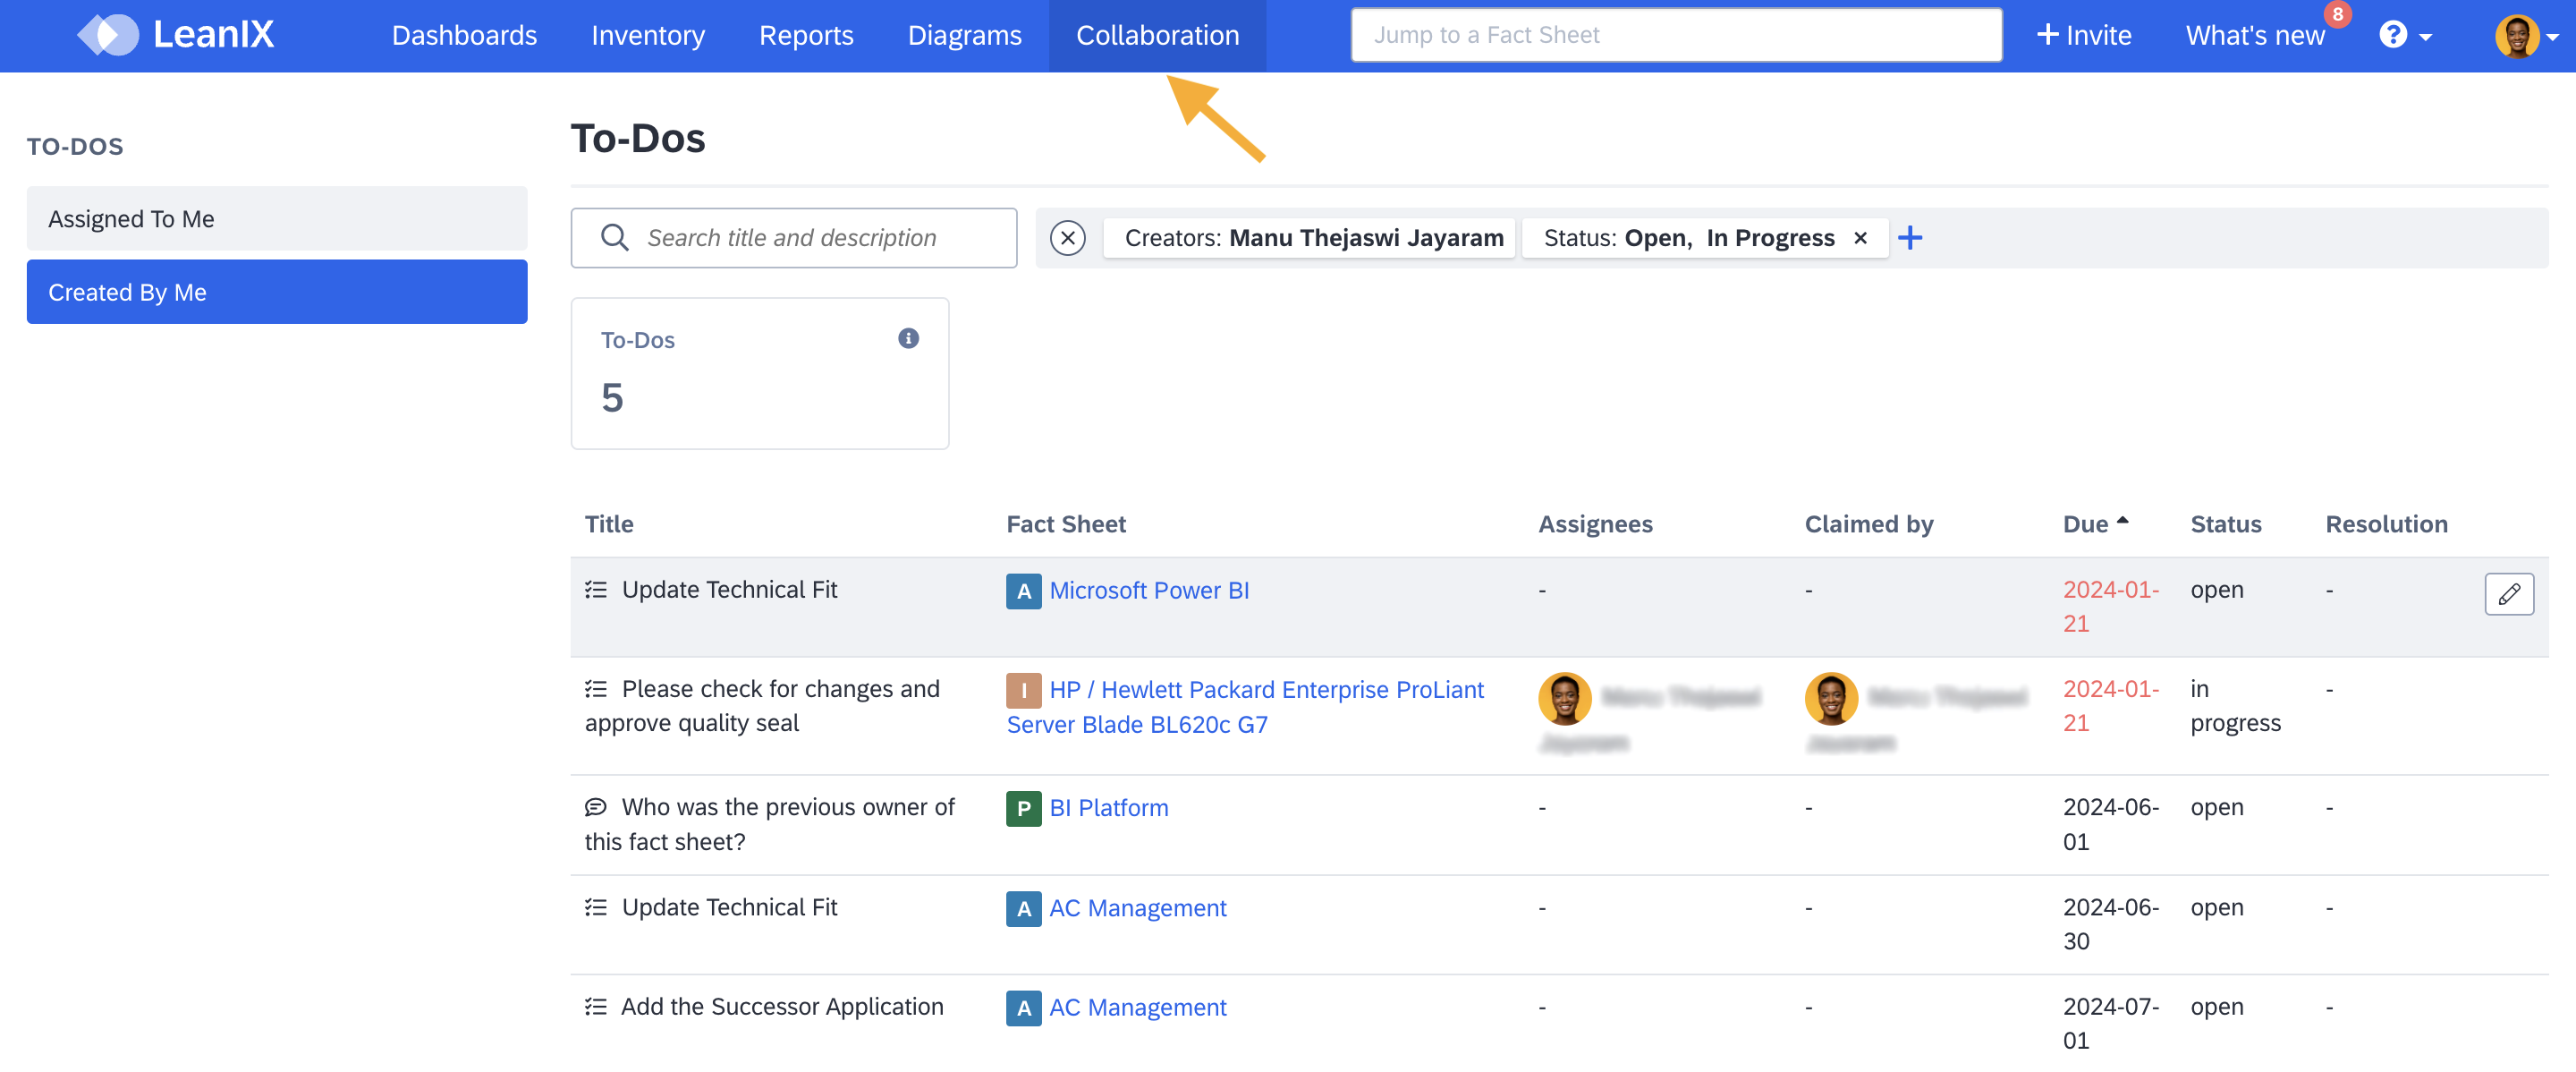
To-Dos in the Collaboration Tab
Accessing the To-Do Items in the Administration Area
To allow governance and track the completion of to-dos, admins have the additional possibility to access the list of all to-dos of a workspace centrally in one place from the administration area. You can search, sort, and filter the items and modify any of the to-do items. To learn more, see Managing To-Dos.
Modifying To-Do Items
In the collaboration tab, you can edit to-do items that were created by you. To edit a to-do item, do the following:
-
In the Collaboration tab, navigate to the Created by me section on the left.
-
Hover over the to-do item you need to modify, and click on the edit icon represented by a pen. This action opens an overlay where you can make your edits.
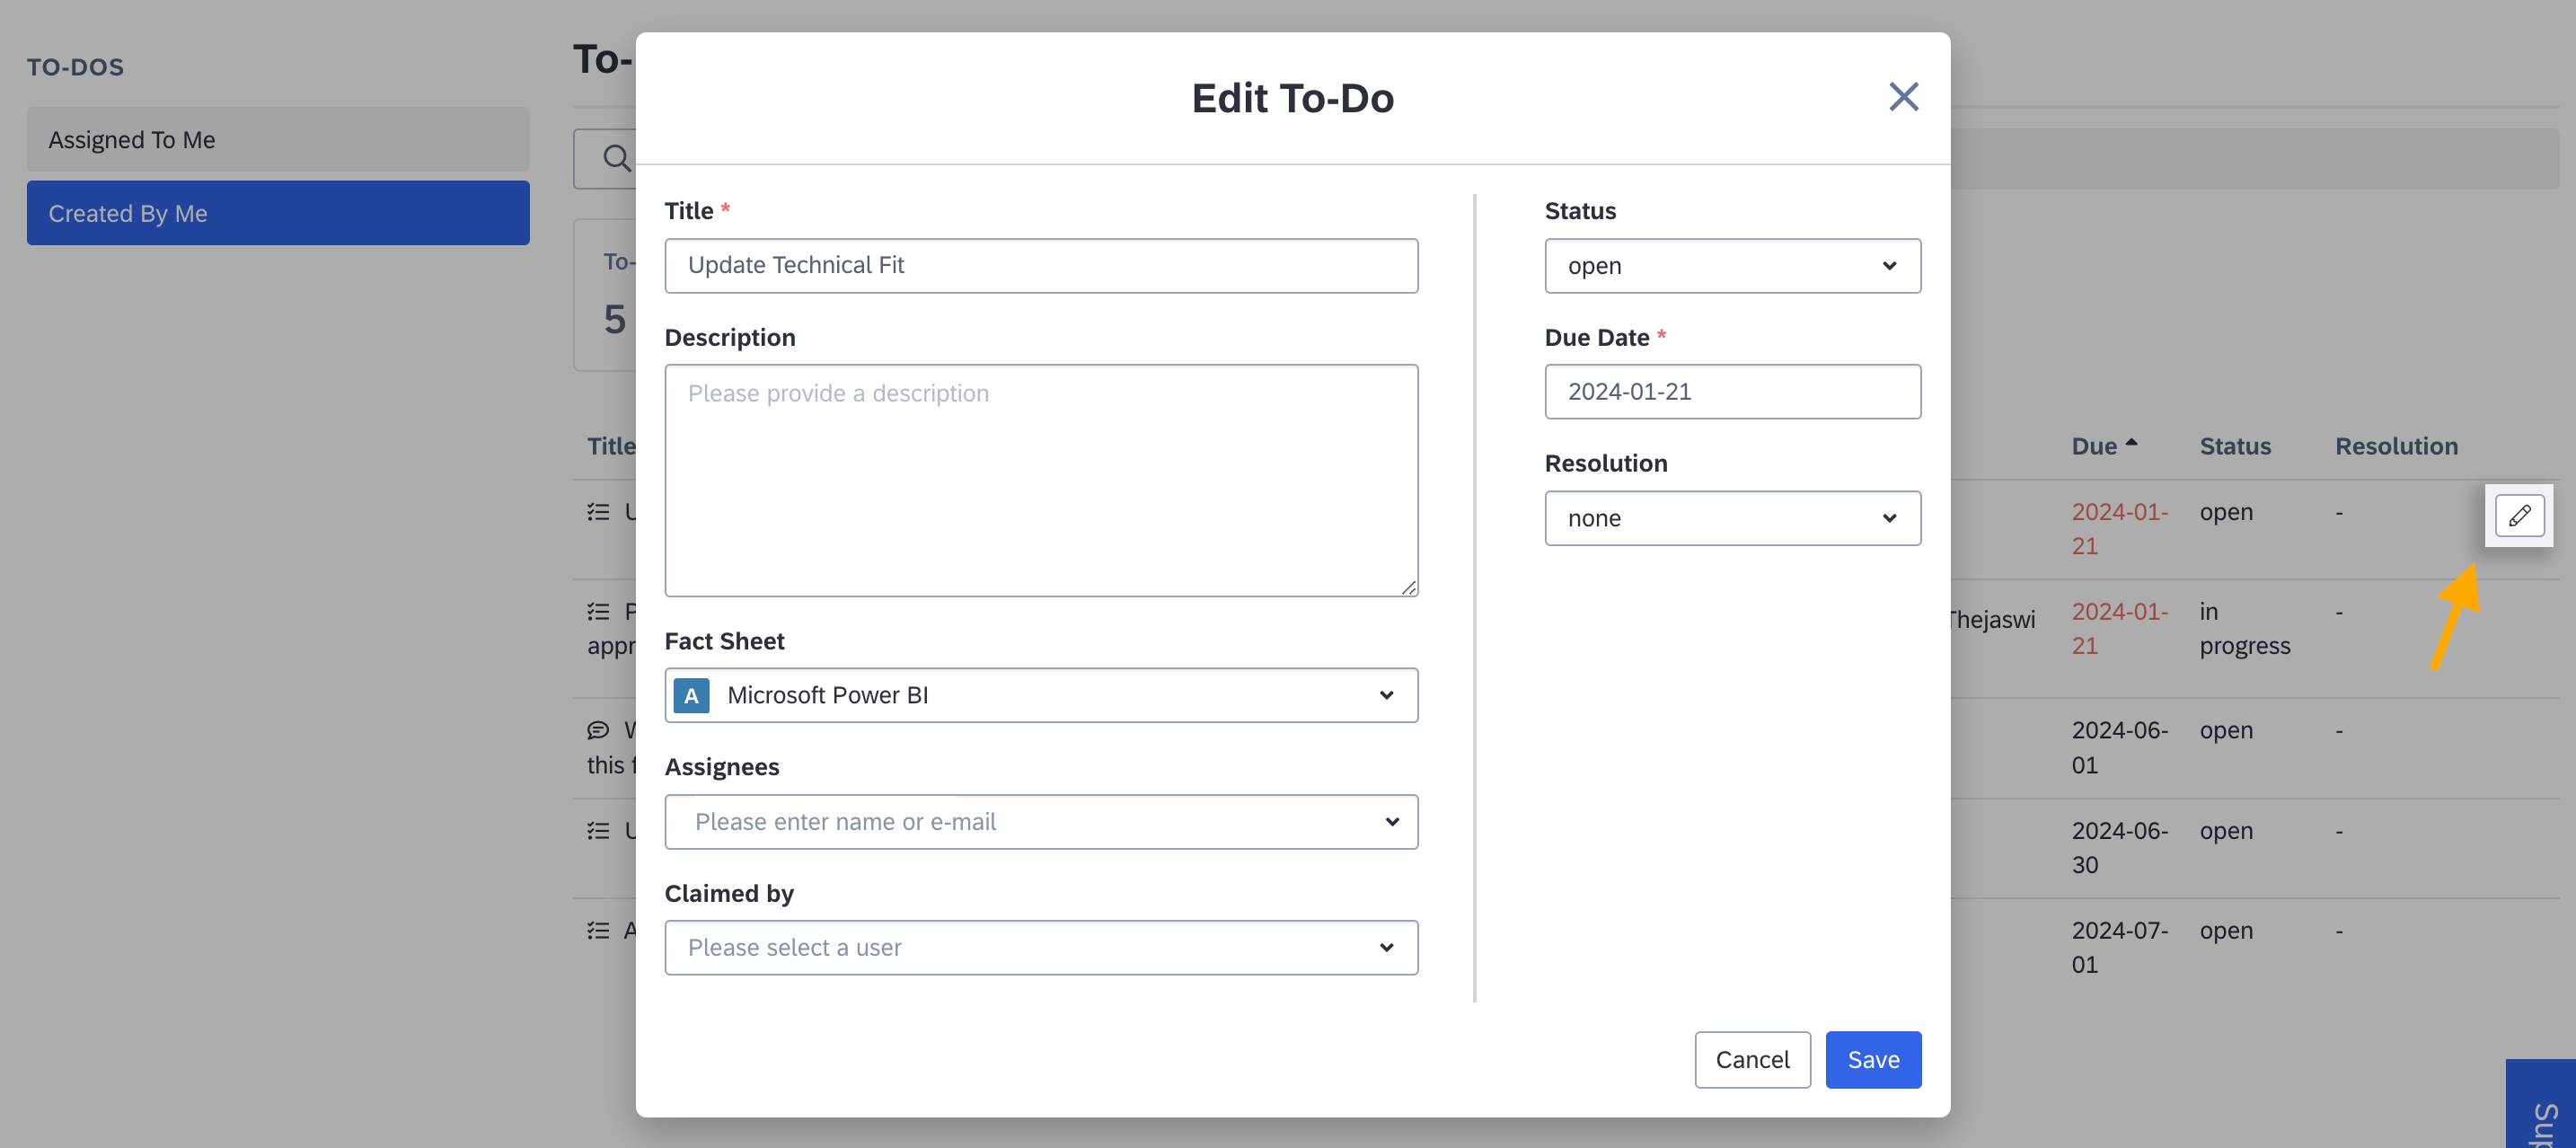
Modifying a To-Do Item
-
After making the needed changes, click Save.
Note
Admins can modify any to-do items in the administration area. To learn more, see Modifying To-Do Items in Administration.
Completing To-Do Tasks
The assignees or any user can claim and complete a to-do task.
-
For an action item to-do, simply click Mark as Complete after the task is completed.
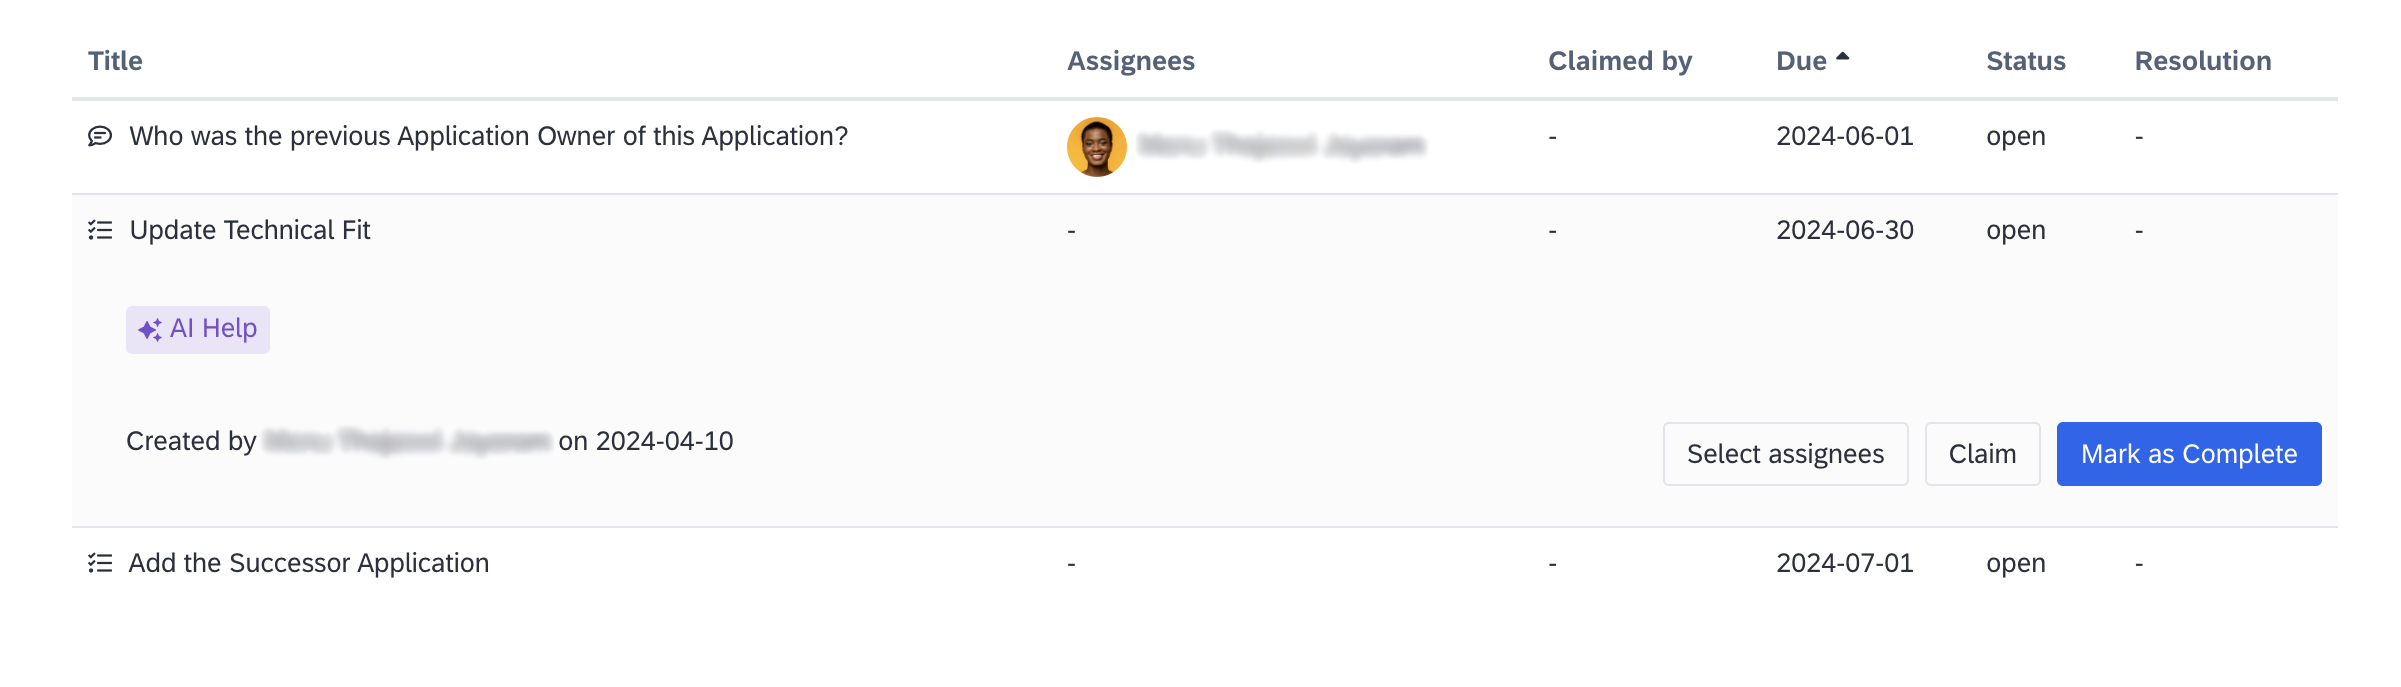
Marking an Action Item To-Do as Complete
-
For an ‘ask question’ to-do, provide the needed answer and click Reply and Close.
-
For an approval to-do, you can Approve or Reject the item based on the criteria and the established processes in your organization. When you need to reject an approval to-do, you are prompted to provide a reason for rejection.
Tip
When further clarification or additional information is necessary, consider using an ‘ask question’ to-do or the comments feature for collaboration before approving or rejecting the task.
When tasks are completed, their status changes to Closed, and the Resolution column indicates whether they were accepted or rejected by the creator of the task.
To remove unfinished tasks after the due date has passed, you can select Close unresolved.

Close Unresolved Tasks
Completed to-dos disappear once the page is refreshed.
The Claim button allows you to take ownership of a task. It indicates to others that you are committing to complete it. This helps prevent multiple users from working on the same task simultaneously.
Any user can claim a to-do task; it is not limited to the assignee.
If no assignees are initially assigned to a task, you can assign it to the appropriate person or persons through the Select assignees button. Additionally, you can change or add more assignees to the task as necessary using the same button. It is a means to assign responsibility to the appropriate person or persons.
Having an assignee is not a requirement for completing a task.
Notifications
Users receive notification when they are assigned to a to-do item and a reminder when the due date is reached. To-dos can be assigned to individuals or multiple users as needed.
These notifications are accessible through all channels configured in your notification settings. Notification aims to ensure buy-in, especially from stakeholders who do not regularly use SAP LeanIX as their primary tool.
You can change your notification settings by navigating to Notifications under My settings and selecting To-Do. To learn more about notifications, see Notifications.
Updated 23 days ago