
Users Overview
View workspace users and manage their access permissions and roles.
Overview
Note
Depending on whether single sign-on (SSO) is enabled for your organization or not, the procedures for managing user access and roles vary. For more information on each scenario, see Managing Users.
To learn how to enable SSO, see Single Sign-On (SSO).
In the Users section of the administration area, you can do the following:
- View and manage workspace users and contacts
- View user details and change their roles
- Export user data by clicking Export
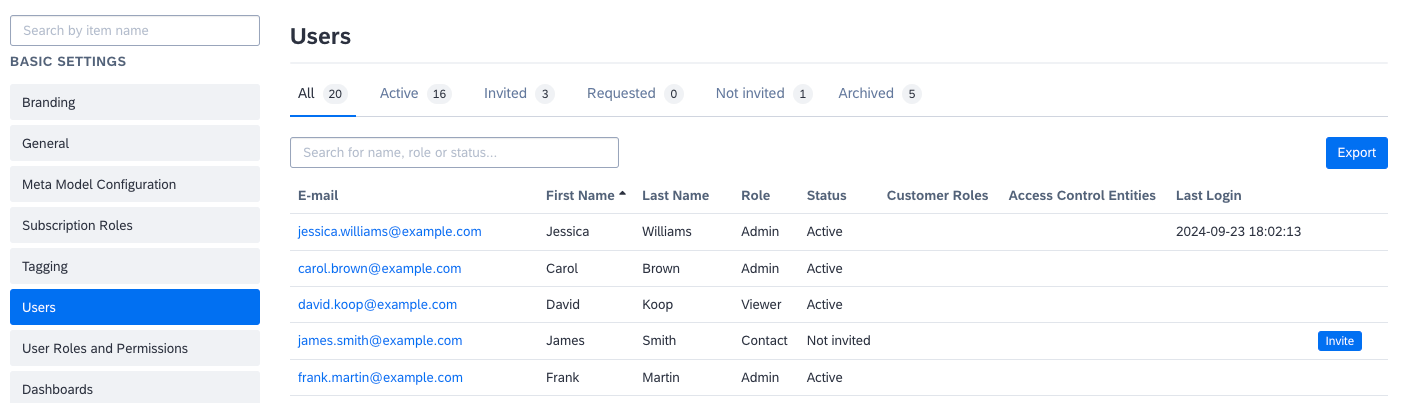
Users Section in the Administration Area
User Statuses
The following table lists the tabs that appear on the Users page, each corresponding to different user statuses.
| Tab (User Status) | Description |
|---|---|
| All | All workspaces users, except for archived ones. |
| Active | Users whose permission for the workspace is active. |
| Invited | Invited users who haven't yet accepted the invitation request. You can reinvite a user by clicking Re-invite. |
| Requested | Invited users who haven't yet been approved by an admin. This admin invitation mode can only be enabled by SAP LeanIX Support. |
| Not invited | Users subscribed to fact sheets as contacts. To learn more about contacts, see Contacts. |
| Archived | Users whose permission for the workspace is archived (deactivated). Archived users don't have access to the workspace. |
Note
On the Users page, the count of users on each tab also includes technical users, but these users are not listed. For additional information, see Technical Users.
Contacts
In SAP LeanIX, users who are subscribed to fact sheets but haven't yet been invited to the workspace and don't have an SAP LeanIX account are called contacts. Contacts are created when non-SAP-LeanIX users are added as fact sheet subscribers. For more information, see Adding Non-SAP-LeanIX Users as Subscribers.
The table below highlights the differences between contacts and workspace users:
| Criteria | Contact | Workspace User |
|---|---|---|
| Status To learn more about statuses, see User Statuses. | Not invited | - Active - Invited (users who haven't yet accepted the invitation request) |
| Ways to add users | - Excel import (subscriber) - Inline table editing (subscriber) - API request | - Email invitation - SSO - SCIM - API request |
| Can be added as a subscriber | Yes | Yes |
| A permission role is assigned | No | Yes |
| Access to the workspace | No | Yes |
| Receives notifications and surveys from SAP LeanIX | No | Yes |
You can view all contacts on the Not invited tab in the Users section of the administration area. When needed, you can invite contacts to a workspace individually or in bulk by clicking Invite on the right. For SSO-enabled workspaces, to prevent sending invitation emails, clear the Send Invitation Email checkbox in the invitation overlay.
You can also invite contacts from the Subscriptions tab on a specific fact sheet or by using the Invite User option in the user profile menu.
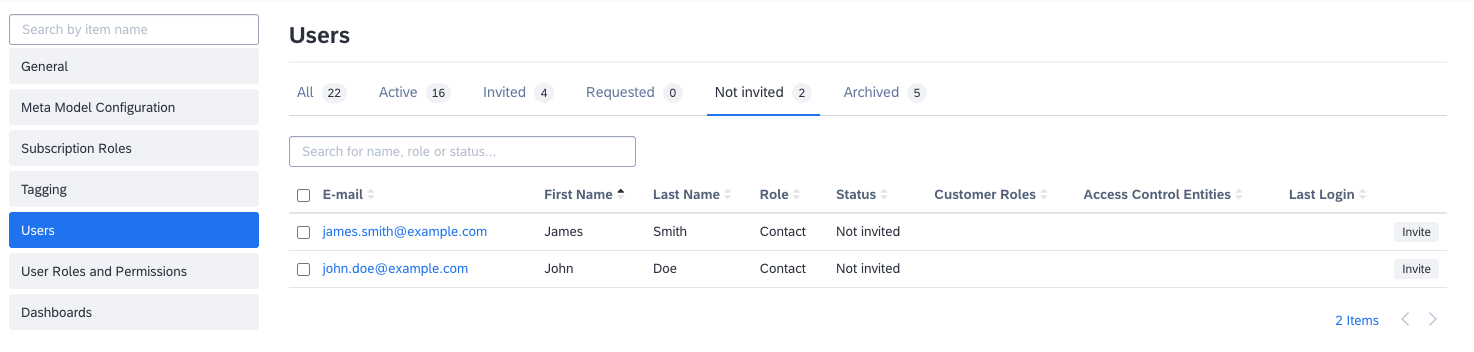
Contacts on the Not Invited Tab in the Users Section of the Administration Area
User Details
To view information for a specific user, on the Users page, select a user by clicking their email address. On the user details page, you can:
- View user details: This includes the user's email address, name, status, role, and last login time.
- Deactivate a user: To deactivate a user, click Archive next to Status. You can't delete users. You can only archive them.
- Change the user's role: If SSO isn't enabled or you're managing roles within SAP LeanIX with SSO, you can change a user’s role on the user details page. Select a different role from the Roles list and click Save. The new role takes effect upon the user's next sign-in.
- View user's fact sheet subscriptions: On the User Subscriptions tab, you can view all fact sheets a user is subscribed to, along with their subscription type and role for each fact sheet.
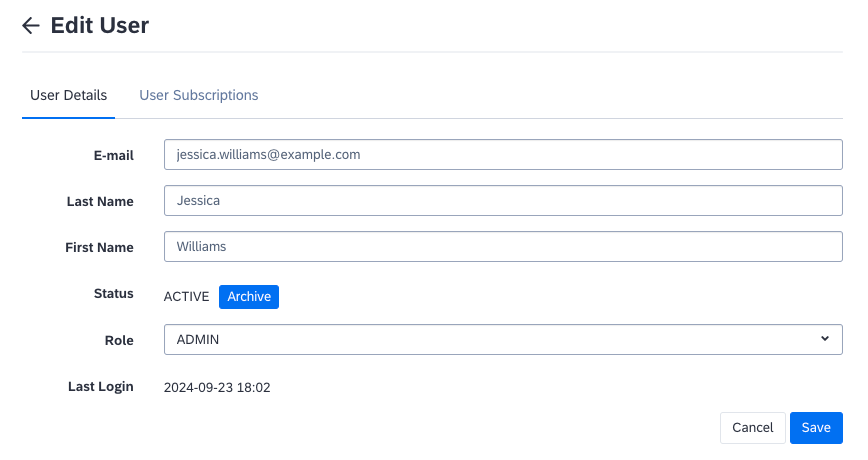
User Details Page
Updated 3 months ago