
Sending Out the Surveys
Preview how the survey looks to the recipient, define the survey recipients based on fact sheet subscription roles, and compose an email invite to distribute the survey.
Introduction
After creating your survey form, you preview its appearance and prepare to send it out. In this stage, you'll define the survey recipients based on fact sheet subscription roles and compose an email invite. This ensures your survey reaches the right audience and clearly communicates its purpose.
Previewing the Survey
After designing your survey, you are directed to the Preview tab. The preview feature provides you with an accurate representation of how the survey form will appear to recipients.
In the preview tab, the survey shows only the first fact sheet from the scoped fact sheets of the survey. Any changes made in the preview mode are not saved to the fact sheet; hence, it is an ideal platform for you to test configurations such as conditionality, calculated fields, etc. However, sections containing fact sheet relations are shown in a read-only state.

Previewing the Survey
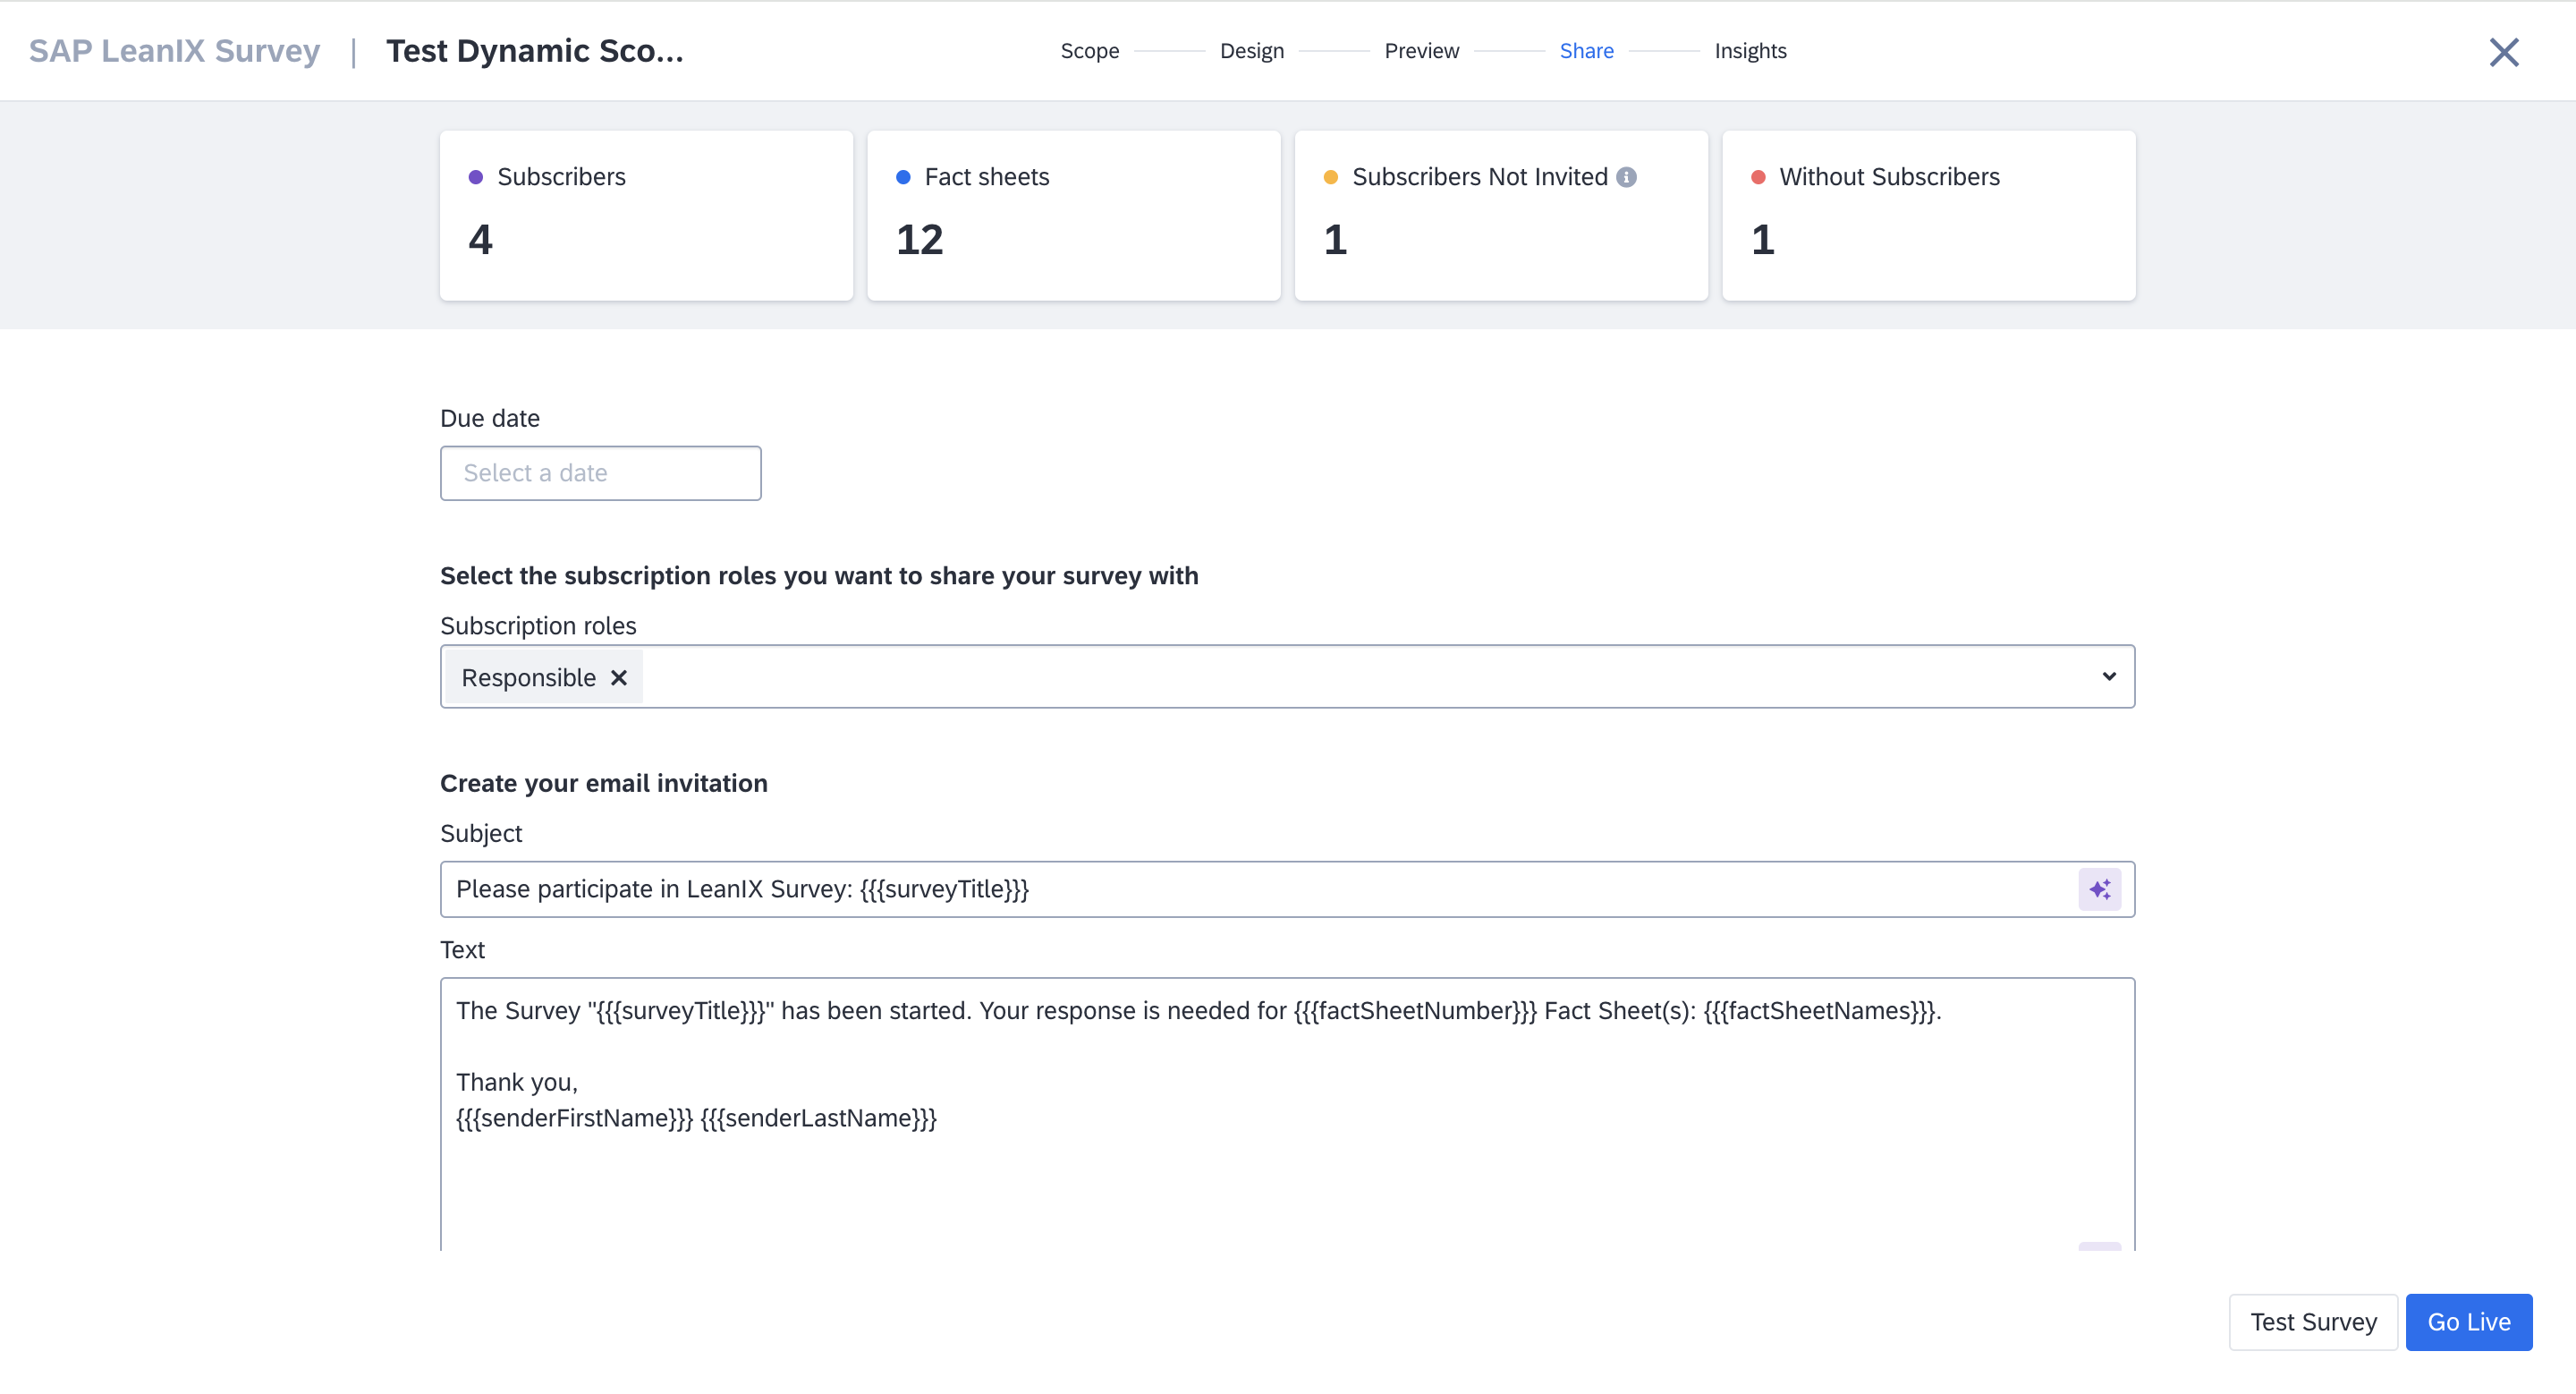
Defining Survey Recipients
After reviewing the survey, proceed to the Share tab to specify the survey recipients. You can create the recipient list by selecting the subscription roles.
Surveys can be sent out only to active users and not to contacts. Active users are those who already have access to the SAP LeanIX workspace, while contacts are those who are subscribed to fact sheets but haven't yet been invited to the workspace and don't have an SAP LeanIX account.
Every active user can receive a survey, regardless of their user role in the workspace. However, if they lack the necessary permissions to edit a fact sheet, they won't be able to answer questions linked to fact sheet fields. To learn more about permissions, see Role-Based Permissions.
The KPI cards at the top provide information on the number of subscribers receiving the survey, the number of fact sheets affected by the survey, the number of subscribers who do not yet have access to the workspace, and the number of fact sheets without subscribers. Clicking on KPI cards gives you further details.
To ensure full participation of recipients, review the fact sheets without recipients, assign subscribers, and ensure that those subscribers are active users.
Best Practice
- Introduce subscription roles based on your organization's defined roles. This ensures you can address a specific set of individuals, such as an Application Owner, Solution Architect, or Data Security Officer. To learn more about subscriptions, see Subscription Roles.
- Survey recipients can add non-SAP LeanIX users as fact sheet subscribers through the survey. This is an effective way to involve the right people who can take ownership of fact sheet data even if they haven’t joined the workspace yet. To learn how, see Assigning Fact Sheet Subscriptions Through Surveys.
Sending Out Surveys
Creating Survey Emails
Fixed Content
Salutation: Certain elements of the survey email are configured based on your workspace's language settings and cannot be altered. For example, if your workspace language is set to English, the email will begin with greeting "Dear Sir/Madam".
'Go to Survey' Button: All survey emails will include a "Go to Survey" button at the end, ensuring a clear call to action for recipients.
Customizable content
You have the flexibility to personalize the text in your survey invitation emails. By incorporating placeholders within curly brackets, such as {{{factSheetNames}}}, you can make each email more specific to the survey and the recipient's involvement. These placeholders will be automatically replaced with the relevant information when the email is sent.
The following placeholders can be used in the email:
factSheetNumber: number of involved fact sheets
factSheetNames: comma-separated names of all involved fact sheets
addedFactSheetNumber: number of newly added fact sheets to the survey
addedFactSheetNames: comma-separated names of newly added fact sheets to the survey
surveyTitle: title of the survey (as seen when answering the survey)
senderFirstName: first name of the survey sender
senderLastName: last name of the survey sender
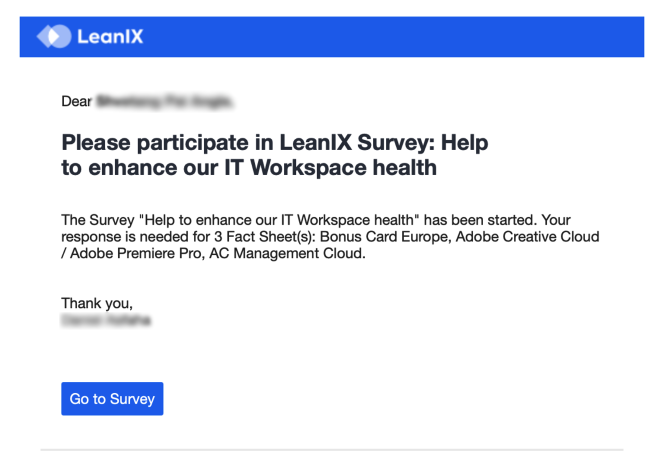
Email Invite for Survey Participation
Decommissioning of {{{surveyLink}}} Placeholder
New survey emails now include a Go to Survey button instead of a link. As a result, the {{{surveyLink}}} placeholder can no longer be used in survey invites. When designing a survey from an old template, you will be prompted to remove survey link placeholders to proceed forward.
AI-Generated Context
Use the AI-generated context feature to easily craft survey invite text. This feature learns from your survey context, including the title, questions, and embedded fact sheet fields, to generate personalized email content.
To use the AI-generated context, click on the AI help icon at the bottom right corner and select Generate new text. If needed, you can regenerate the response again or revert back to the default template by clicking Default.

Using AI Capabilities for Survey Invite Email
Note
AI-generated context feature is available if you have enabled AI cababilities for your workspace. To learn more, see AI Capabilities.
Testing the Survey
After completing your survey design, you can test it by clicking the Test Survey button. Add an email address and send it out to observe how the survey appears to your recipients, ensuring that everything looks as intended before running the survey. You can test the complete user journey of a survey recipient, starting from the survey invite showing up in your inbox, viewing the survey form, filling out the form, and submitting the survey. During a test run, only one fact sheet is displayed, as the survey response form remains consistent for all fact sheets. If everything looks as intended, hit Go Live to execute the survey.
Note
The test run does not update any fact sheet data and does not create survey results.
Attention
Once the survey goes live, the Scope, Design, Preview, and Share tabs become inaccessible, and you can not edit its design and questions until the survey run is finished. To learn how to finish a survey, see Finishing a Survey.
Updated about 2 months ago