
OData Integration
Export fact sheet data into business intelligence tools through OData endpoints.
Overview
The OData integration provides a read-only connector to export fact sheet data in the form of saved searches (also referred to as bookmarks) to business intelligence (BI) tools. This integration enhances your ad-hoc reporting capabilities, allowing you to take advantage of the extensive features that various BI tools offer. Because this is only a one-way integration, importing data back into your SAP LeanIX workspace is not possible.
You can configure the OData integration with the BI tool of your choice, such as Microsoft Power BI, Tableau, SAP Analytics Cloud, and more. To configure the integration, follow the steps described in this guide.
Note
The current integration supports OData version 4.
Prerequisites
- In SAP LeanIX:
- Administrator access to your workspace.
- An API token. You can get it by creating a technical user. For details, see Technical Users.
- Access to your BI tool.
Procedure
- In SAP LeanIX:
- In the Integrations section of the administration area, enable the OData integration.
- In the inventory, create and save searches with the required fields within the table view. OData sharing is only available for saved searches created in this view.
- In the configuration of saved searches, enable OData sharing and set the permission to Unrestricted or Write Restricted. To learn more, see Enabling OData Sharing for a Saved Search.
- In your BI tool:
- Access the OData endpoint of your workspace with an API token that you created. To learn how to choose the right endpoint, see OData Endpoints.
- Import saved searches into your BI tool by connecting to the OData data source. For detailed instructions, refer to the documentation of your BI tool.
Note
If you disable the OData integration in the administration area, the imported data remains shared with the BI tool as long as OData sharing is enabled for individual saved searches.
Enabling OData Sharing for a Saved Search
To export fact sheet data to external systems, enable OData sharing for a saved search. Note the following:
- You can enable OData sharing only for saved searches created within the table view. Only the columns that you selected when creating a saved search are exported through OData.
- Avoid using the dot (.) and the @ symbol in the column names because this interferes with the annotations in OData.
- When the saved search permission is set to Read & Write Restricted, OData sharing is disabled for this saved search.
To enable OData sharing for a saved search, follow these steps:
-
In the Inventory, navigate to the Searches tab in the left sidebar, then click Manage Searches at the bottom of the sidebar.
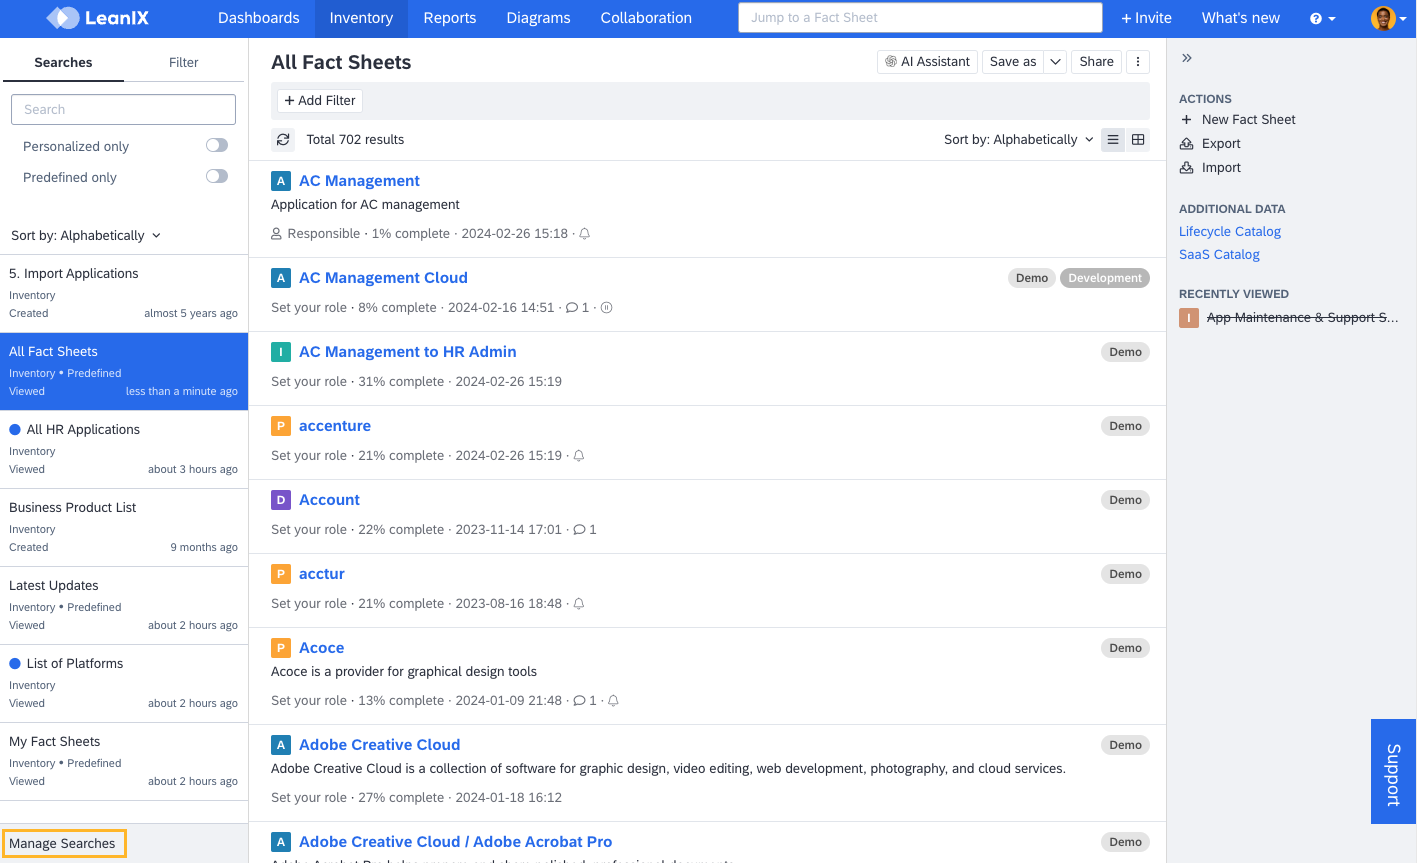
Navigating to Saved Searches from the Inventory
-
On the Manage Saved Searches page, hover over the saved search that you want to update, then click Edit.
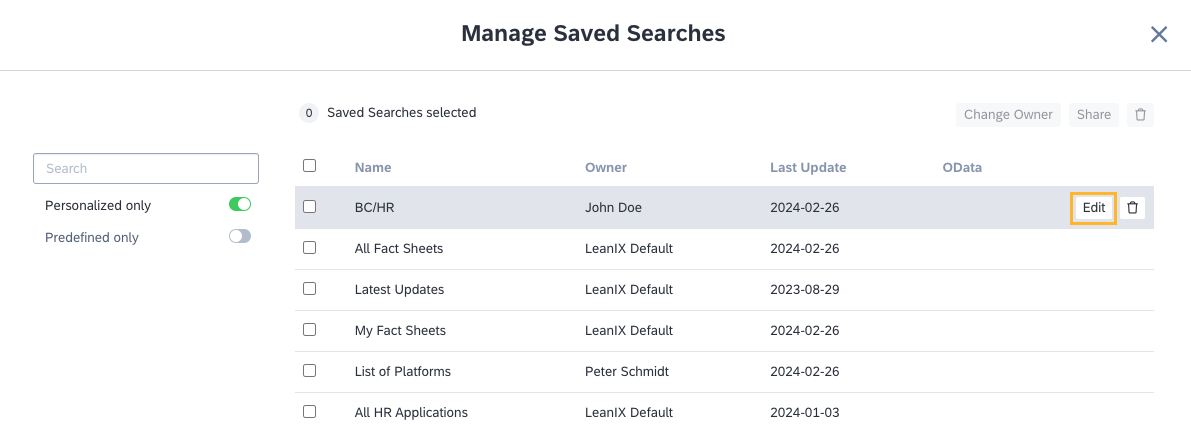
Navigating to the Configuration of a Saved Search
-
On the saved search configuration page, select OData sharing enabled, then click Save.
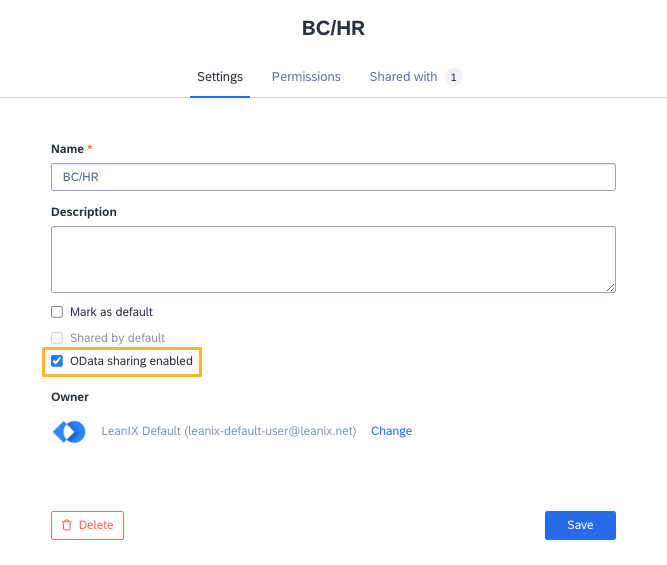
Enabling OData Sharing for a Saved Search
The link icon in the OData column on the Manage Saved Searches page indicates that OData sharing is enabled for a saved search.
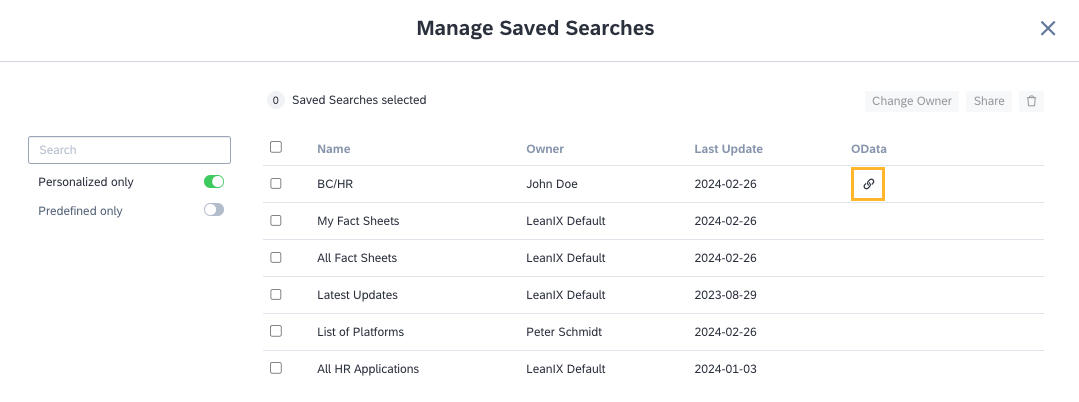
Viewing the Status of "OData Sharing Enabled" Option on the "Manage Saved Searches" Page
OData Endpoints
Supported Endpoints
Caution
Add a trailing slash to the endpoint URL as shown below. The ID of a saved search is appended to the URL. A missing trailing slash results in an unsuccessful request.
The integration supports two REST API endpoints that adhere to the OData standard. These endpoints let you export your saved searches, known as bookmarks within APIs. Both endpoints deliver the same data but differ in their representation of field names:
- BookmarkService.svc: Uses readable field names, also called labels (for example,
Display Name).https://{SUBDOMAIN}.leanix.net/services/import-export/v1/odata/BookmarkService.svc/ - BookmarkDataService.svc: Uses technical field keys (for example,
Application_displayName).https://{SUBDOMAIN}.leanix.net/services/import-export/v1/odata/BookmarkDataService.svc/
Choosing an Endpoint for Your Use Case
The table below lists recommended endpoints for various use cases.
| Use Case | Recommended Endpoint | Reasoning |
|---|---|---|
| Self-service analytics (for example, in Microsoft Power BI or Tableau) without complex transformations | BookmarkService.svc | It's easier to understand and use directly in reports. |
| Ad hoc analysis and quick insights | BookmarkService.svc | It's more user-friendly for exploration. |
| Long-term report stability | BookmarkDataService.svc | It reduces risk when field names change. |
| Data integration and transformations (merging with other sources, stable references) | BookmarkDataService.svc | It offers more stable field references, unaffected by name changes. |
When choosing an OData endpoint, also consider the following:
- If your reports rely on stable field identifiers, use BookmarkDataService.svc to prevent issues when field names change.
- If you prioritize readability and work mainly within Microsoft Power BI or Tableau without merging external data, BookmarkService.svc is the simpler option.
- If you're unsure, test both endpoints to determine which best fits your workflow.
Note
Single and multi-select values for any field are always displayed with their internal technical key (for example,
category_1instead of the labelCategory 1).
Authentication
OData endpoints employ the Basic authentication scheme, which is widely supported by many BI tools. To authenticate to these endpoints, you need an API token (apitoken). You can get an API token by creating a technical user. For more information, see Technical Users.
Updated 6 days ago