
Inventory
The inventory is your centralized repository for managing and documenting enterprise architecture. You create, edit, and organize fact sheets to maintain an accurate depiction of your IT landscape. It is the go-to place for anyone seeking information from the fact sheets.
Overview
The inventory is the centralized repository where you create, add, and manage fact sheets essential for documenting your enterprise architecture. It serves as the go-to place for anyone seeking information from the fact sheets or responsible for maintaining the accuracy of their data.
The inventory houses all enterprise architecture elements, stored and listed as fact sheets, allowing you to search, filter, and sort to find specific information. You can create new fact sheets, edit existing ones, and import or export data as needed. Additionally, the inventory provides access to automatically gathered data about your IT landscape through discoveries and integrations, ensuring a comprehensive and up-to-date view of your IT environment.
This guide provides a high-level overview of the inventory's primary functions and features. For more detailed information, please refer to the Detailed Guides.
Searching and Filtering for Fact Sheets
The searching and filtering capabilities for fact sheets in SAP LeanIX allow you to easily narrow down and focus on the most relevant fact sheets. This enables quick access to specific data, streamlines data retrieval, and supports better decision-making.
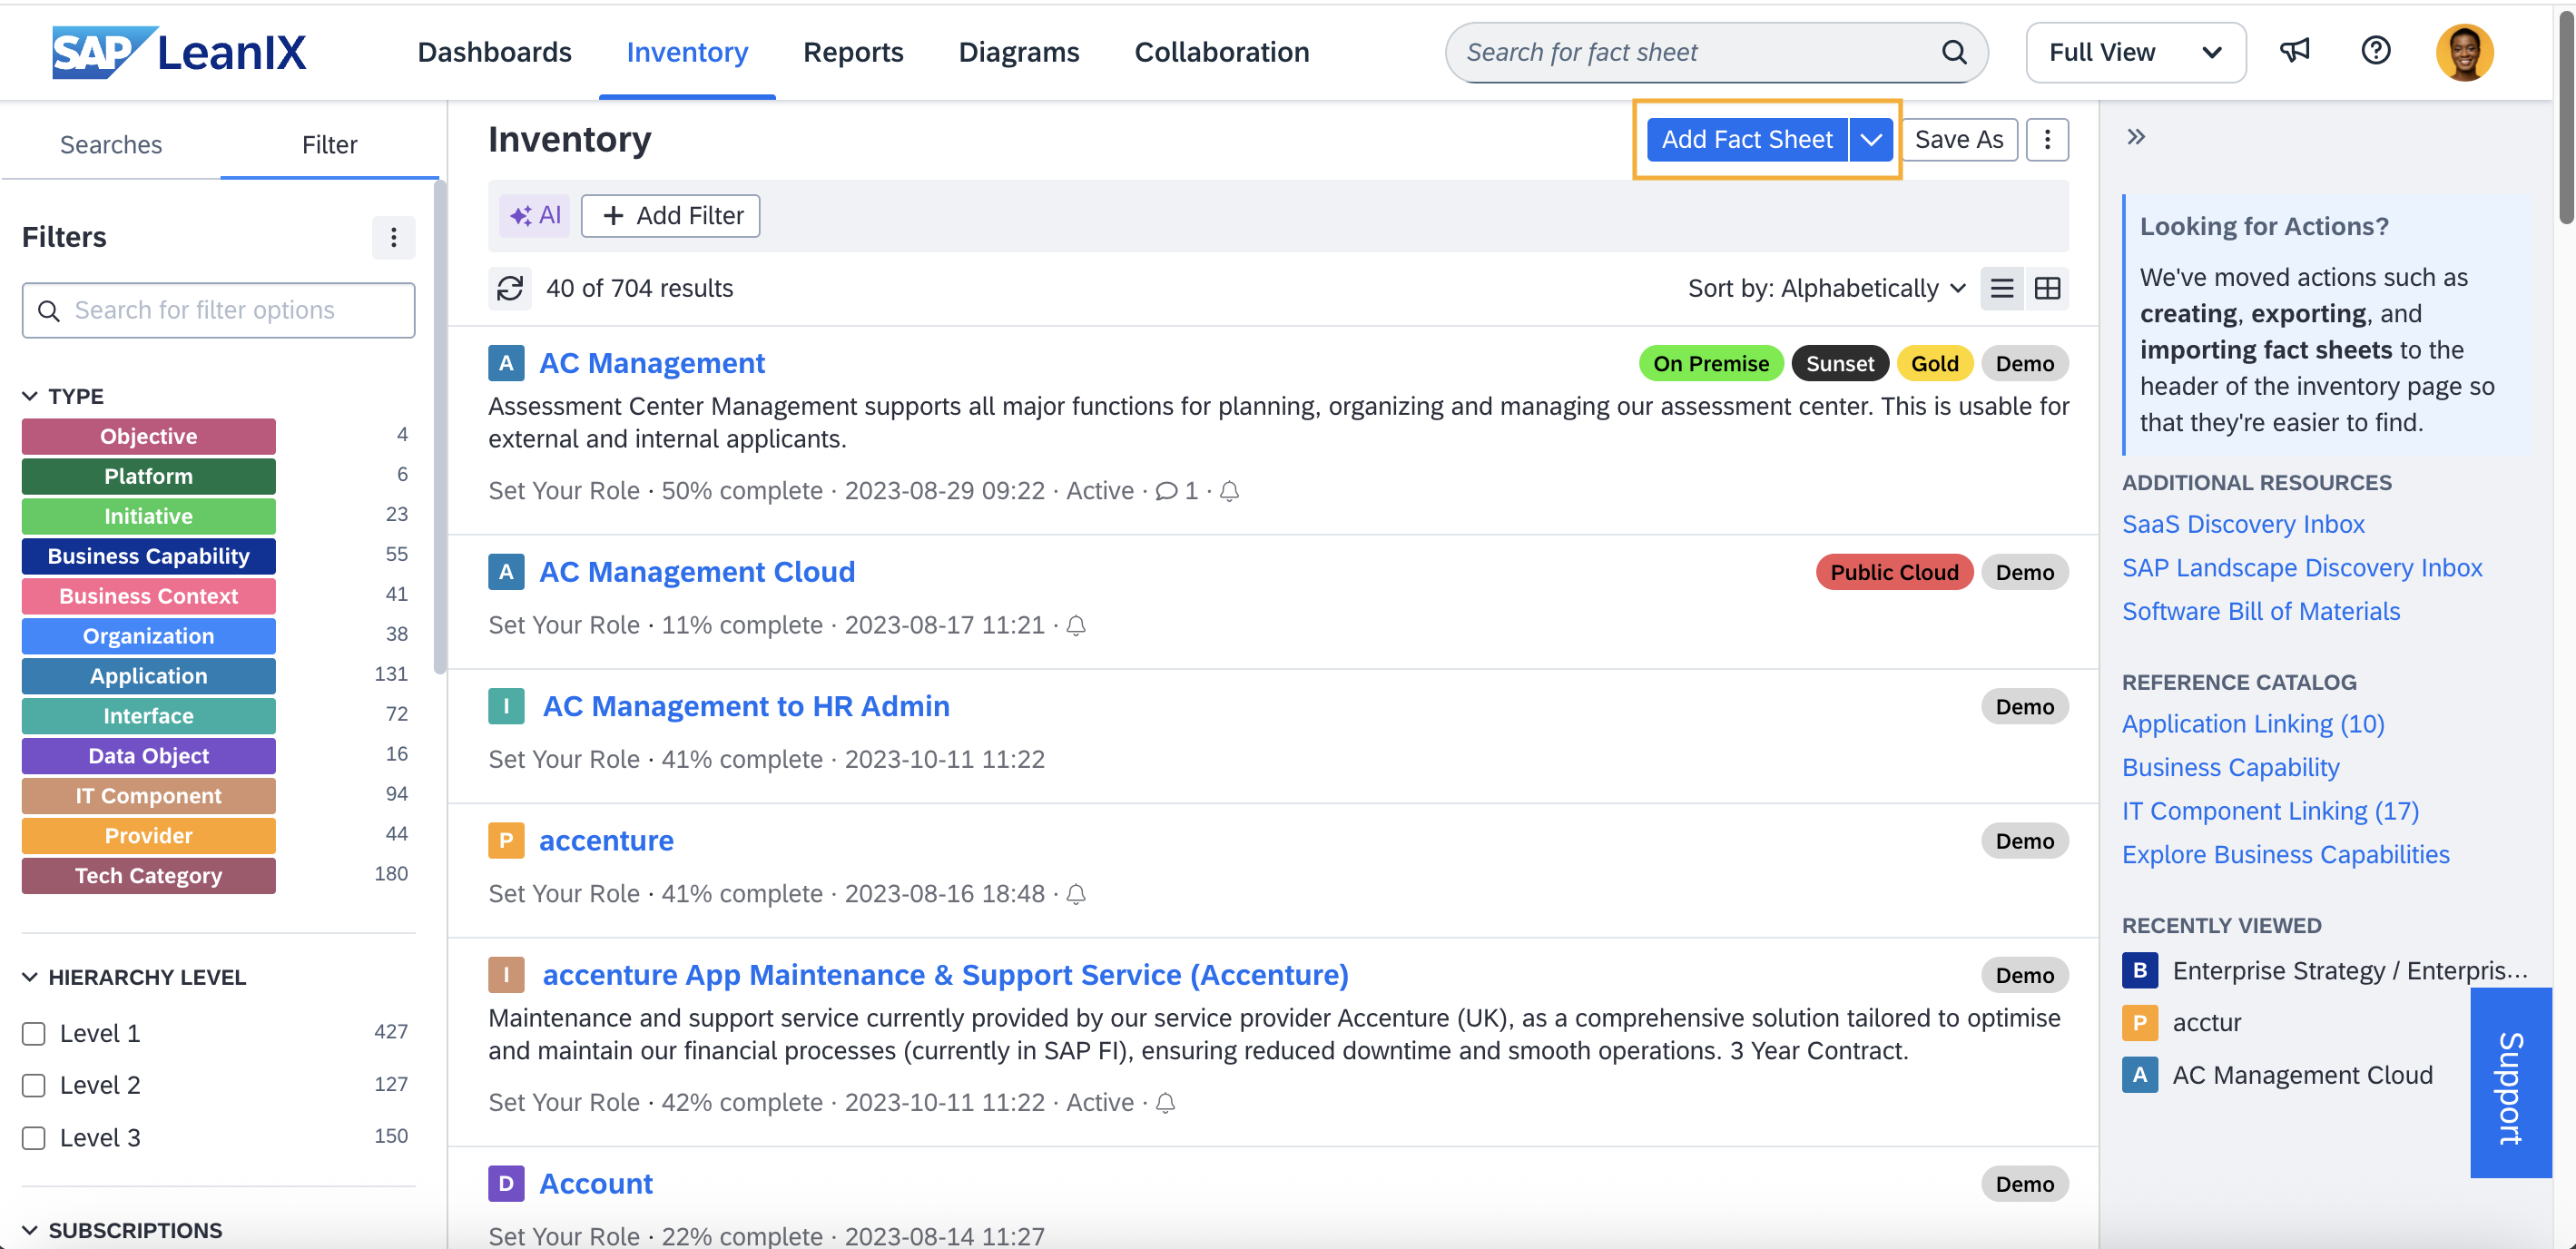
The search field in the top navigation bar helps you quickly find a specific fact sheet and jump straight to it. Clicking on the Add Filter button opens the smart search overlay. In the smart search overlay, you can do full-text searches and apply filters.
The filter panel on the left provides advanced options for applying and managing available filters. The filter groups visible on the filter panel depend on the selected fact sheet type; when you choose a specific fact sheet type, associated filter groups are listed accordingly.
For a detailed guide on searching and filtering, see Searching and Filtering in Inventory.

Searching and Filtering Capabilities in the Inventory
Creating a New Fact Sheet
There are a few different ways to create fact sheets. You can add individual fact sheets in the inventory, or you can import an Excel file to create them in bulk. You also have the option to add them automatically with the Inventory Builder, discoveries, or the reference catalog.
For a detailed guide on creating fact sheets, visit Creating Fact Sheets.
Creating a New Fact Sheet
Importing and Exporting Fact Sheets
You can import and export Excel data in the inventory. This feature is useful if you want to initially populate your inventory or perform bulk updates on your fact sheets.
For more information about importing and exporting fact sheets, refer to Exporting Fact Sheet Data as Excel File and Importing Fact Sheet Data through Excel File.
List View and Table View
In the list view, for every fact sheet, key qualitative and classifying information is shown. Qualitative details include a brief description, your role related to the fact sheet, completeness status, last update timestamp, and indication if the quality seal is broken. Classifying information, such as the fact sheet type and associated tags, can be seen on the right.
You can switch to table view for a more detailed view. The table view presents factsheets in a tabular format, displaying factsheets in rows and their attributes as columns. This offers you a structured way to visualize your inventory data and is valuable for conducting comparative analyses. You can easily scan, sort, and compare data across different criteria and make informed decisions.
You switch from list view to table view by selecting the As Table button. By default, the table shows basic information such as fact sheet name and type, but you can add further columns as needed. You can also do inline editing in the table view, allowing you to quickly update and modify information directly within the rows and columns, which enhances workflow efficiency.
For a detailed guide on table view and inline editing, see Bulk Updating Data in Inventory Table View.
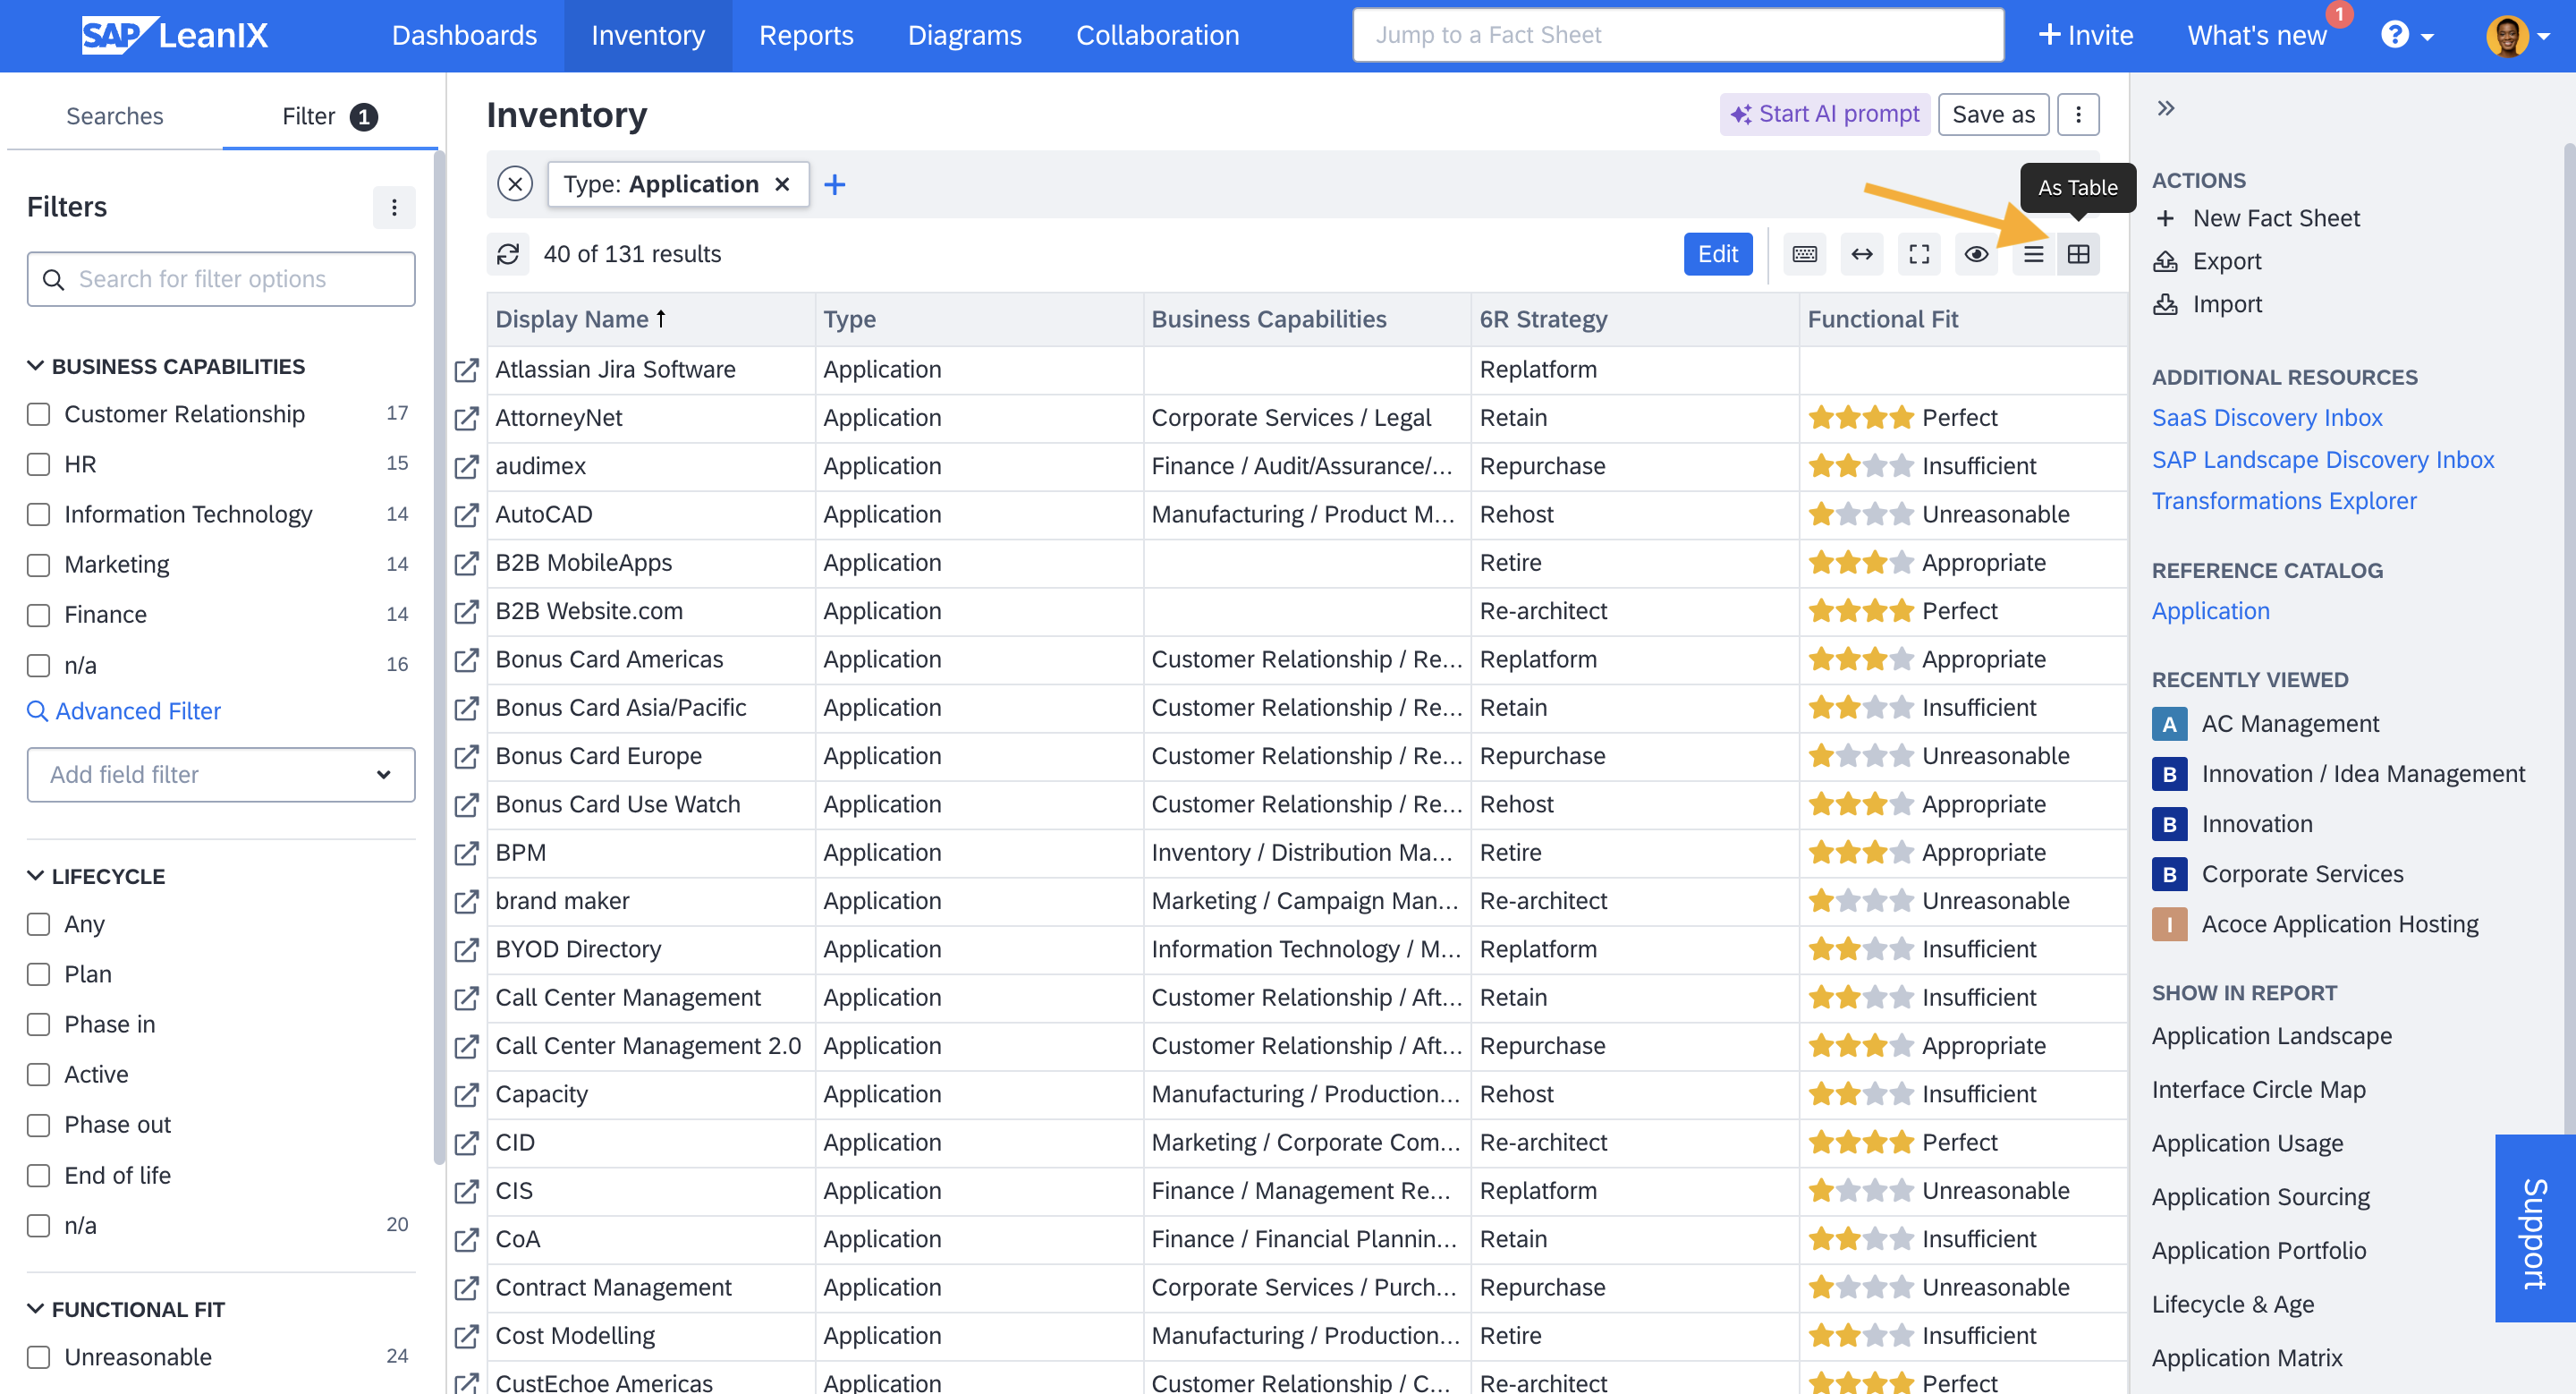
Table View and Inline Editing
Additional Resources and Reference Catalog
From the inventory, you can also access automatically gathered information about your IT landscape through the reference catalog and discoveries. This includes data from the reference catalog, SaaS discovery, SAP landscape discovery, reference business architecture, and more. To learn more, see Reference Catalog and Discovery and Integrations.
Depending on your access privileges, you can find links to catalog data and discovery inboxes on the right-side pane of the inventory.
Detailed Guides
| Guides | Description |
|---|---|
| Fact Sheets | Fact sheets in SAP LeanIX are used to record essential and comprehensive details about each architectural object, such as applications, business capabilities, IT components, etc. Learn about their structure, types, and subtypes. |
| Creating Fact Sheets | Learn how to create fact sheets in the inventory. This guide also covers fact sheet naming conventions and cloning fact sheets. |
| Adding and Editing Data in Fact Sheets | Learn how to add and edit data in fact sheets, including editing across multiple fact sheets through inline editing in table view mode, and using the export and import options for bulk updates. |
| Collaborating and Managing Data in Fact Sheets | Explore how to collaborate and manage data in SAP LeanIX fact sheets. Learn how to add and handle data across various tabs of the fact sheet, including Subscriptions, Comments, To-dos, Resources, Transformations, and Surveys. |
| Importing Fact Sheet Data Through Excel File | SAP LeanIX’s import feature enables efficient bulk updates, including adding, updating, and archiving fact sheets. This guide provides formatting rules, error handling, and step-by-step guidance for importing data through an Excel file. |
| Exporting Fact Sheet Data as Excel File | SAP LeanIX’s export feature allows you to export fact sheet data as an Excel file for bulk updates, easy data manipulation, and offline analysis. Learn how to use it. |
| Increasing Your Data Quality | Learn how to enhance data quality in SAP LeanIX with features like fact sheet completion scores, mandatory fields, quality seals, and surveys. Use integrations and discovery tools for accurate, up-to-date data. |
| Fact Sheet Completeness | The fact sheet completion score measures how much of the required data has been filled out for a fact sheet. Learn how it is calculated and how to assign weights to fields, subsections, and sections. |
| Fact Sheet Subscription | Fact sheet subscription assigns responsibility and accountability to users for maintaining data. Learn about fact sheet subscriptions, including types, roles, and how to assign and subscribe to fact sheets to promote stakeholder involvement and ensure data accuracy and completeness. |
| Quality Seal | Learn how to ensure data integrity using the quality seal by assigning approval responsibility to accountable and responsible subscribers of fact sheets. When the seal is broken, it prompts verification and approval of fact sheet information. |
| Mandatory Attributes | Mandatory attributes are essential fields specified by admins to ensure data integrity and quality in fact sheets. They must be filled out for fact sheets to approve quality seal, ensuring consistent and reliable information. |
| Searching and Filtering in Inventory | Learn how to quickly find fact sheets, apply filters, manage filters, and save search results for future access. |
| Advanced Filter Options | Advanced filter options provide powerful ways to refine searches and manage fact sheets. These options allow for complex queries, making it easier to find and organize specific architectural elements within your IT landscape |
| Tags | Tags are labels used to classify and categorize fact sheets, making it easy to filter, organize, and analyze data. Learn how to assign and manage tags, understand when and when not to use them, as well as leverage them for filtering and reporting. |
| AI Capabilities | Learn how you can use SAP LeanIX AI capabilities to automate tedious documentation tasks, accelerate data usage, and speed up research. |
| Archiving, Deleting and Recovering Fact Sheets | Learn to archive fact sheets individually or in bulk and effortlessly view or recover archived fact sheets. |
Updated about 1 month ago