
Transition guidelines
The redesign of the BTM module brought many improvements that users running the previous version can use.
This page explains the distinctions and how to transition to the new standard.
In this upcoming article, we will walk you through the latest changes in the Business Transformation Module and help you understand what’s in it for you and how you can migrate to the current concept, which has already been adopted by most of our customers.
Why the change
Making LeanIX easy to use is one of our mantras, and we’re constantly listening to customer feedback to ensure we deliver high-quality products.
Changing how the Business Transformation Module works follows a similar reason, as we’re committed to helping you plan changes for your team, as well as get your other stakeholders' buy-in through compelling roadmaps, through easy and intuitive experiences.
In a nutshell, the aim is to simplify how BTM works by removing some unnecessary layers, such as Plans/Building Blocks, the Timeline of a building block, and others.
What do you need to know
Some concepts have changed as part of the latest BTM module, and here’s what you need to know:
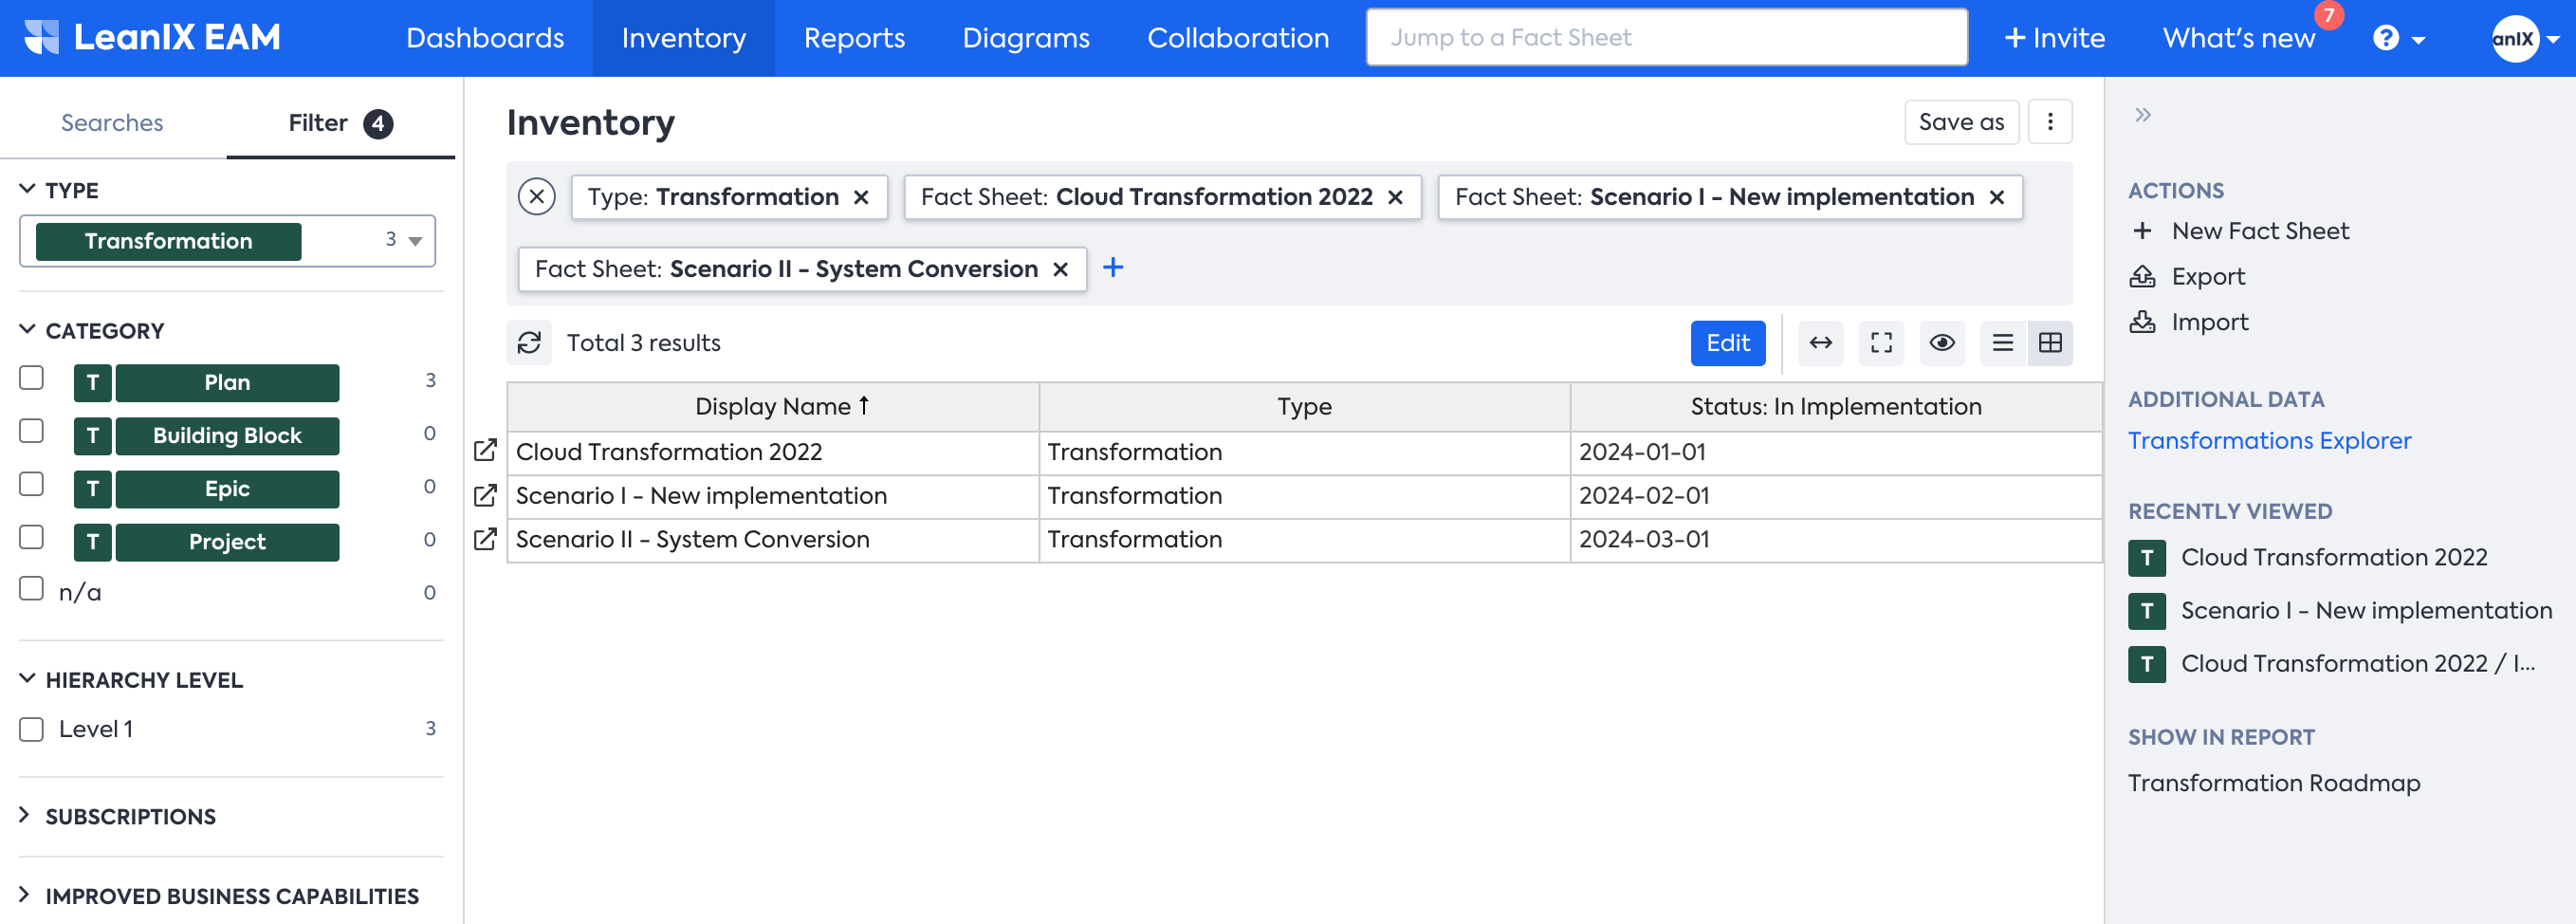
- Transformation Item from the Metamodel was replaced by the Project FactSheet
- Impacts have been replaced by Transformations, which guide you in planning your initiatives without the need to know the Meta-Model in depth.
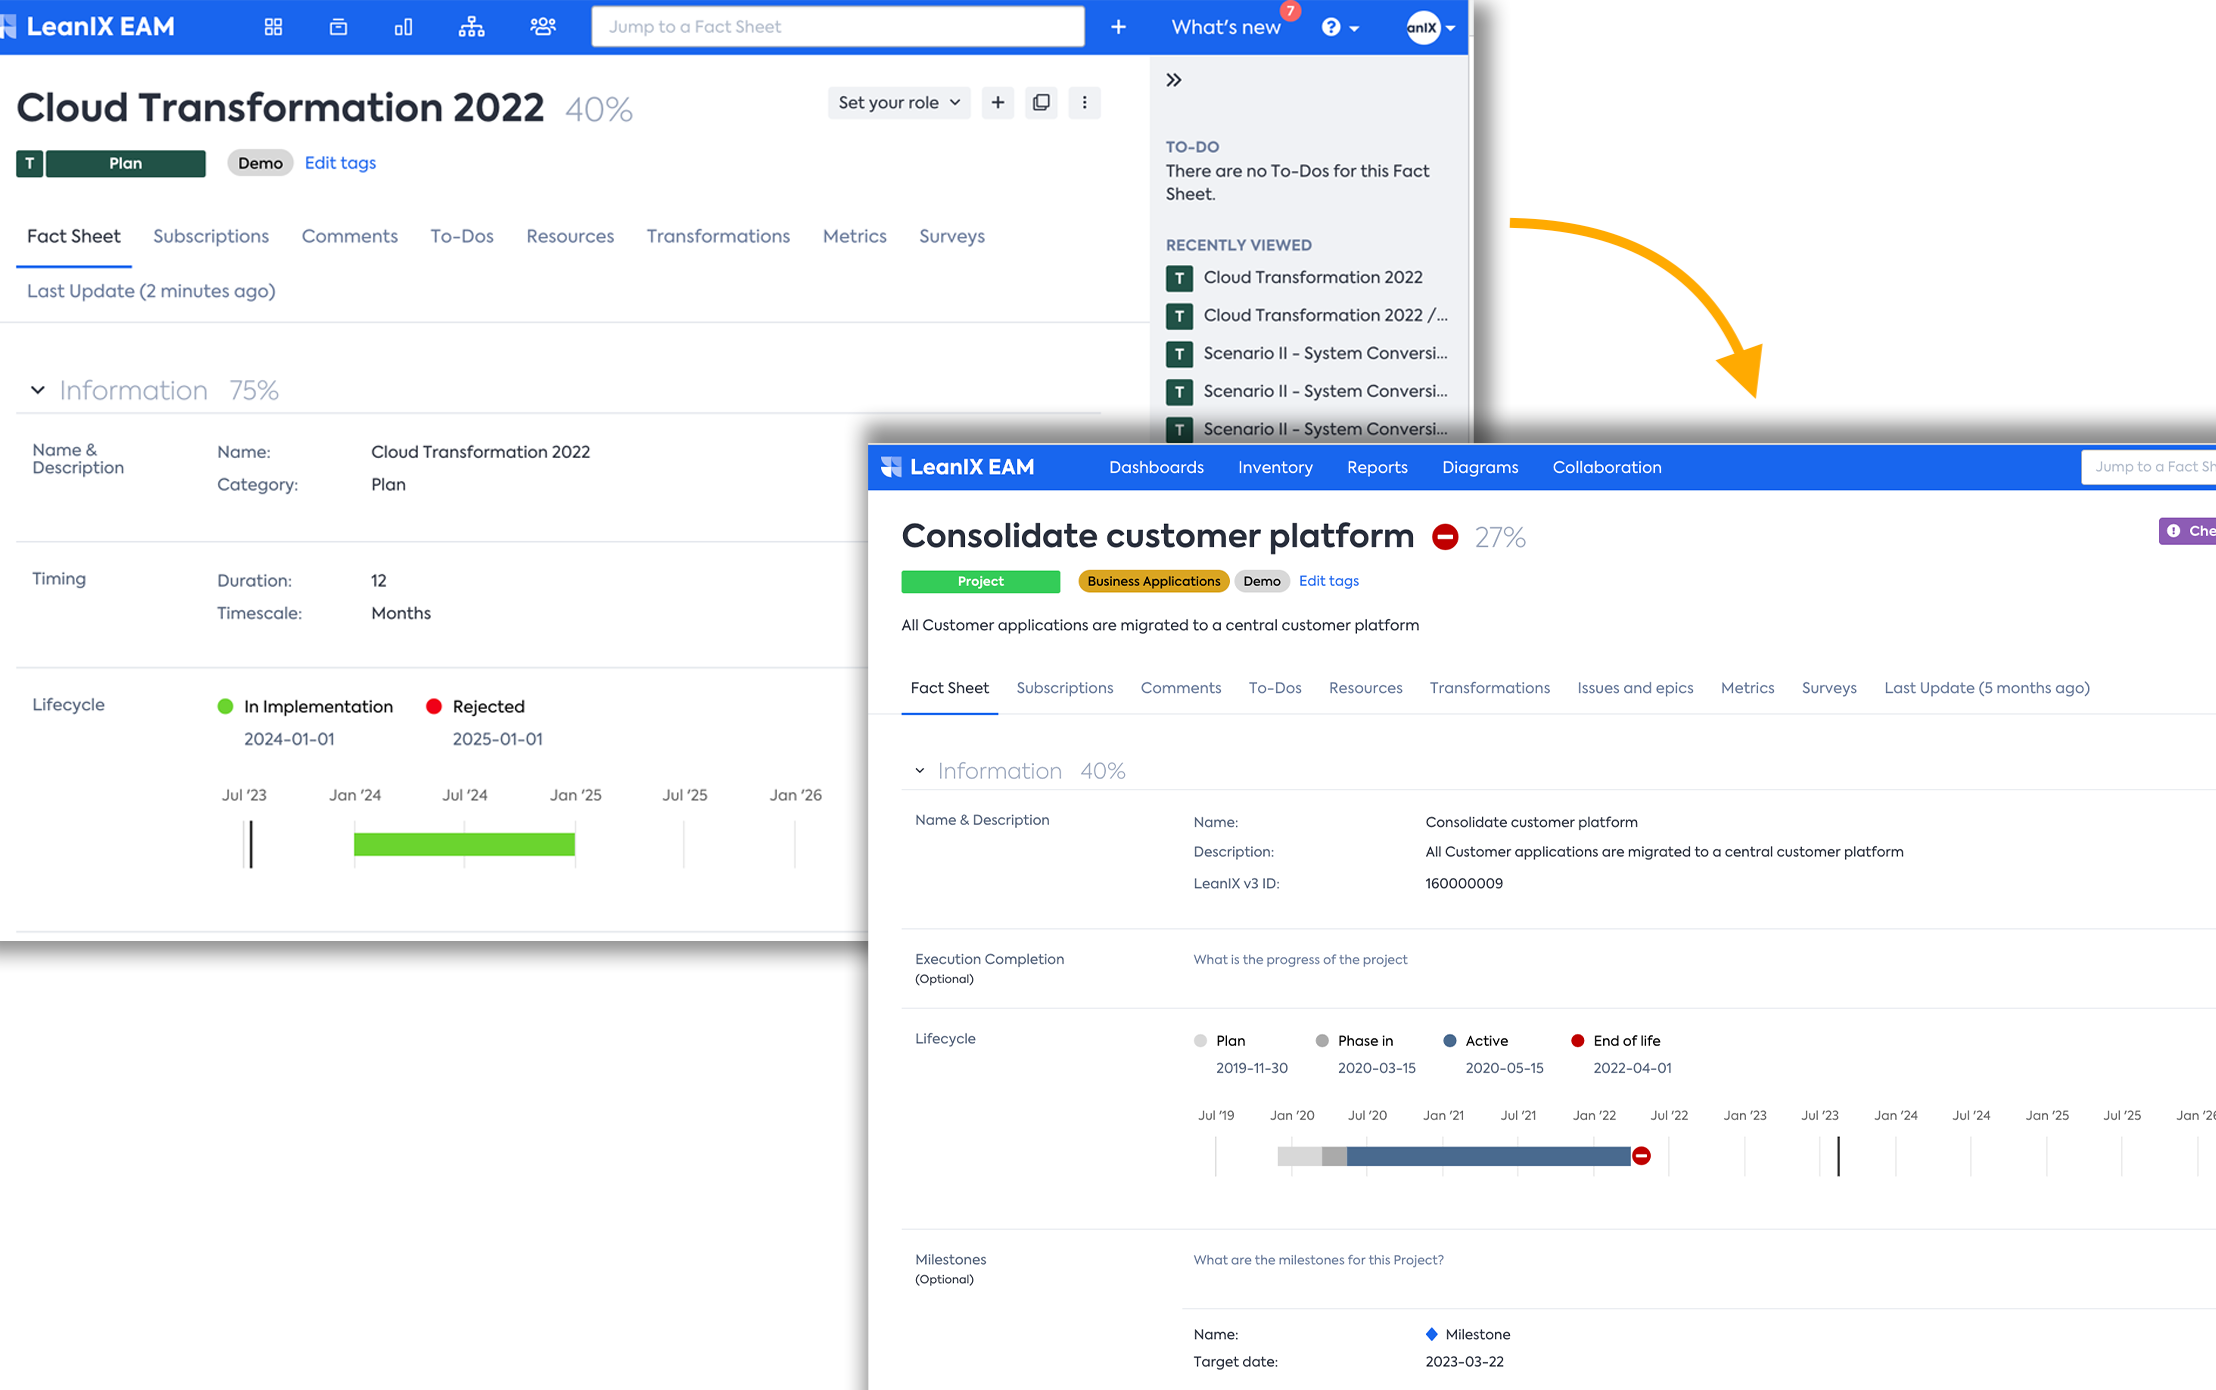
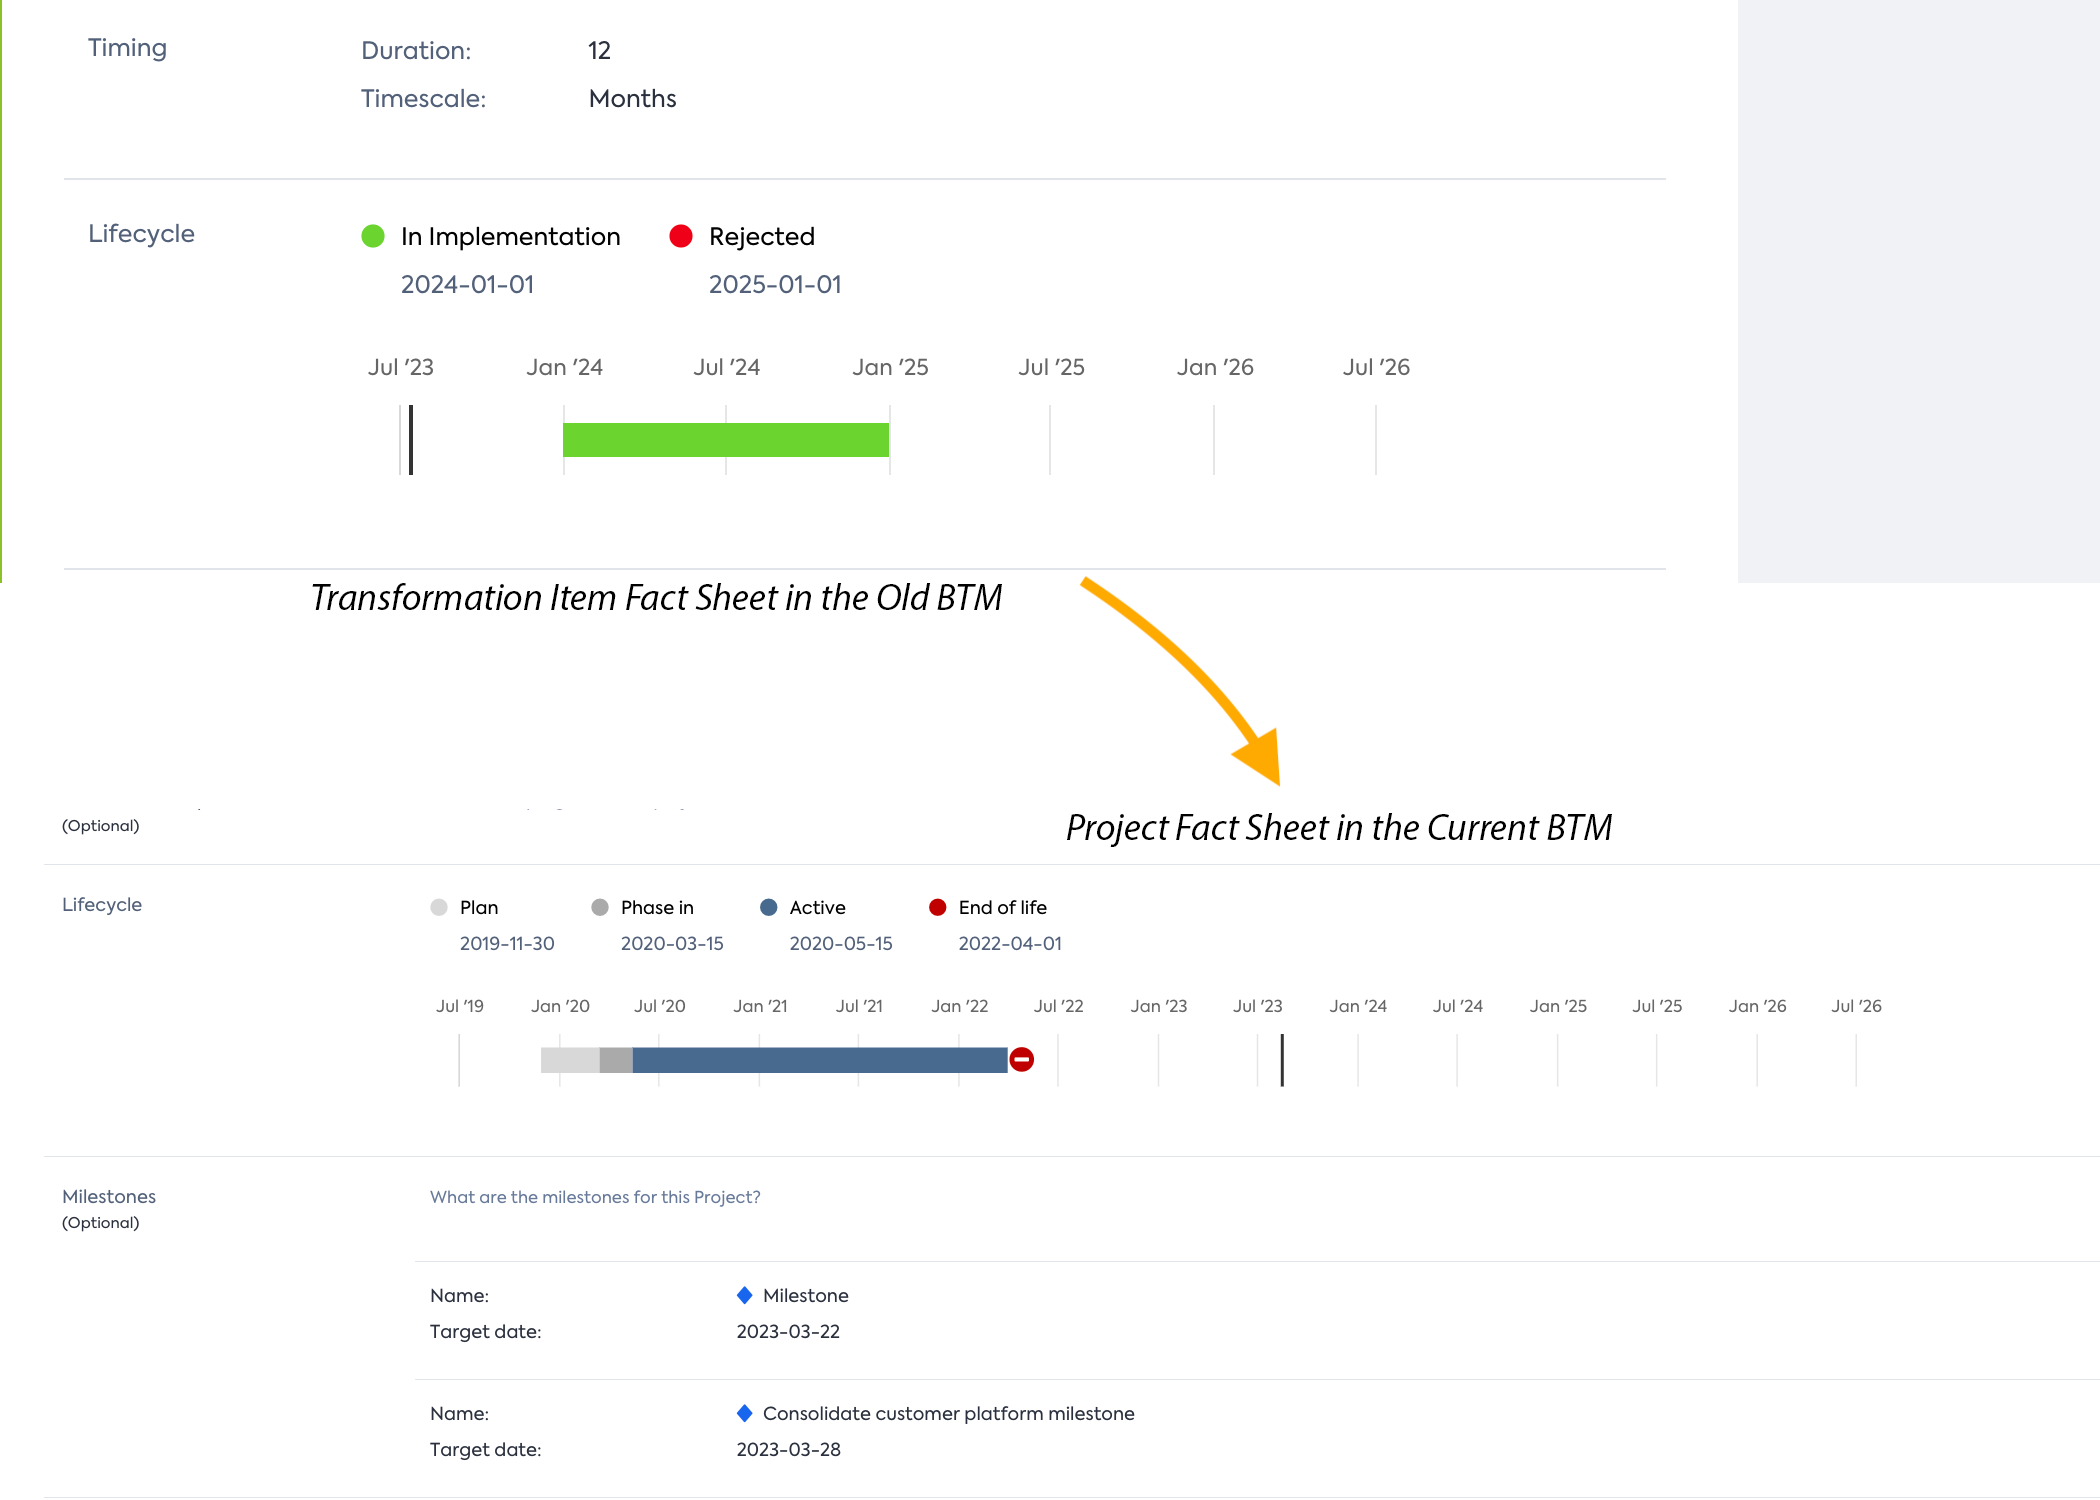
Transformation Item Fact Sheet in the Old BTM Vs Project Fact Sheet in the Current BTM
Upgrading to the new concept
Note
No data will be lost in migrating from the old to the latest BTM concept!
- In the admin settings, go to Optional Features & Early Access.
- Click on Configure in the BTM: TRANSFORMATIONS & MILESTONES
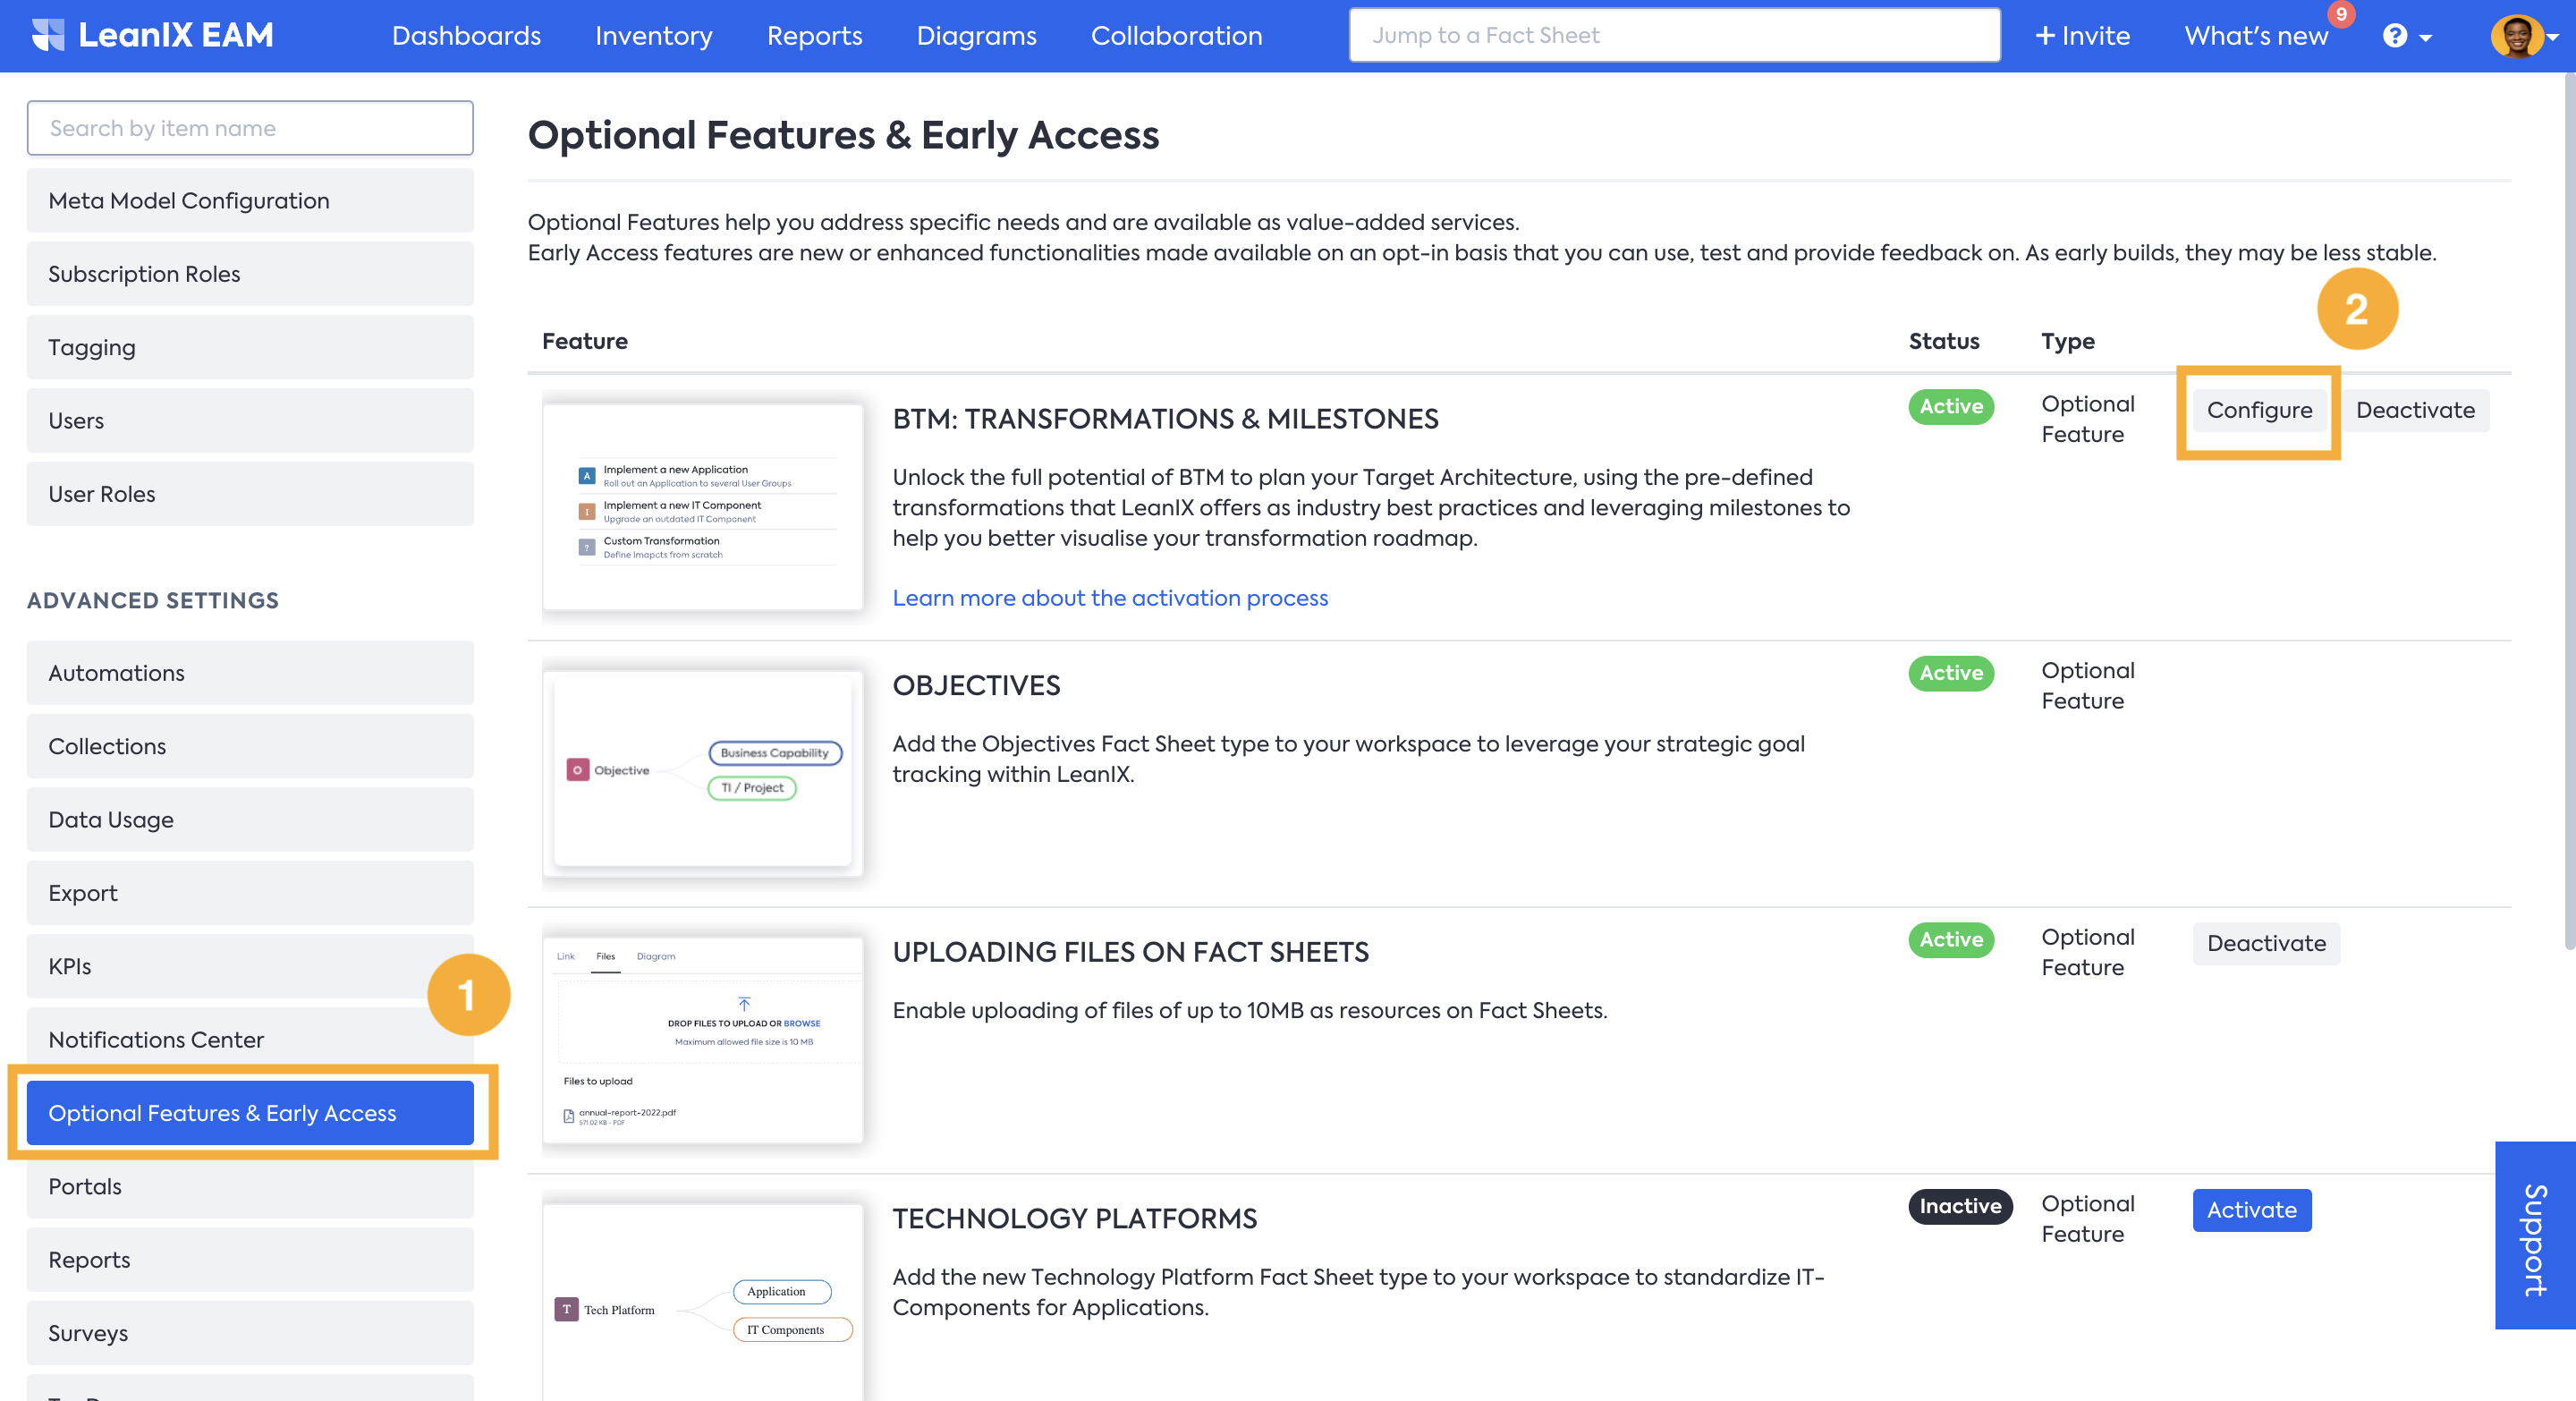
There are two steps required to move and you can find them under the Configuration Area, as shown below, under Data Transition.

Step 1. Lifecycle Upgrade
a) The New BTM works by using specific dates. The Old BTM was using not just lifecycle but also timing (duration, timescale, and relative date).
b) To ensure that the Projects in the new BTM will have a start and an end date and that your roadmap report continues to work, a specific date needs to be added in the In Implementation Phase of the lifecycle of your plan. The system will then automatically calculate the start and end dates of your projects.
In the Configure BTM menu, Clicking on the Button for the plans which need to be reviewed will open the below table view, where you can edit the specific dates which will be used for the Project Lifecycle.
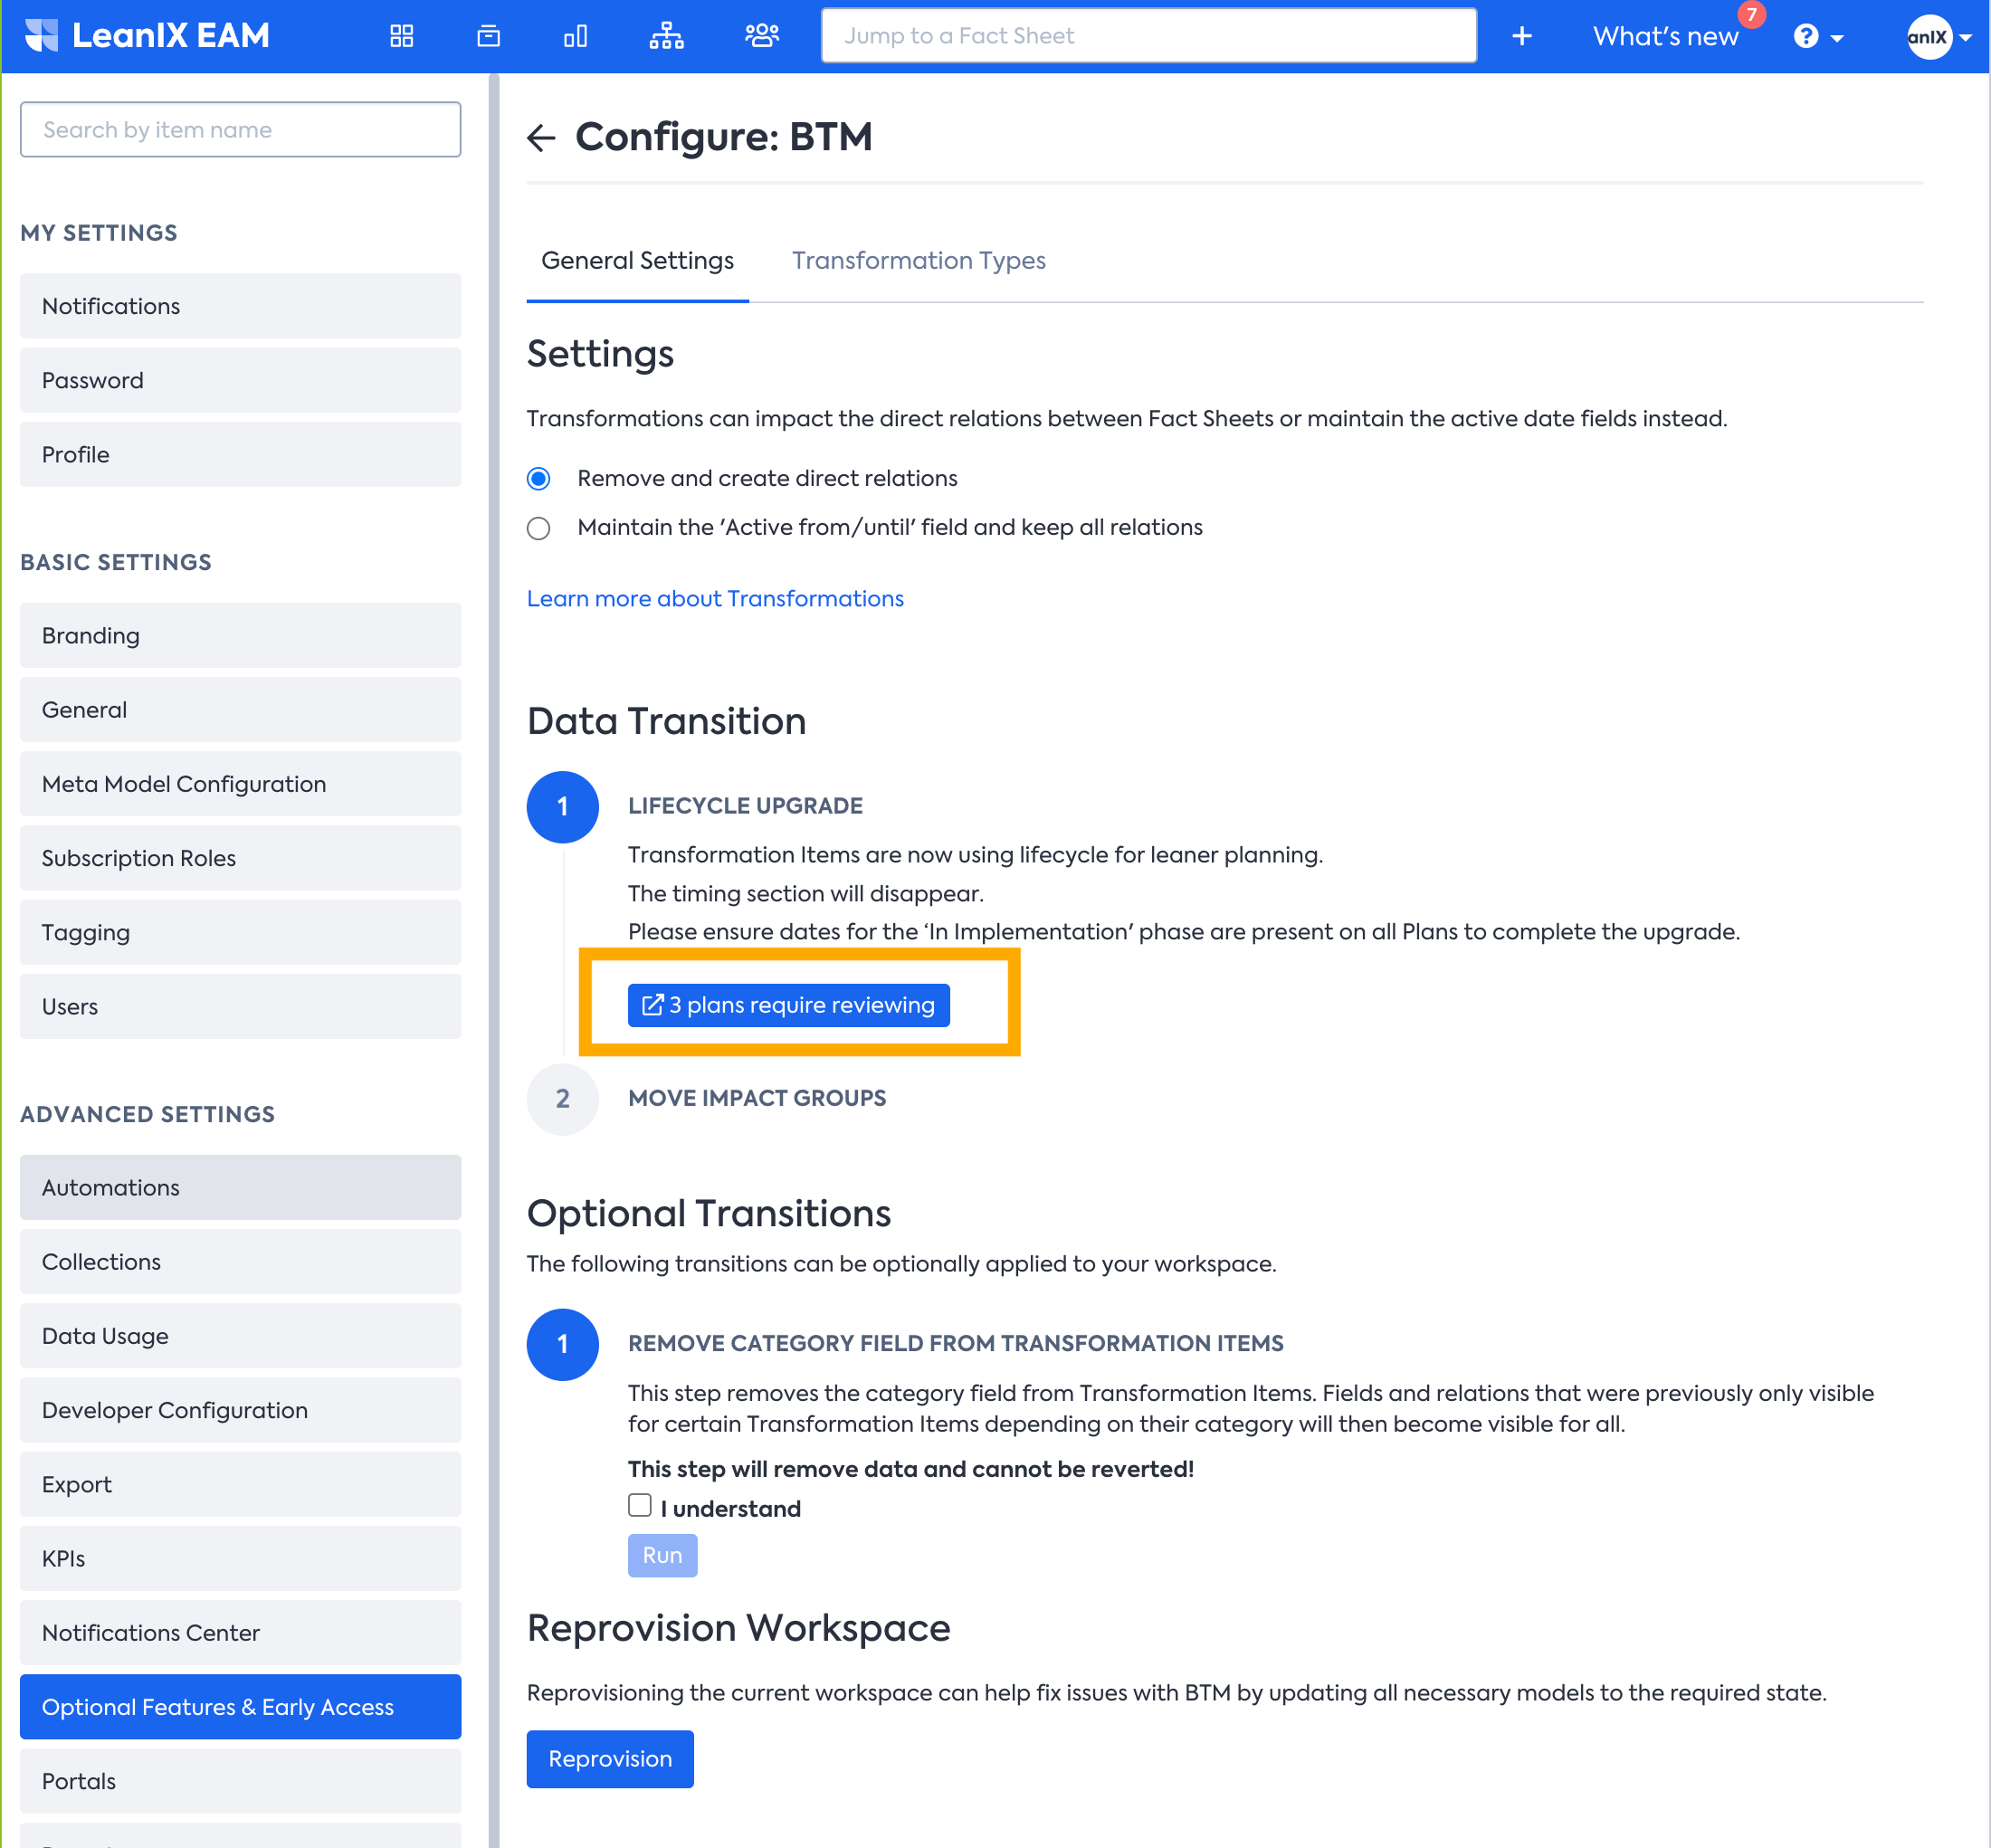
Step 2: Move impact groups
Once the first step is done, it is possible to move all your current impact groups to our new transformation logic. Each impact group that was not executed will be mapped to a Custom Transformation. None of the executed impacts will be moved, as they are already part of your current Inventory.
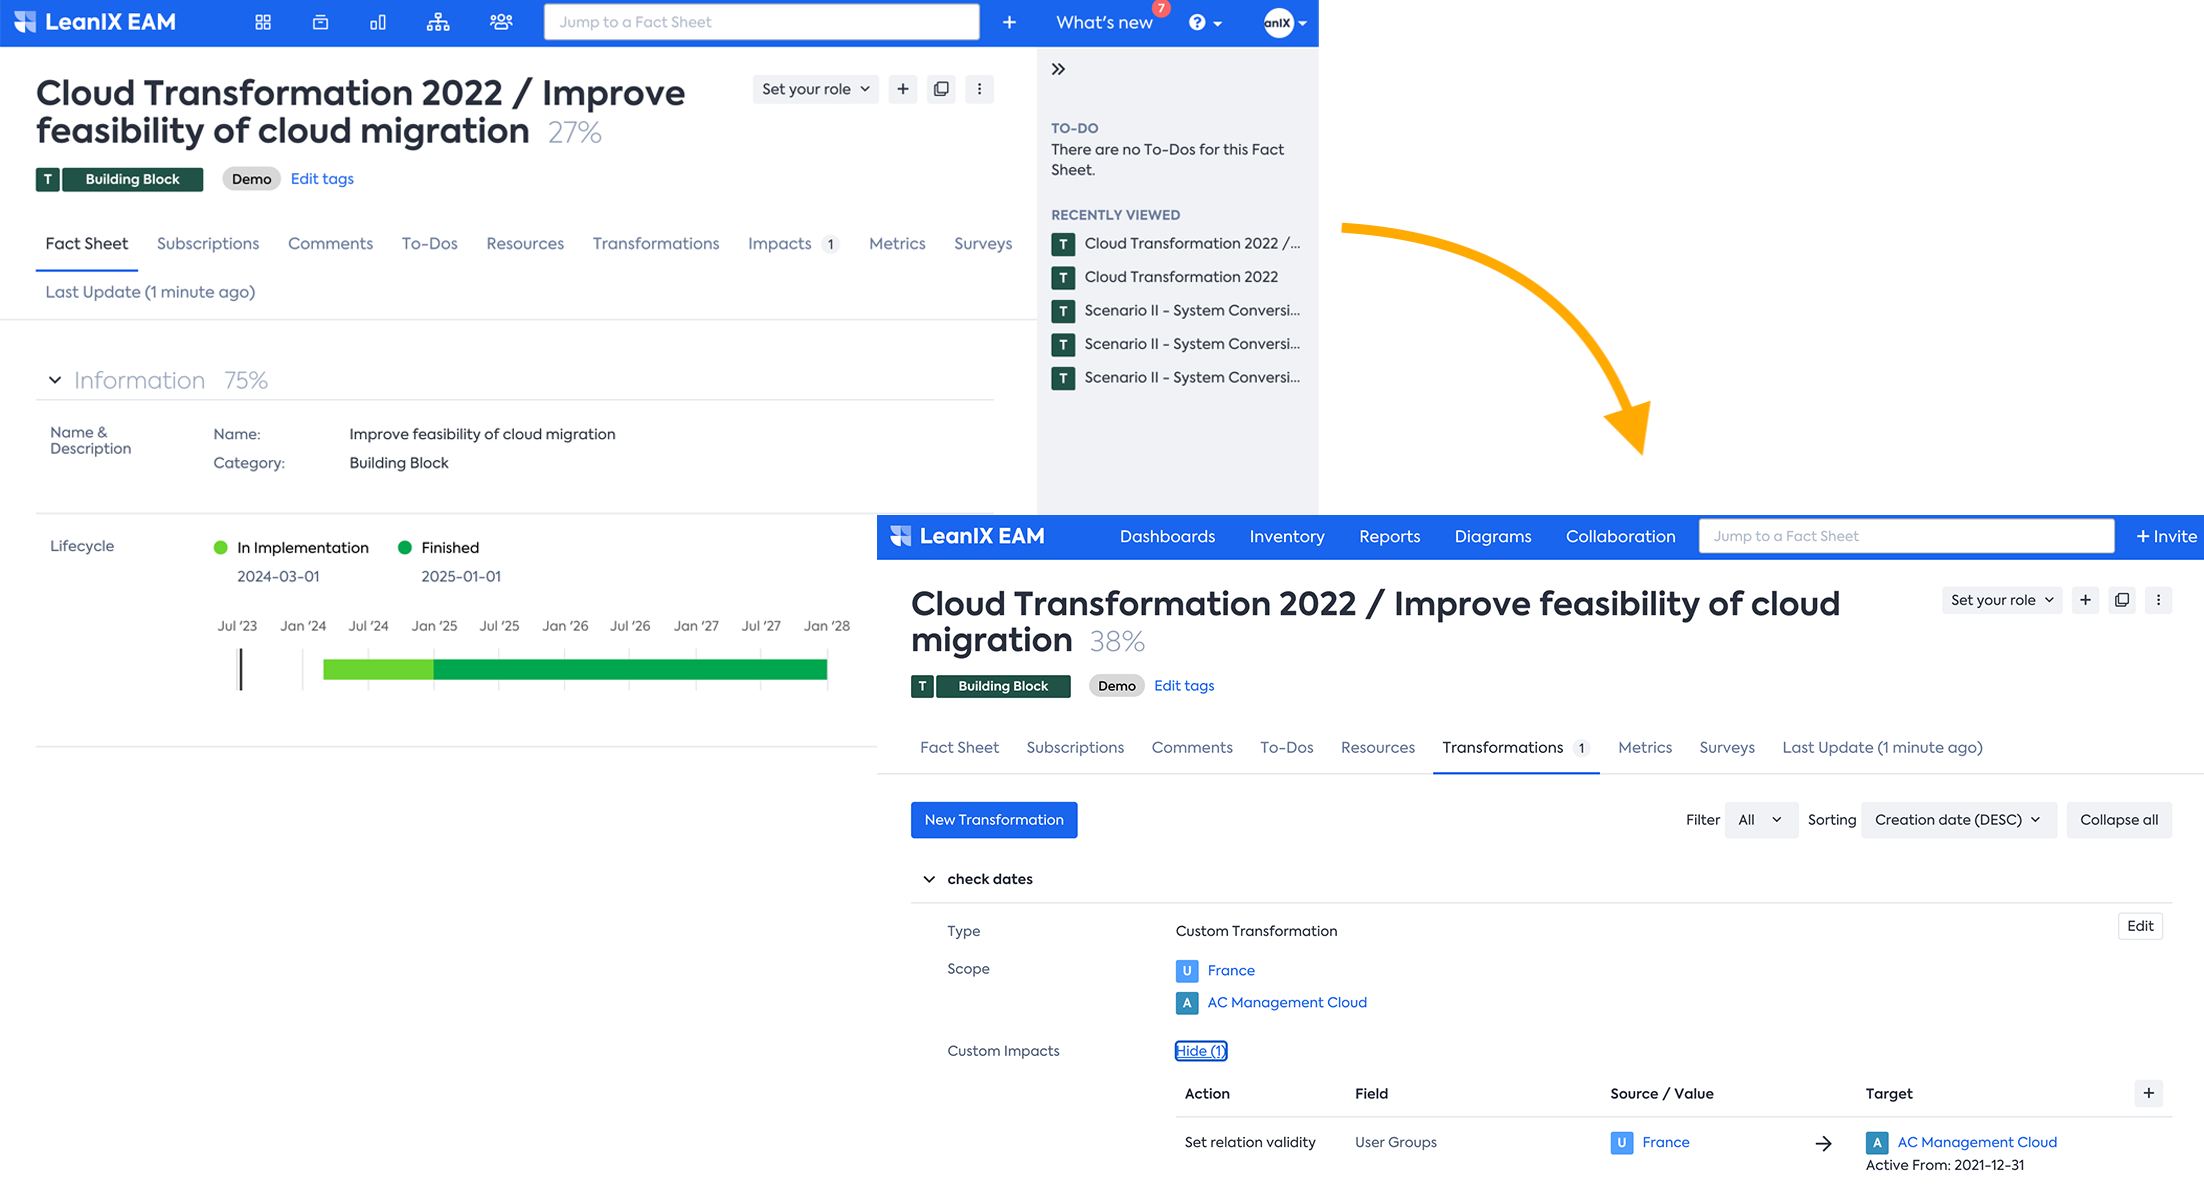
Example of a Transformation Item where the Category was Building Block Vs Example of a Transformation Item where Type is Custom Transformation as the impacts are moved to new BTM
That’s it! After addressing these two steps, you should be good to go and start exploring the updated capabilities of the latest BTM module.
🎉 Congratulations! Now you can leverage the new BTM and make use of the new logic of transformations and milestones
Updated 10 months ago