iOS-Specific Setup (Intune)
Information
This guide assumes that you are an Intune Admin.
Add the “LeanIX EAM for Intune” app as a managed app
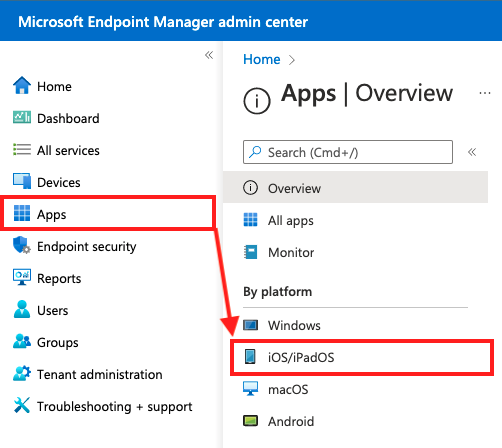
- Go to Microsoft Endpoint Manager. Go to “Apps”. Click on “iOS/iPadOS”.
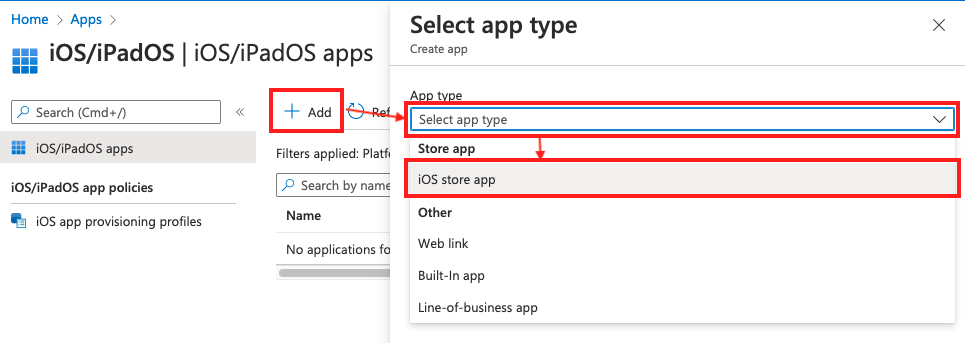
- Click on “Add”. Select App Type as “iOS Store App”. Click on “Select”.
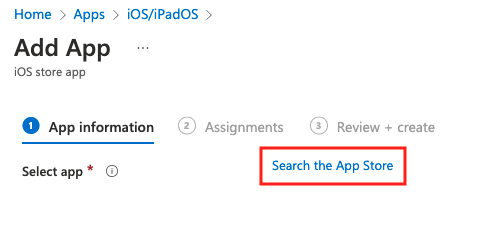
- Click on “Search the App Store”
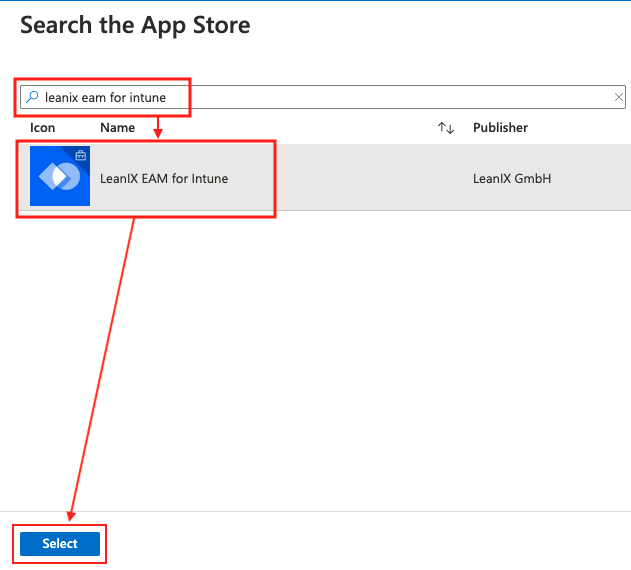
- Search for “LeanIX EAM for Intune” and click on the search result. Click on “Select”
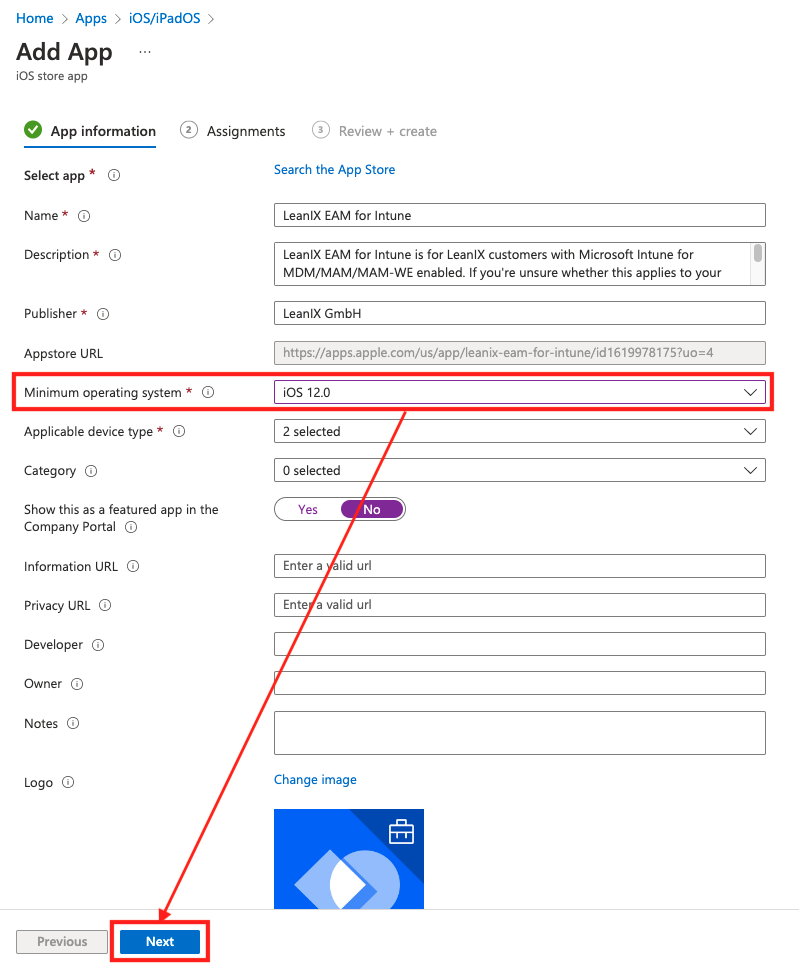
- Change the “Minimum operating system”.
The “LeanIX EAM for Intune” iOS app supports minimum iOS version 12.0. So, set this field as at least “iOS 12.0” or above (as per your company’s compliance policy).
Click “Next”
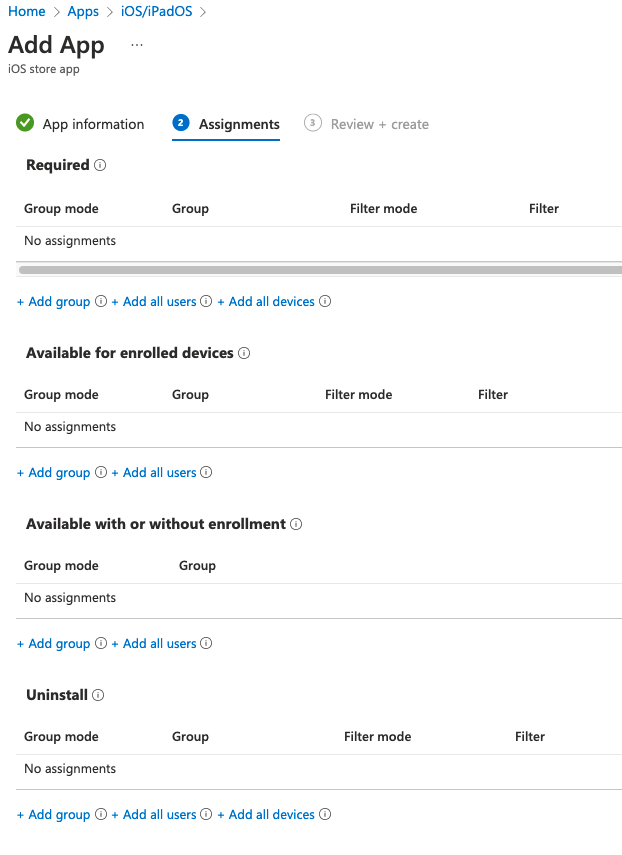
- Assign the app to the groups/users in your organization whom you would want to give access to the managed LeanIX app on their personal/managed mobile devices.
- Create the iOS managed app.
Important Note
It is mandatory for the iOS app to have at least one protection policy applied.
You should now configure protection policies by following either of the sections below.
Apply Existing Protection Policy to “LeanIX EAM for Intune” App
If you already have Protection Policy for other apps in your organization and want to assign the same policy to LeanIX EAM for Intune, follow these steps
- Go to Microsoft Endpoint Manager. Go to “Apps”. Click on “App Protection Policies”
- Open the protection policy, go to “Properties” > “Apps” Section Header > Click on “Edit”
- Scroll to the bottom and “Select Custom Apps”
- Enter “net.leanix.app.intune” in the “Bundle ID” field
- Click on “Add” > Click on the newly added package from the list
- Click on “Select”
- Review and Save the policy
Apply New Protection Policy to “LeanIX EAM for Intune” App
- Go to Microsoft Endpoint Manager > “Apps” > “App Protection Policies”.
- Click on “Add”. Select “iOS”
- Configure the basic details as per your needs
- In the “Apps” Section, Click on “Select custom apps”
- Enter “net.leanix.app.intune” in the “Bundle ID” field
- Click on “Add” > Click on the newly added package from the list
- Click on “Select”
- Continue configuring the protection policy as per your needs.
- On Step 6 (Assignments), make sure to add the users/groups you want this protection policy assigned to.
- Create the Protection Policy.
Once you have configured the protection policies, you can now add a configuration policy (optional).
If you also want to add the Android app, follow the Android Setup Instructions and then add the configuration policy.
Updated over 1 year ago
